
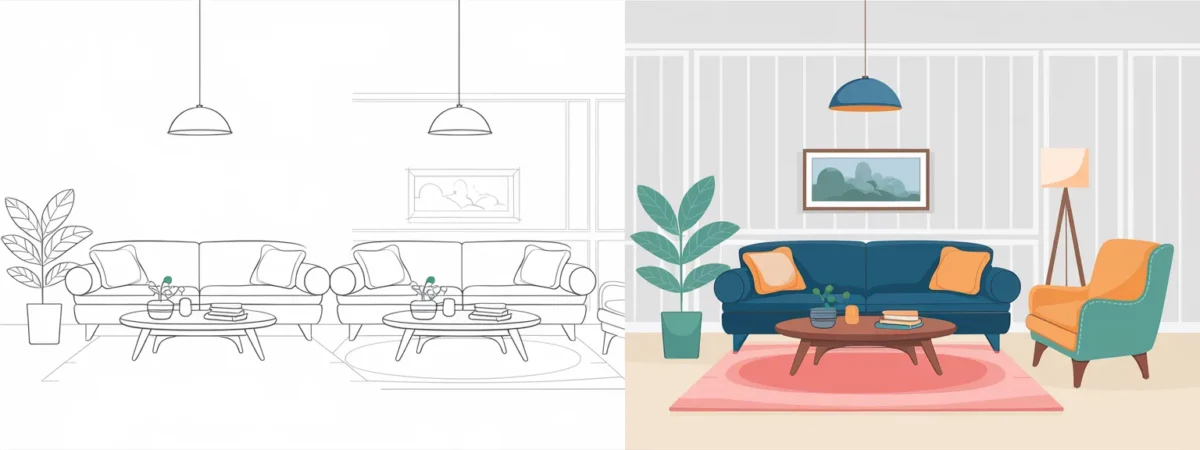
A living room drawing helps turn ideas into clear visual plans. Many people struggle to imagine layout, furniture placement, and balance without a visual guide. Step-by-step drawing solves this problem by breaking the living room into simple parts. Each step builds on the previous one, making the process easier to follow. Drawing also helps avoid common layout mistakes such as blocked walkways, oversized furniture, or poor lighting placement. A clear drawing allows better decisions before buying furniture or decor. Living room drawings support planning for both small and large spaces. This guide focuses on easy drawing methods that anyone can follow, even without design experience.
Living rooms serve many daily functions. They support sitting, conversation, rest, and shared activities. A drawing helps balance these needs by showing how space works in real use. Step-by-step drawings reduce confusion by showing where to start and how to progress. Instead of guessing, each idea follows a clear order. This makes drawing less stressful and more accurate. The goal of this guide is to provide living room drawing ideas that feel simple and practical. Each idea focuses on clarity, spacing, and proportion. These drawings help users stay engaged because they offer clear visual answers instead of abstract advice.
20 Living Room Ideas
Listing all ideas early helps users understand what they will learn. Many people search for living room drawing ideas because they want quick direction before committing time. A clear list provides structure and builds confidence. Step-by-step drawing works best when the process stays predictable. Each idea in this guide follows a simple logic. First, draw the room outline. Next, place large furniture. Then add supporting elements. This method keeps drawings readable and easy to correct. Living room drawings also help test ideas without physical effort. Changes on paper cost nothing and save time later.
These drawing ideas work for different room sizes and styles. Some focus on furniture placement. Others focus on walls, lighting, or zoning. Not every living room needs all twenty ideas. Selecting the right ones depends on room shape, use, and personal needs. Each drawing idea stands on its own but can also combine with others. The list below shows the full range of step-by-step living room drawing ideas covered in this guide. Detailed explanations will follow later so users can move at their own pace.
The 20 living room drawing ideas covered in this guide:
- Simple sofa and coffee table layout drawing
- Minimal living room floor plan sketch
- Step-by-step TV wall drawing
- Easy accent chair placement drawing
- Window and curtain living room sketch
- Rug placement living room drawing
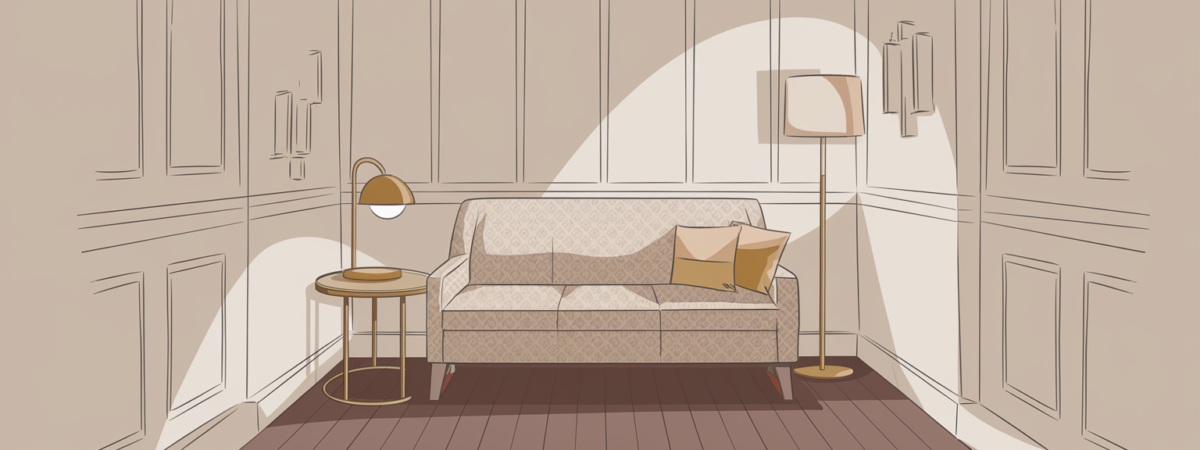
- Side table and lamp drawing guide
- Modern shelving unit drawing
- Wall art placement living room sketch
- L-shape sofa drawing steps
- Small living room layout drawing
- Open living room zoning sketch
- Lighting placement living room drawing
- Corner seating living room sketch
- Fireplace wall drawing guide
- Entry-to-living room transition drawing
- Symmetrical living room layout sketch
- Asymmetrical modern living room drawing
- Minimal decor placement drawing
- Finished living room perspective sketch
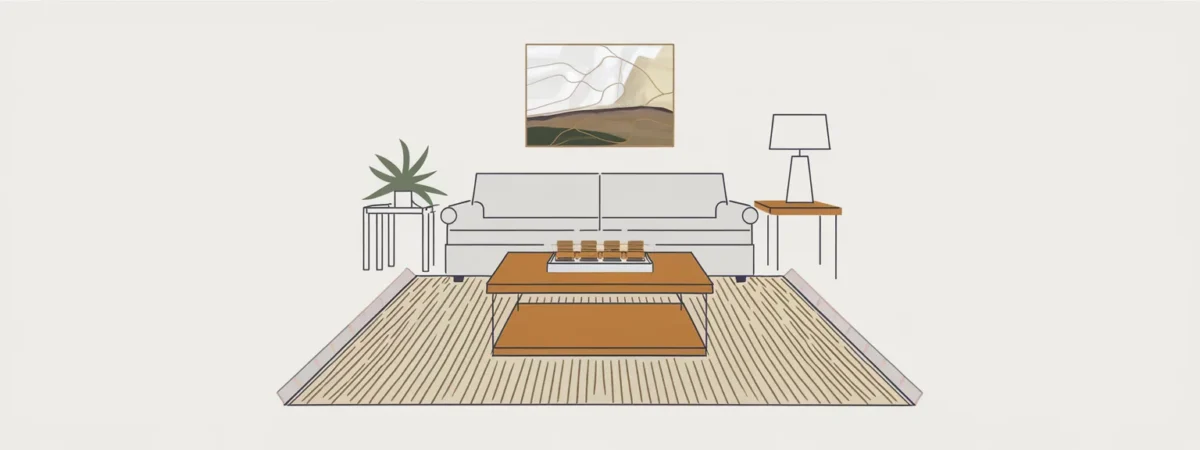
Simple Sofa And Coffee Table Layout Drawing
A simple sofa and coffee table layout drawing starts with the room outline and fixed elements like doors and windows. Begin by drawing a rectangle that matches the room shape. Mark entry points and circulation paths to protect walking space. Place the sofa first because it anchors the seating area. Draw the sofa as a clean rectangle with correct proportions to the room size. Leave clear space behind and in front of the sofa to allow movement. Next, add the coffee table centered to the sofa. Keep the table size smaller than the sofa width to maintain balance. This step-by-step approach helps beginners understand spacing before adding detail. Clear spacing improves comfort and prevents crowding.
Refine the drawing by checking distances. Keep at least 16–18 inches between the sofa and coffee table for legroom. Align the coffee table edges parallel to the sofa for visual order. Avoid pushing the sofa against the wall unless space demands it. Centering the seating area creates a stable focal zone. This drawing teaches proportion and alignment, which apply to many layouts. The final step adds light line weight to furniture outlines while keeping walls thinner. This contrast improves readability.

Minimal Living Room Floor Plan Sketch
A minimal living room floor plan sketch focuses on clarity over detail. Start by drawing the room perimeter to scale. Add walls, openings, and fixed features. Use light lines to keep the sketch flexible. Place the largest furniture items next, starting with seating. Draw furniture as simple shapes without texture. This keeps attention on layout logic. Protect circulation paths by drawing arrows that show movement. This step ensures the plan supports daily use. Minimal floor plans help users test ideas quickly and make changes without redrawing details.
Refine the plan by adjusting spacing. Ensure walkways remain clear and furniture does not block doors. Balance furniture across the room to avoid visual weight on one side. Add secondary items like side tables only after core placement works. Keep line thickness consistent to avoid confusion. This step-by-step method builds confidence and teaches layout fundamentals. The finished plan should feel open and readable, ready for further detail if needed.

Step-by-Step TV Wall Drawing
A step-by-step TV wall drawing begins with the wall outline and mounting zone. Draw the wall rectangle and mark the centerline at eye height from the seating position. Place the TV as a centered rectangle aligned to this line. Keep margins around the TV to avoid crowding. Next, add a low console below the TV, keeping it wider than the screen for balance. This sequence helps users avoid common mistakes like mounting the TV too high or using oversized units.
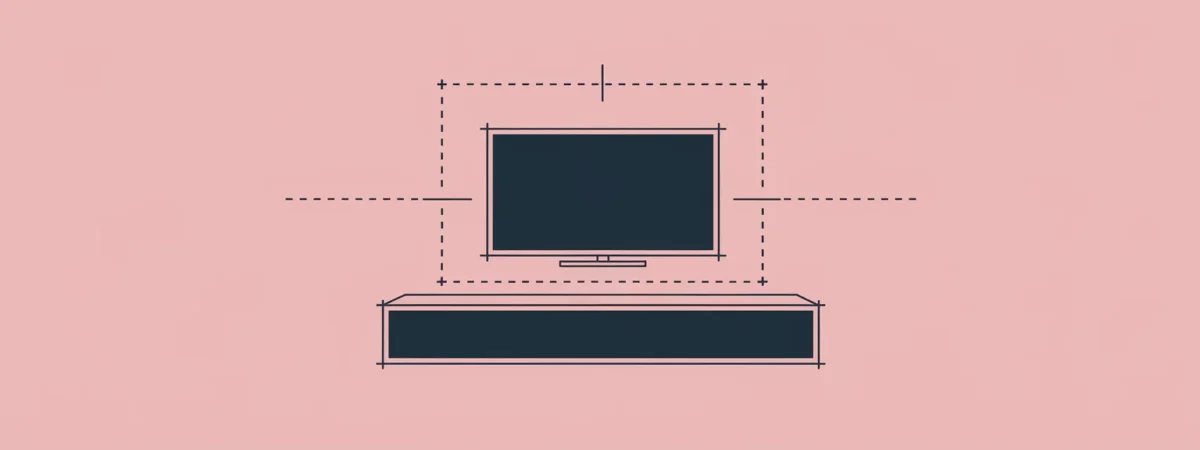
Refine the drawing by adding shelving or panels only if space allows. Keep shapes simple and symmetrical. Avoid stacking too many elements vertically. Check viewing distance by drawing a dashed line from the sofa to the screen. This ensures comfort. Finish by reinforcing outlines and erasing guide lines. The final drawing should read clearly from a distance, showing hierarchy and alignment without decoration.
Easy Accent Chair Placement Drawing
An easy accent chair placement drawing starts after primary seating works. Draw the sofa first, then identify an open corner or side zone. Place the accent chair as a smaller rectangle angled slightly toward the sofa. This angle supports conversation and improves flow. Keep space between the chair and walls to avoid blocking movement. This step-by-step method shows how to add seating without crowding the room.
Refine placement by checking clearances. Leave space for a small side table if needed. Avoid placing the chair directly in walking paths. Balance the chair with lighting by adding a lamp nearby in the sketch. This completes a functional seating pocket. Finish by adjusting angles and reinforcing final lines. The drawing teaches balance, orientation, and scale in a simple way.

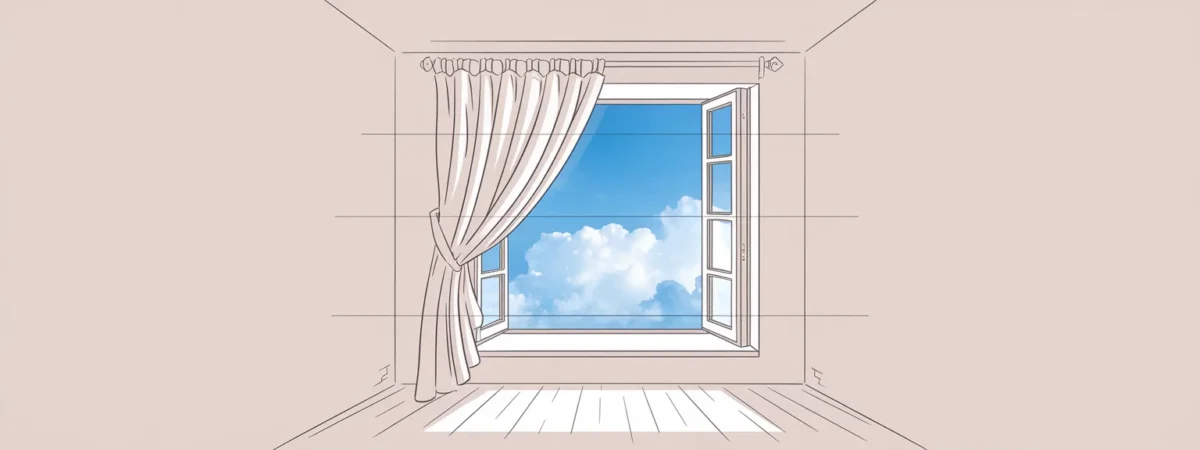
Window And Curtain Living Room Sketch
A window and curtain living room sketch begins with window placement on the wall. Draw the window opening accurately to scale. Add curtain rods above the window frame to suggest height. Draw curtains as simple vertical lines extending to the floor. This step shows how curtains affect proportions. Keeping curtains long improves perceived height and balance.
Refine the sketch by checking overlap with furniture. Curtains should clear seating and not block walkways. Keep curtain folds simple to avoid clutter. Indicate light direction with arrows to show how curtains filter daylight. Finish by strengthening final lines. This drawing teaches how soft elements interact with structure in a clear, step-by-step way.
Rug Placement Living Room Drawing
A rug placement living room drawing starts after the main seating layout feels stable. Begin by sketching the room outline and the sofa position. Draw the rug as a large rectangle that sits under the front legs of the sofa. This step anchors the seating area and prevents the rug from feeling disconnected. Keep the rug centered to the sofa rather than the room walls. This teaches proportion and alignment. Draw the rug edges parallel to the walls for clarity. The rug size should extend beyond the sofa sides so the seating zone feels unified. This step-by-step method helps avoid common mistakes like rugs that are too small or pushed against walls.
Refine the drawing by adding the coffee table on top of the rug. Ensure the table sits fully within the rug boundaries. Check walking paths around the rug edges and adjust size if movement feels tight. Use lighter lines for guide marks and darker lines for final placement. This drawing teaches how rugs define space and improve balance. The final sketch should clearly show the rug as a base layer supporting furniture, not as a decorative afterthought.
Side Table And Lamp Drawing Guide
A side table and lamp drawing guide begins after seating placement works. Start by drawing the sofa or chair outline. Add a small square or circle beside the seating to represent the side table. Keep the table height aligned with the seat arm level. This step helps users understand scale. Next, draw the lamp as a vertical element rising from the table. Keep the lampshade simple to avoid clutter. This step-by-step approach shows how lighting integrates with furniture rather than floating randomly in the room.
Refine the drawing by checking spacing. Ensure the table does not block walking paths. Lamps should sit close enough to reach while seated. Indicate light direction with soft lines to show coverage. Avoid oversized lamps that overpower small tables. This guide teaches how to balance function and proportion. The finished sketch should show a clear relationship between seating, table, and light, making the living room feel usable and calm.

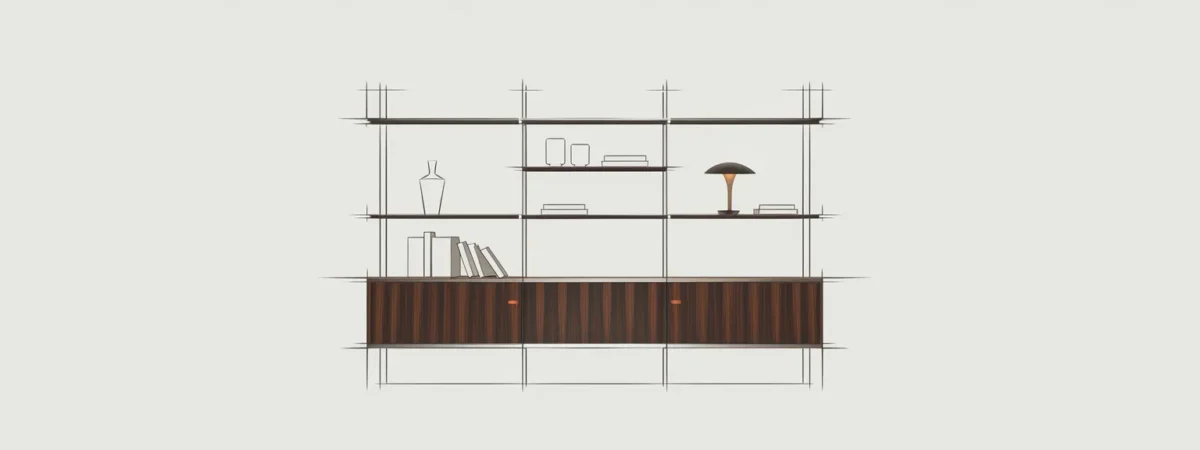
Modern Shelving Unit Drawing
A modern shelving unit drawing starts with the wall outline and available width. Draw the shelving unit as a vertical rectangle or series of stacked rectangles. Keep shelves evenly spaced to maintain order. This step helps users plan storage without overcrowding walls. Use simple lines to represent shelves rather than detailed objects. This keeps the focus on structure. Modern shelving drawings often stay symmetrical for clarity.
Refine the drawing by adding a few placeholder items like books or boxes as simple shapes. Avoid filling every shelf. This teaches restraint. Check alignment with nearby furniture to maintain balance. Keep shelves shallow to avoid visual bulk. The final sketch should communicate scale, spacing, and placement clearly, helping users decide if shelving fits their living room before installation.
Wall Art Placement Living Room Sketch
A wall art placement living room sketch begins with identifying the main wall, usually behind the sofa. Draw the wall and sofa first. Place the artwork as a rectangle centered above the sofa. Keep the artwork width smaller than the sofa width. This step teaches proportion. Draw the artwork at eye level when seated. This avoids common mistakes like hanging art too high.
Refine the drawing by checking spacing. Leave a small gap between the sofa top and the artwork. Avoid multiple small frames unless planning a gallery wall. Keep the sketch simple to focus on placement. This guide helps users visualize balance and alignment. The final drawing should clearly show how wall art connects visually to furniture rather than floating on the wall.

L-Shape Sofa Drawing Steps
An L-shape sofa drawing starts with defining the corner orientation. Draw the room outline and mark the corner where the sofa will sit. Sketch the long section first, then add the shorter return section. Keep both parts proportional. This step-by-step method helps users understand how L-shape sofas define zones. Draw clear walkways around the sofa to protect movement.
Refine the drawing by adding a coffee table and rug to anchor the seating area. Ensure the open side of the L faces the room center. Avoid blocking windows or doors. Use heavier lines for final placement. This drawing teaches zoning and scale, helping users plan comfortable layouts without guesswork.

Small Living Room Layout Drawing
A small living room layout drawing begins with careful attention to scale. Start by drawing the room outline to proportion, keeping walls and openings accurate. In small spaces, every inch matters. Place the largest furniture item first, usually a sofa, against the longest uninterrupted wall. Draw the sofa as a compact rectangle to avoid exaggeration. Next, mark walking paths to protect movement. This step ensures the layout remains usable. Avoid filling corners too early. Empty space supports balance in small rooms. This drawing method helps users see how restraint improves comfort.
Refine the drawing by adding only essential furniture. A small coffee table or nesting table works better than bulky pieces. Draw furniture with lighter lines first, then darken once placement feels right. Avoid pushing all items against walls. Centering the seating zone often improves flow. This drawing teaches how to make small rooms feel open through spacing and proportion rather than decoration.

Open Living Room Zoning Sketch
An open living room zoning sketch shows how to divide space without walls. Begin by drawing the full open area outline. Identify the living room zone using rugs or furniture orientation. Draw the sofa facing inward to define the seating area. Use dashed lines to indicate zones rather than solid walls. This approach teaches visual separation without barriers. Zoning helps large open spaces feel organized and comfortable.
Refine the sketch by adding secondary zones such as dining or reading areas. Keep spacing between zones consistent. Avoid overlapping furniture across zones. This drawing method helps users understand how layout guides behavior. Zoning sketches improve clarity and reduce confusion in open-plan homes. The final drawing should clearly show boundaries created by placement, not construction.
Lighting Placement Living Room Drawing
A lighting placement living room drawing starts after furniture placement feels settled. Draw the room outline and mark seating areas. Place light sources where activities occur. Begin with ambient lighting, then add task lighting near seating. Draw floor lamps as vertical lines and table lamps as smaller shapes. This step-by-step approach shows how light supports use rather than decoration.
Refine the drawing by checking light overlap. Avoid dark corners by spacing lights evenly. Indicate light spread with soft arcs. Keep fixtures proportional to furniture. This drawing teaches how to balance light across the room and avoid reliance on a single overhead source. Clear lighting plans improve comfort and usability.
Corner Seating Living Room Sketch
A corner seating living room sketch focuses on using overlooked areas. Start by drawing the room outline and identify an unused corner. Place a chair or small loveseat angled slightly inward. This angle supports conversation and improves flow. Draw the seating with enough clearance from walls. This step helps users turn dead corners into functional zones.
Refine the sketch by adding a small side table or lamp. Ensure the corner seating does not block walkways. Balance the seating with nearby furniture to avoid isolation. This drawing teaches efficient space use and adds flexibility to layouts. The final sketch should show a comfortable, integrated corner zone.
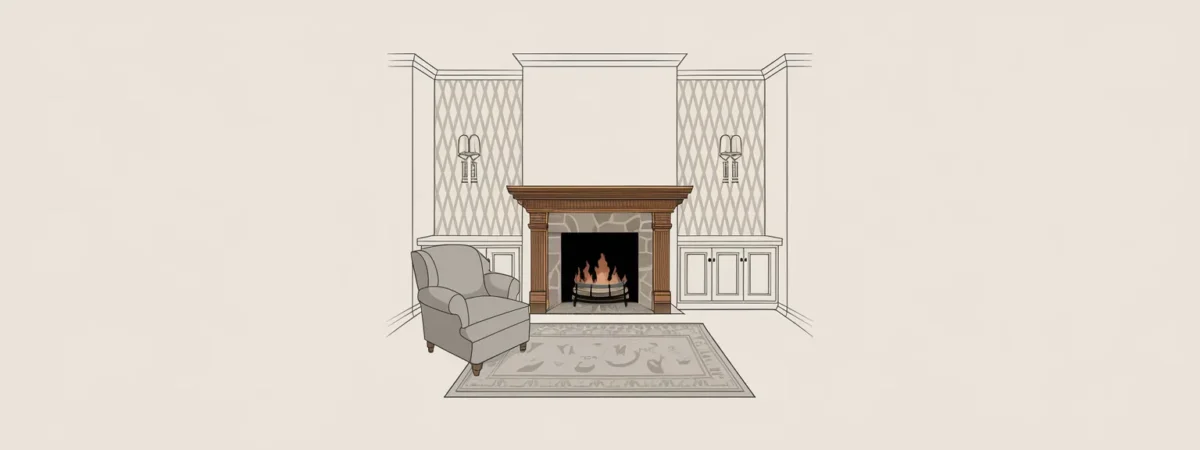
Fireplace Wall Drawing Guide
A fireplace wall drawing guide starts with the wall outline and fireplace position. Draw the fireplace as a centered rectangle at appropriate height. Add the mantel or surround as simple lines. Keep proportions balanced to avoid overpowering the room. This step helps users plan focal walls clearly.
Refine the drawing by adding seating orientation toward the fireplace. Avoid placing the TV too high above the fireplace. Keep accessories minimal. This drawing teaches how to balance focal elements without clutter. The final sketch should communicate hierarchy and alignment clearly.
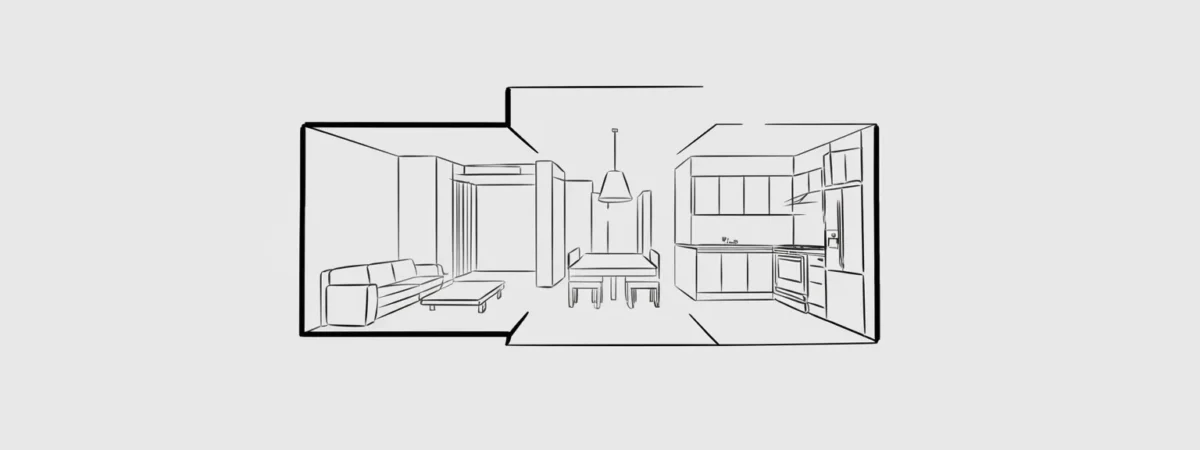
Entry-To-Living Room Transition Drawing
An entry-to-living room transition drawing helps define how movement flows from one space into another. Start by drawing the entry outline and the adjacent living room boundary. Mark the doorway or open passage clearly. Next, sketch the first visible furniture piece in the living room, usually a console, sofa back, or rug edge. This step shows how the living room announces itself from the entry. Keep lines light at first to test spacing. Clear transitions prevent visual confusion and improve comfort. This drawing method teaches how furniture orientation guides movement naturally.
Refine the drawing by adding directional cues. Rugs, lighting, or artwork placement can signal the shift between spaces. Avoid placing tall furniture directly at the transition point. This blocks sightlines. Maintain clear walking paths. The final drawing should show a smooth visual handoff from entry to living area. This approach helps users plan welcoming spaces that feel connected rather than abrupt.

Symmetrical Living Room Layout Sketch
A symmetrical living room layout sketch focuses on balance and order. Begin by drawing the room outline and center axis. Place the main sofa centered on this axis. Add matching elements on both sides, such as chairs or tables. Symmetry creates calm and predictability. This step-by-step drawing helps users understand alignment and proportion. Keep shapes simple to focus on balance rather than detail.
Refine the sketch by checking spacing on both sides. Distances should match closely. Lighting placement should also mirror across the axis. Avoid overfilling the space. Symmetry works best with restraint. This drawing teaches how balance supports comfort and visual clarity. The final sketch should feel stable and organized.

Asymmetrical Modern Living Room Drawing
An asymmetrical modern living room drawing introduces balance through contrast rather than mirroring. Start with the room outline and place the sofa off-center. Add supporting elements that counterbalance the weight visually. For example, a chair on one side can balance shelving on the other. This drawing method teaches dynamic balance. Asymmetry suits modern spaces because it feels relaxed yet intentional.
Refine the drawing by adjusting visual weight. Large items should balance smaller groups rather than dominate. Maintain clear walkways. Lighting should support balance by filling empty areas. This drawing helps users create modern layouts that feel natural without strict rules. The final sketch should feel cohesive even without symmetry.
Minimal Decor Placement Drawing
A minimal decor placement drawing teaches restraint. Start with a completed furniture layout. Add decor as small shapes only where needed. Focus on one or two surfaces, such as a coffee table or shelf. Avoid spreading decor everywhere. This step-by-step approach shows how less improves clarity.
Refine the drawing by removing excess marks. Keep negative space visible. Decor should support the room, not compete with furniture. This drawing helps users avoid clutter and maintain calm. The final sketch should show intentional placement rather than decoration volume.
Finished Living Room Perspective Sketch
A finished living room perspective sketch brings all steps together. Start with a light perspective grid to establish depth. Draw walls, floor, and major furniture following earlier layouts. Perspective helps users see height, distance, and proportion. Keep lines clean and simple. This sketch shows how individual steps combine into a complete view.
Refine the sketch by darkening final lines and removing guides. Add light shading only where needed to suggest depth. Avoid heavy detail. The finished perspective sketch should feel clear and readable. This final step helps users visualize the living room as a whole before execution.

Frequently Asked Questions
These questions cover common concerns people face when learning to draw living room layouts. The answers focus on clarity, simplicity, and practical drawing order.
Do I Need Drawing Experience To Sketch A Living Room?
No. Step-by-step drawing focuses on simple shapes and spacing rather than artistic skill.
What Should I Draw First In A Living Room Sketch?
Start with the room outline and major furniture pieces before adding details.
How Can Drawing Help Avoid Layout Mistakes?
Drawing reveals spacing issues early, such as blocked walkways or oversized furniture.
Should I Draw Lighting In A Living Room Plan?
Yes. Lighting placement affects balance and comfort, especially when following layered lighting principles like those explained in layered lighting.
Can Step-By-Step Drawings Help Small Living Rooms?
Yes. Drawing helps test layouts that make small rooms feel open, similar to strategies used for small living spaces.
Final Thoughts And Practical Experience
This guide reflects practical experience using drawing as a planning tool for real living rooms, not just visual exercises. I have worked with people who felt overwhelmed by furniture choices until a simple sketch clarified scale and movement. Step-by-step drawing consistently reduced mistakes such as oversized rugs, poor seating distance, and unbalanced layouts. In many cases, drawing revealed that fewer furniture pieces improved comfort. Sketching lighting placement early helped avoid flat rooms and supported better atmosphere, especially when combined with principles seen in lighting balance. Drawing also helped users understand how ceiling height and wall proportions affect layout, similar to insights used when improving room height perception. In neutral spaces, sketches helped plan contrast and texture without relying on guesswork, echoing approaches used for neutral living rooms. The most effective drawings stayed simple, readable, and flexible. They focused on order rather than decoration. People who used drawings before purchasing furniture felt more confident and stayed satisfied with their layouts over time. A living room drawing does not need detail to be useful. It needs clarity, proportion, and logical steps. When drawing supports real movement and daily use, the final living room feels comfortable, balanced, and easy to live in.
