
5 small bathroom layouts that make 50 sq ft feel like a spa focus on maximizing space, flow, and function. Narrow floating vanities and wall-mounted toilets free floor area, while corner showers with clear glass keep sightlines open. Linear storage and recessed niches reduce clutter, and strategic lighting enhances brightness and depth. Using floor plans that balance circulation with thoughtful fixtures turns compact areas into roomy, relaxing spa-like bathrooms.
Small bathrooms don’t have to feel cramped or stressful. Whether you’re redesigning a powder room or working with a compact ensuite, the right floor plan can transform your space from cluttered chaos into a peaceful retreat. We’ll show you exactly how to arrange your fixtures, what materials work best, and which design tricks professional designers use to create that airy, spa-like feeling.
Understanding Your 50 Square Foot Space

A 50 square foot bathroom is actually more common than you might think. This size typically measures about 5 feet by 10 feet or 7 feet by 7 feet. While it sounds tiny on paper, thousands of homeowners have turned these compact spaces into beautiful, functional bathrooms that rival much larger rooms.
The key is understanding what you’re working with. Most building codes require at least 30 inches of clearance in front of toilets and 21 inches in front of sinks. Showers need a minimum of 30 by 30 inches of floor space. Once you know these basics, you can start arranging things in ways that actually make sense for daily use.
Why Layout Matters More Than Size
You’ve probably been in big bathrooms that feel awkward and small bathrooms that somehow work perfectly. That’s all about layout. A smart floor plan guides your eye around the room, creates natural pathways, and makes every fixture feel like it belongs exactly where it is.
Think of your bathroom like a puzzle. Each piece needs to fit together without creating bottlenecks or dead spaces. When you walk in, you shouldn’t bump into the sink or feel trapped between the toilet and the shower. Good flow means you can move around comfortably even when the room is technically small.
The Spa Feeling Everyone Wants

What makes a bathroom feel like a spa? It’s not just fancy tiles or expensive fixtures. Real spa vibes come from clean lines, uncluttered surfaces, and a sense of calm the moment you step inside. Natural light helps a lot, but even bathrooms without windows can achieve this feeling through smart lighting and color choices.
Spas feel peaceful because everything has its place. There’s no visual clutter, no cramped corners, and no awkward empty spaces that don’t serve a purpose. Your 50 square foot bathroom can capture this same energy with thoughtful planning and a few designer secrets.
Layout One: The Classic Linear Design
The linear layout is probably the most popular choice for narrow bathrooms. Everything lines up along one wall or two opposite walls, creating a clear pathway down the middle. This setup works especially well for bathrooms that are roughly 5 feet by 10 feet.
Picture walking into a room where the sink sits near the door, the toilet comes next, and the shower or tub takes up the far end. This arrangement feels natural because it follows how most people actually use a bathroom. You come in, wash your hands, and the shower is waiting at the back for when you need it.
How to Arrange Fixtures in a Line
Start with your shower or tub at the farthest point from the door. This creates privacy and makes the room feel deeper than it really is. Your eye travels all the way to the back, which tricks your brain into thinking the space is larger.
Place your toilet in the middle section, ideally with a few inches of clearance on each side. The sink goes closest to the door for easy access. This order makes sense for plumbing too, since water lines typically run along exterior walls.
Making Linear Layouts Feel Wider
Use a large mirror above the sink that stretches almost wall to wall. This reflects light and visually doubles the width of your bathroom. Paint the walls a light, neutral color to keep things airy.
Consider a floating vanity instead of one that sits on the floor. When you can see the floor continuing underneath, the room automatically feels less cramped. Add a glass shower door rather than a curtain, and suddenly your 50 square feet feels like 75.
Best Materials for This Layout
Stick with large format tiles on the floor. Small tiles create too many grout lines, which chop up the space visually. A 12 by 24 inch tile running the length of the room draws the eye forward and makes everything feel longer.
For walls, consider running subway tiles horizontally rather than in the traditional vertical pattern. This creates horizontal lines that widen the space. Keep your color palette simple with no more than three colors total in the entire room.
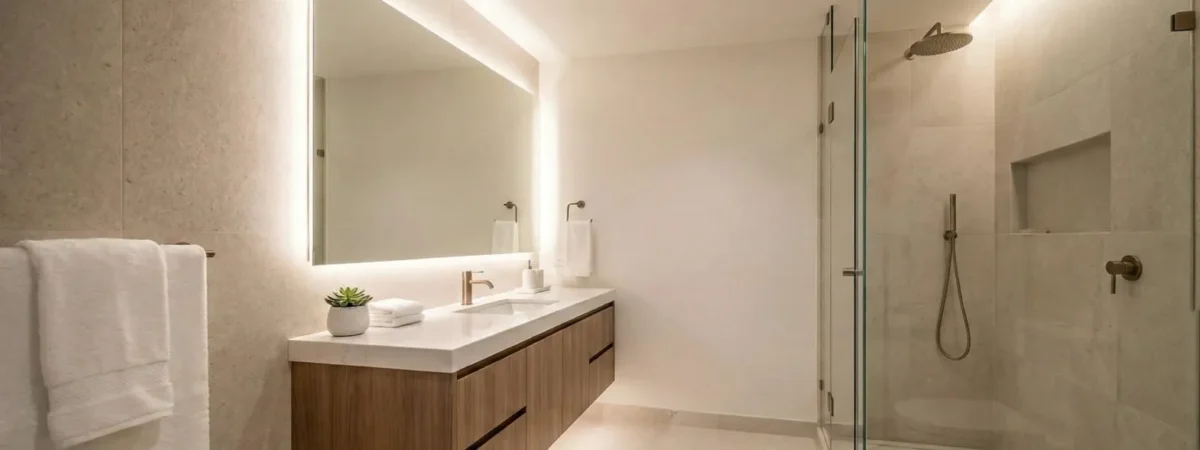
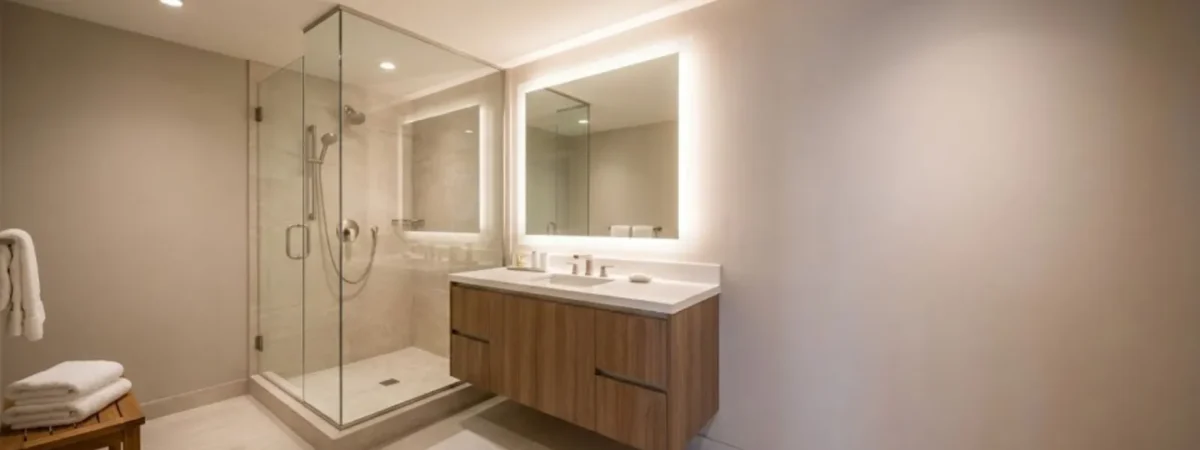
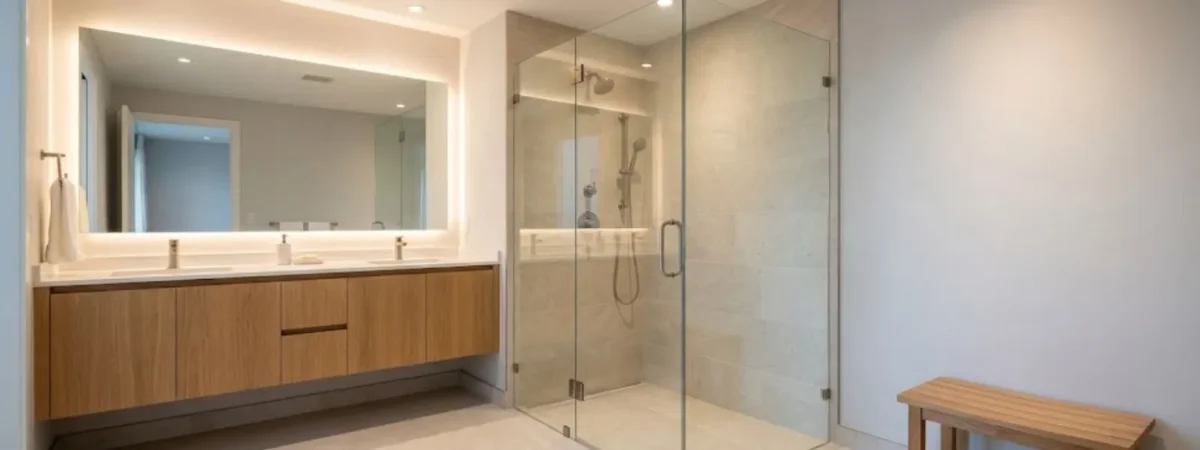
Layout Two: The Corner Shower Configuration
Corner showers are magic in small bathrooms. By tucking the shower into a corner, you free up the center of the room for movement. This layout works beautifully in square bathrooms around 7 feet by 7 feet.
The corner shower setup puts your shower in one corner, your toilet along one wall, and your sink either on the adjacent wall or opposite the toilet. This creates a triangle pattern that naturally guides traffic flow and keeps everything accessible.
Positioning Your Corner Shower
Choose the corner farthest from the door for your shower. This placement provides privacy and makes the room feel balanced. A neo-angle shower with a diagonal door uses corner space efficiently while adding visual interest.
Look for a shower pan that’s at least 36 by 36 inches if you can fit it. This gives you enough elbow room to actually enjoy your shower without feeling boxed in. Frameless glass doors are worth the investment because they completely open up sight lines.
Where Everything Else Goes
Put your toilet on the wall perpendicular to the shower corner. This creates separation between wet and dry areas, which just makes practical sense. You want at least 15 inches of clearance from the center of the toilet to any wall or fixture.
Your vanity can go on the wall opposite the toilet or next to the door, depending on your plumbing situation. A wall-mounted sink with a narrow profile works great here because it doesn’t jut out into the walking space.
Adding Storage Without Bulk
Recessed medicine cabinets are your best friend in this layout. They provide tons of storage without sticking out into the room. Install one above the sink and maybe another shallow one above the toilet for extra toiletries.
Corner shelves inside the shower keep soap and shampoo organized without taking up valuable floor space. Look for tension pole caddies or built-in niches if you’re doing a full renovation. Every inch counts, so think vertically whenever possible.
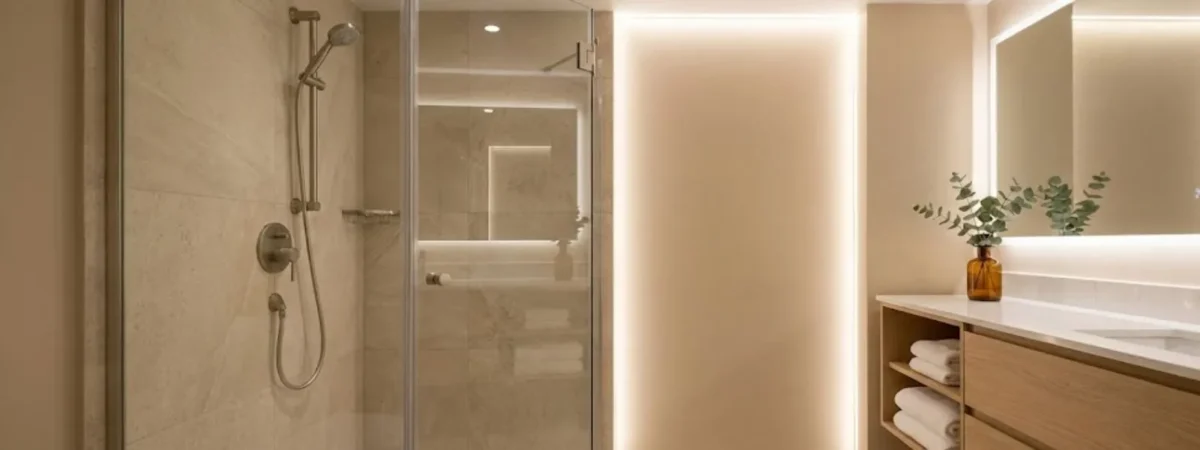
Lighting Tricks for Corner Layouts
Mount a light fixture directly above the shower to eliminate shadows and make that corner feel bright and inviting. Add sconces on either side of the mirror rather than a single bar light overhead.
Consider a dimmer switch so you can adjust the mood. Bright light for getting ready in the morning, softer light for relaxing evening baths. This simple addition makes your bathroom feel more spa-like immediately.
Layout Three: The Wet Room Approach
Wet rooms are gaining popularity in small spaces for good reason. The entire bathroom becomes one waterproof space with a shower area that doesn’t have walls or a raised threshold. This European-style design makes 50 square feet feel dramatically larger.
In a wet room layout, the floor slopes gently toward a linear drain, usually in the shower zone. You might have a glass panel to keep water mostly contained, but there’s no separate shower enclosure eating up precious space. Everything flows together seamlessly.
Creating a Wet Room Feel
The floor needs to be completely waterproof with proper drainage. This usually means a sloped concrete subfloor with a waterproof membrane and tiles that channel water toward the drain. It’s more work upfront but creates an incredibly open feeling.
Install your toilet and sink as you normally would, but design the shower area to blend into the rest of the floor. A low glass partition or half-wall can guide water without creating visual barriers. The key is making the shower zone feel like part of the room, not a separate box.
Ventilation and Water Control
Good ventilation is absolutely critical in wet rooms. Install a high-quality exhaust fan rated for the square footage of your bathroom. Run it during showers and for at least 20 minutes afterward to prevent moisture buildup.
Use a handheld shower head on a slide bar so you can direct water exactly where you want it. This gives you more control and keeps water from splashing all over your toilet and vanity. A small glass partition on the sink side helps too.
Is a Wet Room Right for You
Wet rooms work best if you’re doing a complete gut renovation. Retrofitting an existing bathroom into a wet room requires significant plumbing and waterproofing work. But if you’re starting from scratch, the investment creates a truly luxurious feel.
They’re also ideal if you have mobility concerns or plan to age in place. No threshold to step over means easier access for everyone. The open design accommodates wheelchairs and walkers much better than traditional enclosed showers.
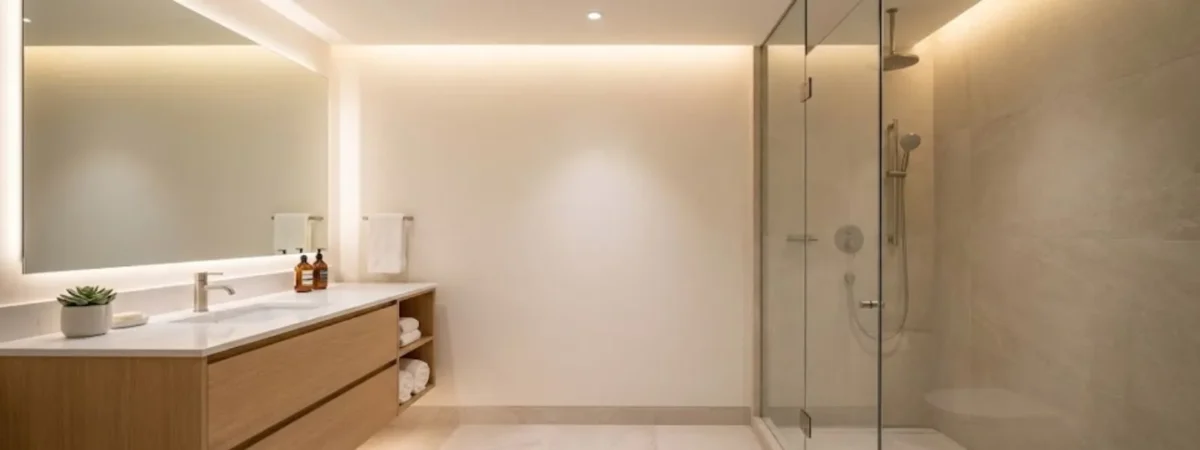
Layout Four: The Compact Three-Quarter Bath
A three-quarter bath includes a sink, toilet, and shower but no tub. This is perfect for 50 square feet because tubs eat up enormous amounts of space. By eliminating the tub, you gain room for a more comfortable shower and better traffic flow.
This layout typically puts the shower along one wall, the toilet next to it, and the sink on the opposite wall or perpendicular to the toilet. The arrangement creates an L-shape or U-shape that maximizes every square foot.
Why Skip the Tub
Tubs in tiny bathrooms usually end up being too short and narrow to actually enjoy. A 54-inch tub is standard, but in a 50 square foot space, that leaves barely any room for the toilet and sink. You end up with a bathroom that’s bad at everything instead of good at what matters most.
A well-designed shower with a bench, handheld sprayer, and good water pressure beats a cramped tub every time. You’ll use your shower daily, while tubs in small bathrooms often go unused for months. Be honest about your actual habits, not what sounds nice in theory.
Shower Design That Delivers
Aim for a shower that’s at least 36 by 36 inches if possible. This gives you enough room to move comfortably and even add a corner bench for a true spa experience. Benches are incredibly useful for shaving legs, setting down products, or just enjoying a steam.
Choose a rain shower head for that luxury hotel feeling. Add a handheld sprayer on a slide bar for practical washing. Install a shower niche at chest height to keep products organized and within easy reach. These details transform a basic shower into something special.
Vanity Options for This Layout
A 24-inch vanity is usually perfect for this layout. It provides counter space and storage without overwhelming the room. Look for models with drawers instead of doors because drawers maximize usable storage in tight spaces.
If you’re really tight on space, consider a pedestal sink with a small wall-mounted cabinet nearby. This keeps things minimal while still providing essential storage. Just make sure you have somewhere to set down your toothbrush and hand soap.
Color and Texture Choices
Keep shower tiles light but add texture for interest. A subtle pattern or natural stone look adds spa vibes without closing in the space. Save bold colors for towels and accessories that you can change out easily.
Paint the ceiling the same color as the walls or even lighter. This draws the eye up and makes the room feel taller. Add one statement element like a beautiful mirror or unique light fixture, but keep everything else simple and cohesive.
Layout Five: The Split Bathroom Design
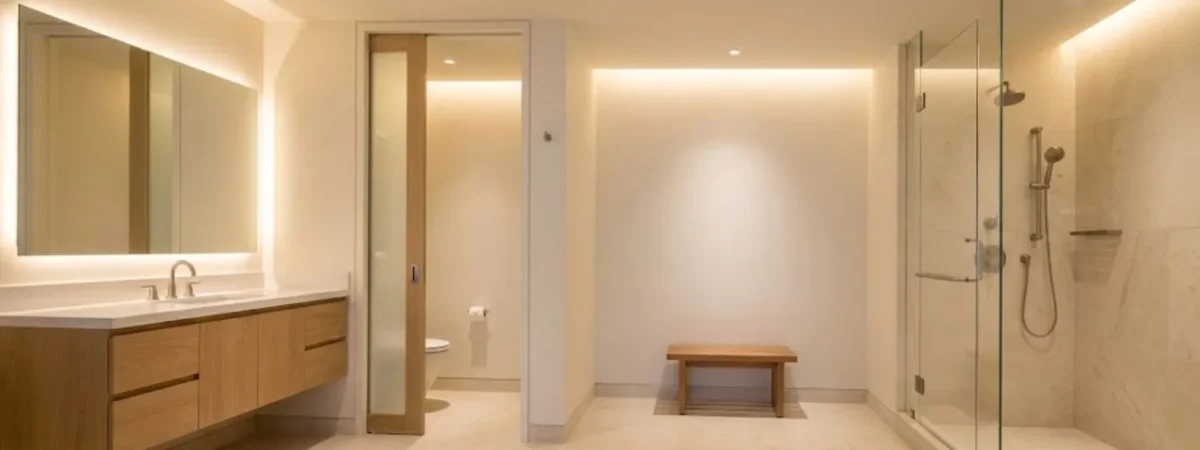
Split bathrooms separate the toilet area from the sink and shower, creating two zones within your 50 square feet. This works through either a half-wall, a pocket door, or clever placement that provides privacy without full enclosure.
Think of this as a bathroom within a bathroom. The sink and shower are open and accessible, while the toilet gets its own little nook. This setup is incredibly practical for couples or families sharing a small space.
Creating Privacy in Open Spaces
A frosted glass panel or half-wall between the toilet and the rest of the bathroom provides privacy without blocking light or making the space feel chopped up. The partition only needs to be 4 or 5 feet tall to do its job effectively.
Another option is positioning the toilet in a corner behind the door swing. When the door opens, it naturally shields the toilet from view. This costs nothing and works surprisingly well in many layouts.
Maximizing the Sink Zone
With the toilet tucked away, your sink area can become a proper grooming station. Add a larger mirror, better lighting, and more counter space. This is where you’ll spend most of your time, so make it comfortable and functional.
Consider a double sink if you have wall space, even if they’re small. Two people can brush teeth or wash hands simultaneously, which makes morning routines so much smoother. Even compact sinks at 12 inches wide each can work in a split design.
Traffic Flow Considerations
Make sure you have at least 24 inches of clear walking space between fixtures. This allows people to move around even when someone is using the sink or shower. The toilet zone can be tighter since only one person uses it at a time.
Think about door swings carefully. A pocket door or barn door saves space and prevents that awkward moment when the door hits the toilet or sink. These doors slide rather than swing, which is perfect for compact layouts.
Adding Luxury to Small Spaces
Install heated floors in the main area for that spa touch. Radiant floor heating uses minimal electricity and makes a huge difference in how the space feels. Stepping onto a warm floor transforms your morning routine.
Add a Bluetooth speaker in the ceiling for music or podcasts while you get ready. Good sound quality and ambiance make even the smallest bathroom feel more luxurious and personal. These small upgrades create big impacts on daily experience.
Design Elements That Create Spa Vibes
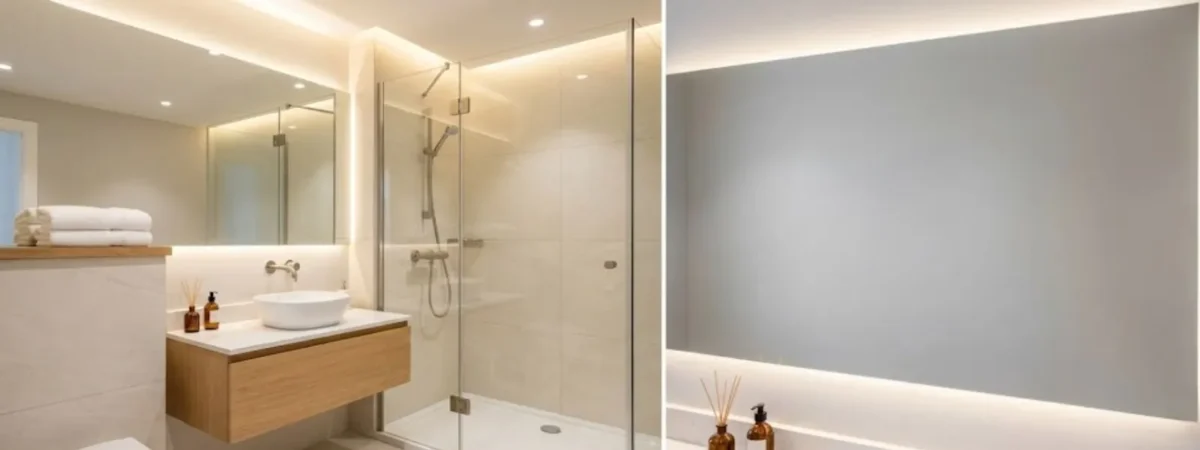
Beyond layout, certain design choices consistently make small bathrooms feel more spa-like. These elements work regardless of which floor plan you choose and can be added during renovation or gradually over time.
Natural materials like wood, stone, and plants bring calming energy into small spaces. A wooden bath mat or stool adds warmth. A small potted plant that thrives in humidity makes the room feel alive and cared for.
The Power of Good Lighting
Layered lighting makes any bathroom feel more expensive and spa-like. You need bright task lighting at the mirror, ambient lighting overhead, and maybe accent lighting to highlight nice features. Each layer serves a purpose and creates depth.
Warm white bulbs around 3000K feel more relaxing than cool white bulbs. Save the bright daylight bulbs for work spaces. Your bathroom should feel soothing, and lighting temperature plays a huge role in that.
Smart Color Palettes
Stick with two or three colors maximum. White, gray, and natural wood tones create a timeless spa aesthetic that never feels dated. You can add pops of color through towels and accessories, but keep the permanent elements neutral.
Avoid busy patterns on large surfaces. A patterned floor or wild shower tile can make a small space feel chaotic. Save patterns for small doses like a decorative soap dispenser or a framed print.
Texture Over Pattern
Instead of patterns, use texture to create visual interest. A matte black faucet against white tile provides contrast. Natural stone has inherent texture that adds depth without busyness. Textured paint or wallpaper on one wall creates a focal point.
Mix smooth and rough textures throughout the space. Glossy tile with matte paint, smooth counters with textured towels, polished fixtures with natural wood accents. This variety engages the eye without overwhelming the space.
Storage Solutions That Don’t Take Up Space

Storage is critical in small bathrooms, but bulky cabinets and shelves make the room feel even tinier. The trick is finding ways to store everything you need without adding visual clutter or eating up precious floor space.
Vertical storage is your secret weapon. The space above the toilet, behind the door, and up to the ceiling often goes unused. These areas can hold tons of stuff when you add the right organizers and shelving systems.
Built-In Options
Recessed shelving between wall studs provides storage without sticking out into the room. These niches work great in showers for toiletries or next to the toilet for extra toilet paper and cleaning supplies. They’re invisible from most angles but incredibly functional.
Medicine cabinets with mirrored doors serve double duty. You get storage and a mirror without using any additional wall space. Modern medicine cabinets come in sleek designs that look nothing like the clunky versions from decades past.
Furniture That Multitasks
A vanity with drawers stores way more than you’d expect. Use drawer dividers to maximize organization and keep things from becoming a jumbled mess. The space under a pedestal sink can accommodate a small rolling cart for extra storage.
Over-the-door organizers and hooks make use of the back of the door. Hang bathrobes, store hair tools, or organize makeup. This space is usually wasted but can hold a surprising amount when you add the right accessories.
Common Mistakes to Avoid
Even with a great layout, certain mistakes can ruin the spa feeling you’re trying to create. These errors are incredibly common in small bathroom renovations, but they’re easy to avoid once you know what to watch for.
Using too many different materials or colors makes the space feel busy and small. Stick to your plan and resist the urge to add just one more element. Simplicity always wins in compact spaces.
Skimping on Lighting
One overhead light is never enough. Shadows make bathrooms feel dark and depressing even during the day. Invest in proper task lighting around the mirror and consider adding a waterproof light inside the shower area.
Natural light is ideal, but if you don’t have a window, mimic it with the right bulbs and placement. Light should come from multiple angles to eliminate shadows and create an even, bright atmosphere.
Ignoring Ventilation
Poor ventilation leads to mold, mildew, and that damp smell that ruins even the prettiest bathroom. Install a properly sized exhaust fan and actually use it. Run it during showers and for 20 to 30 minutes after to remove all the moisture.
If moisture builds up on mirrors and walls after every shower, your ventilation isn’t adequate. Address this immediately because moisture damage gets expensive fast and completely undermines any spa atmosphere.
Choosing Form Over Function
That gorgeous vessel sink might look amazing in photos, but is it practical for your daily routine? Beautiful fixtures that don’t work well create frustration, which is the opposite of spa vibes. Choose fixtures that look good and function perfectly for your specific needs.
Think about your actual routine. Do you need counter space for products? Is storage for towels important? Will multiple people use this bathroom at once? Answer these questions honestly before finalizing your design.
Budget-Friendly Ways to Upgrade

Creating a spa-like bathroom doesn’t require unlimited funds. Smart upgrades in the right places deliver maximum impact without breaking the bank. Focus your budget on the things you touch and see every day.
Paint is incredibly cheap and makes a massive difference. A fresh coat in a calming neutral color transforms the entire room. Add a peel-and-stick backsplash behind the sink for a custom look without the cost of real tile installation.
Where to Splurge
Invest in a quality faucet and shower head. You use these fixtures multiple times every day, and cheap versions feel cheap every single time. A good faucet with a solid feel and smooth operation makes the whole bathroom feel more luxurious.
The mirror is worth splurging on too. A beautiful framed mirror or a large frameless mirror with LED backlighting becomes the focal point of your bathroom. This is what you see every morning, so make it something you actually enjoy looking at.
Where to Save
You don’t need designer tiles to create a beautiful bathroom. Standard white subway tiles look timeless and cost a fraction of trendy options. Use standard sizes and avoid custom cuts to keep installation costs down.
Paint existing cabinets instead of replacing them. New hardware and a fresh coat of paint can make old vanities look completely new. This saves thousands compared to buying and installing new cabinetry.
Final Thoughts
A 50 square foot bathroom can absolutely feel like a spa with the right layout and design choices. The five layouts we covered each solve different challenges and work for different space configurations. Pick the one that matches your bathroom’s shape and your daily needs.
Remember that spa vibes come from simplicity, good lighting, and thoughtful details. You don’t need expensive materials or a huge space. Smart choices that prioritize function and flow while keeping things visually calm will transform even the tiniest bathroom into a peaceful retreat you actually look forward to using every day.
Start with your layout, then layer in the design elements that matter most to you. Take your time, plan carefully, and don’t be afraid to ask for help from professionals when needed. Your dream spa bathroom is completely achievable, even in just 50 square feet.
