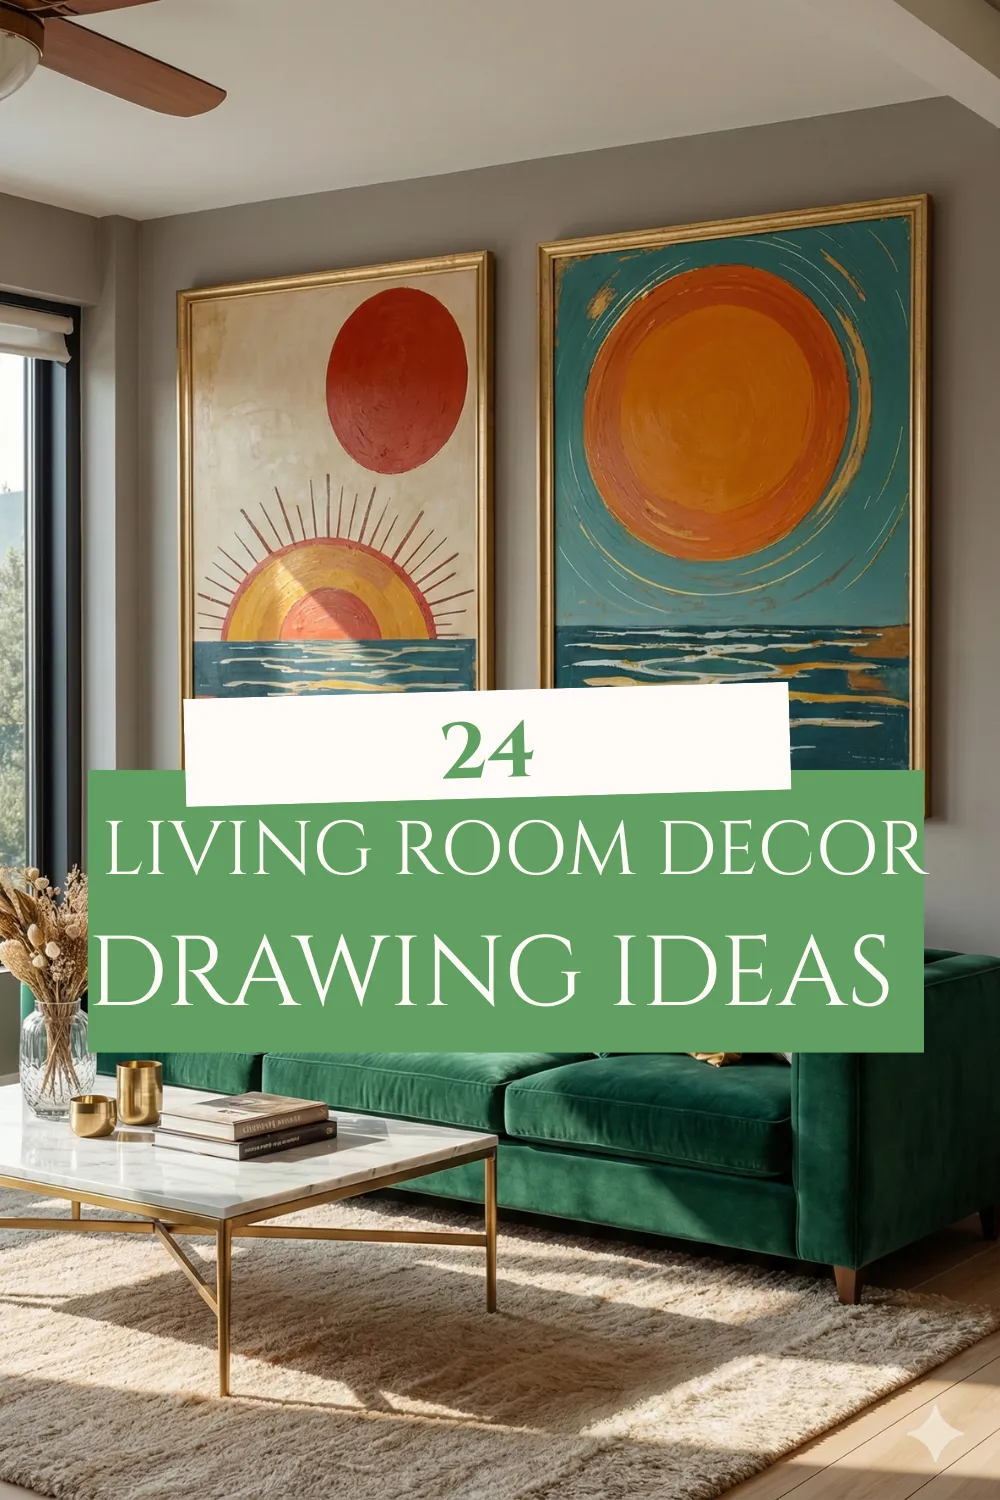
You want to sketch out your living room ideas before buying furniture or painting walls. Drawing your decor plans helps you see what works and what doesn’t without spending a dime. It saves time, money, and stops you from making costly mistakes.
This guide shows you 24 practical drawing ideas for living rooms. You’ll learn simple sketches for furniture placement, color schemes, wall art layouts, and full room designs. Whether you’re redecorating one corner or planning a complete makeover, these drawing ideas help you visualize your space clearly.
Why Drawing Your Living Room Ideas First Makes Sense
Most people jump straight into buying furniture and decor without planning. Then they realize the couch is too big or the colors clash. Drawing your ideas first solves this problem.
When you sketch your living room, you see the space differently. You notice how much room that sectional actually takes up. You realize the TV stand blocks the window. You catch problems before they become expensive mistakes.
Drawing also helps you communicate with family members or designers. Instead of saying “I want something cozy,” you show them exactly what you mean. Everyone gets on the same page faster.
You don’t need fancy art skills either. Simple sketches with basic shapes work perfectly. A rectangle for the couch, circles for lamps, squares for tables. That’s all you need to start planning.
Basic Room Layout Drawings

Start with the bones of your room. Draw the walls, windows, and doors first. Use a simple floor plan view like you’re looking down from the ceiling.
Measure your actual room and use a basic scale. For example, one inch on paper equals one foot in real life. This keeps everything proportional.
Mark where the windows sit. Note which way doors swing open. Show any permanent features like fireplaces or built-in shelves. These fixed elements shape where everything else goes.
Once you have the basic outline, add your furniture as simple shapes. Don’t worry about making it pretty. Focus on seeing if everything fits and flows well.
Furniture Arrangement Sketches
Your furniture arrangement makes or breaks a living room. Draw different layouts to find what works best.
Try a conversation circle first. Put your seating in a way where people can easily talk. Sofas and chairs should face each other with no more than eight feet between them. Draw this setup and see how much walking space remains.
Next, sketch an entertainment-focused layout. Center everything around the TV or fireplace. Make sure every seat has a clear view. Check that you’re not sitting too close or too far from the screen.
Also try an L-shaped arrangement. Place your sofa along one wall and a loveseat or chairs perpendicular to it. This works great for smaller rooms or open floor plans.
For each layout, draw the traffic paths. These are the invisible walkways people use to move through the room. You need at least 30 inches of clear space for comfortable walking. If your sketch shows tight squeezes, rearrange the furniture.
Sectional Sofa Placement Ideas

Sectionals are tricky because they’re big and permanent-feeling. Drawing helps you test different positions without moving heavy furniture.
Sketch your sectional in a corner first. This classic position saves space and creates a cozy feel. The L-shape fits naturally against two walls, leaving the center of the room open.
Try floating the sectional in the middle of the room too. Draw it facing the TV or fireplace with the back toward another area. This works well in open-concept homes where you need to divide spaces.
Consider angling the sectional. Instead of parallel to the walls, turn it at 45 degrees. This adds visual interest and can improve traffic flow. Your drawing will show if you have enough room for this bold move.
Always sketch where people will put their feet. Every seat needs a coffee table or ottoman within reach. If your drawing shows someone stretching too far for their drink, adjust the layout.
Color Scheme Planning Drawings

Colors transform a room, but picking the right ones feels overwhelming. Drawing with colored pencils or markers helps you test combinations safely.
Start with the 60-30-10 rule on paper. Your dominant color covers 60% of the room (usually walls). Your secondary color takes 30% (like furniture). Your accent color pops up in 10% (pillows, art, decor).
Draw simple color blocks showing this breakdown. Try different combinations. Maybe navy walls, tan sofa, and orange accents. Or gray walls, navy sofa, and yellow accents. Seeing the proportions on paper shows which combo feels balanced.
Sketch warm versus cool schemes separately. Warm colors (reds, oranges, yellows) make rooms feel cozy and energetic. Cool colors (blues, greens, purples) create calm, spacious vibes. Draw the same room with both approaches to see which matches your goal.
Don’t forget about your existing colors. Draw your current flooring, built-ins, or permanent features. Then add new colors around them. This prevents clashing with things you can’t change.
Wall Art Gallery Layout Sketches

Gallery walls look amazing but often turn into crooked, awkward messes. Drawing the layout first guarantees success.
Measure your wall space. Transfer those dimensions to paper. Now cut out small paper shapes representing your frames. Move these around on your drawing until you find a layout you love.
Try the traditional grid style first. Draw frames in neat rows and columns with equal spacing. This looks clean and organized. It works especially well with matching frames and similar-sized art.
Next sketch an organic salon-style gallery. Mix different frame sizes and shapes. Start with your largest piece near the center. Arrange smaller pieces around it. Keep the spacing between frames consistent (about two to three inches works well).
Consider a statement piece approach too. Draw one large piece of art centered on the wall. Add smaller pieces on either side if desired, but let the big one be the star.
Whatever layout you choose, draw light pencil lines showing where nails go. Measure up from furniture below to keep spacing even. Your drawing becomes your installation template.
Lighting Plan Drawings

Good lighting needs three types: ambient (overall room light), task (reading or work light), and accent (highlighting art or features). Draw where each type goes.
Start by sketching your ceiling fixtures. Mark the center of the room for a main chandelier or flush mount. Note if you have can lights and where they sit.
Then draw your floor and table lamps. Every seating area needs light. Place a lamp within reach of each chair or sofa spot. Don’t make people sit in shadows.
Add accent lighting last. Draw small spotlights aimed at art, plants, or architectural features. These create depth and interest after dark.
Use your drawing to check for dark corners. Every space should have light from at least one source. If you spot a dim area, add another lamp or move existing ones.
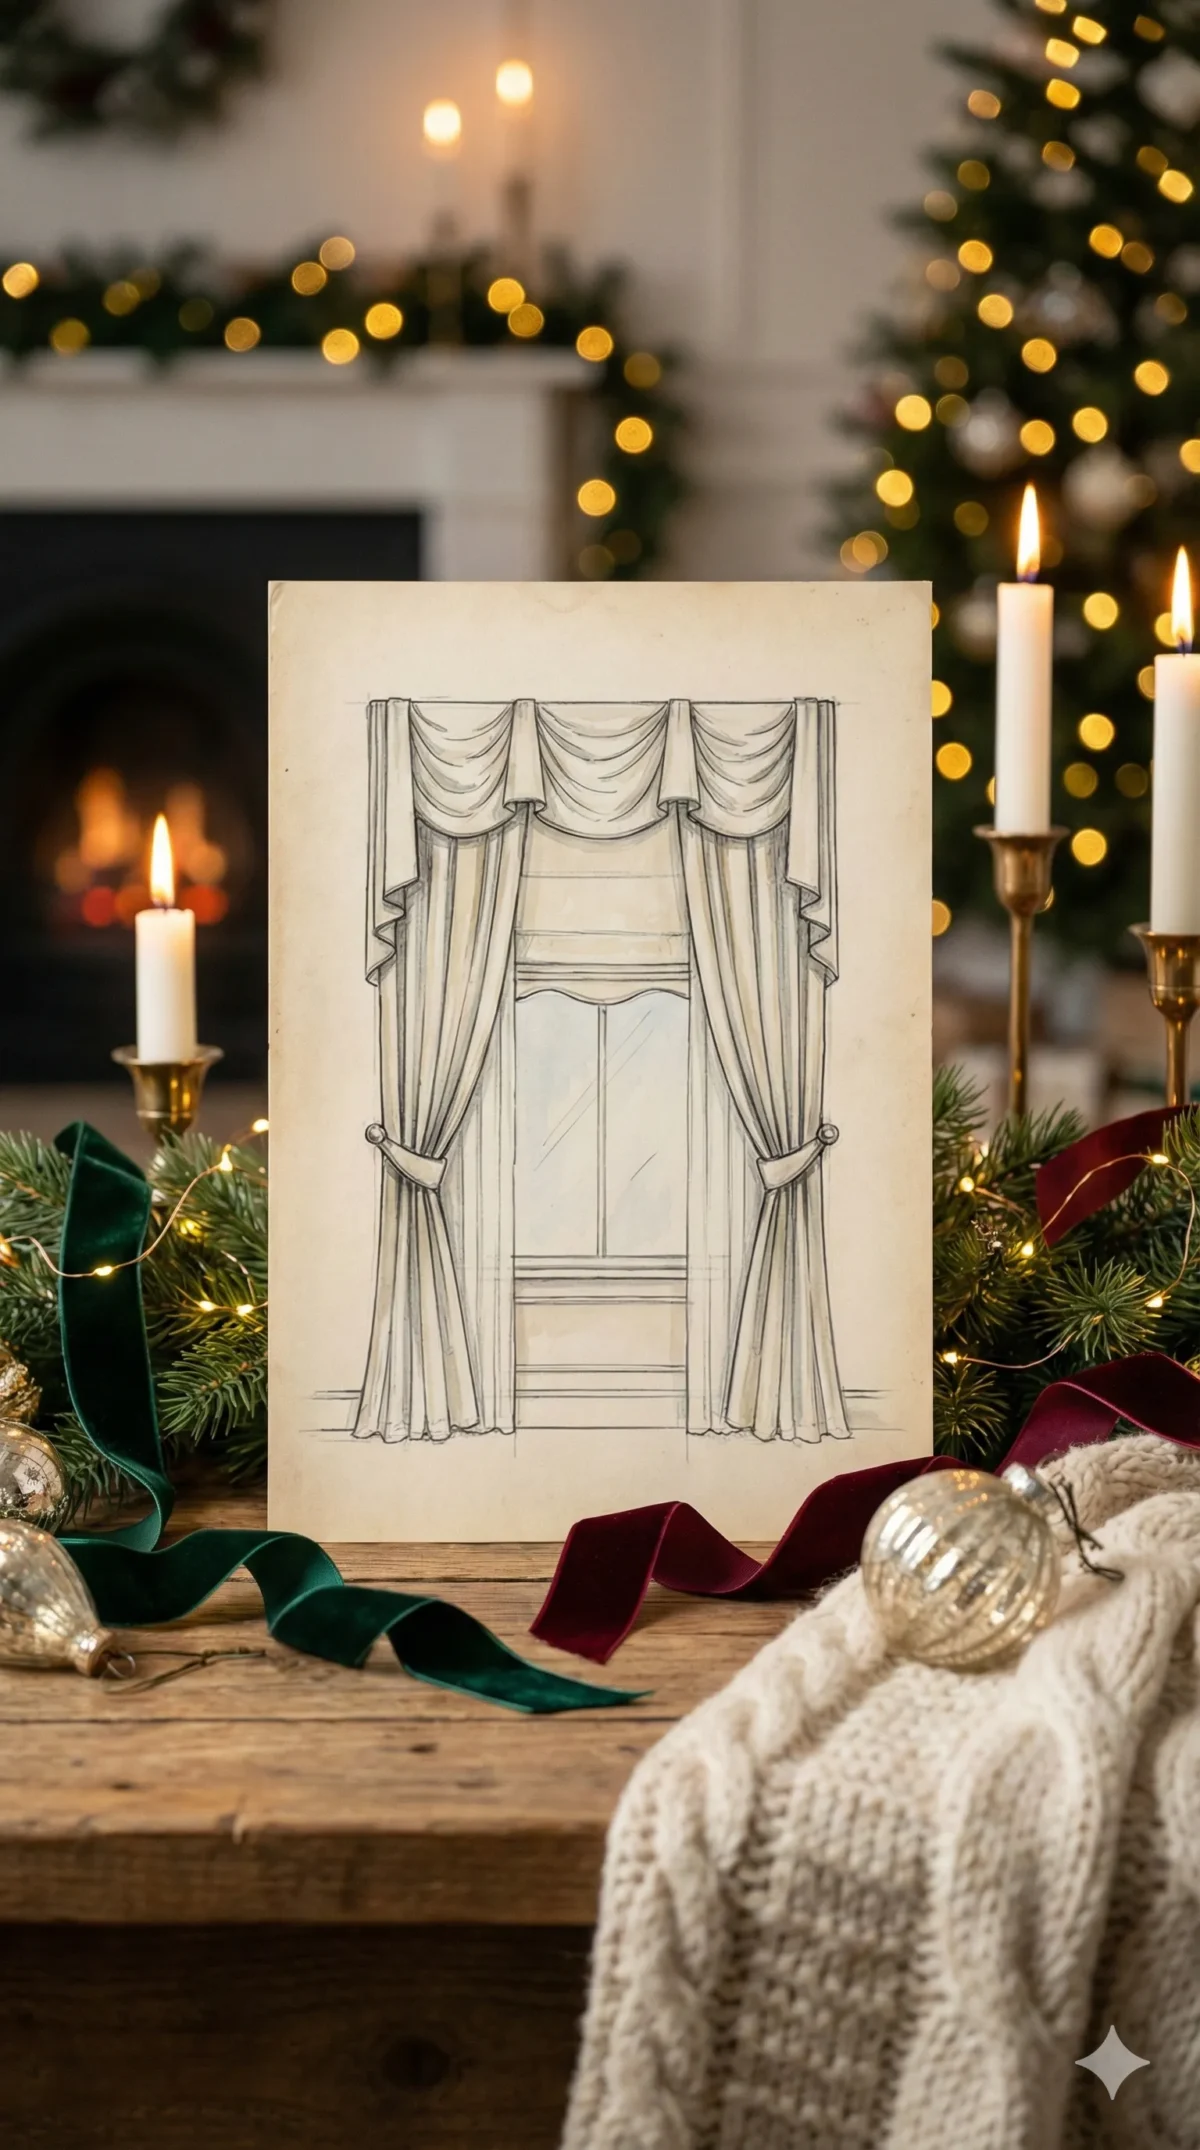
Window Treatment Design Sketches

Windows affect privacy, light, and style. Drawing different treatments helps you choose wisely.
Sketch your windows at actual size if possible. Show where the frame sits. Mark how far above the window you can mount a curtain rod (this makes ceilings look taller).
Draw floor-length curtains first. They should hover about half an inch above the floor. Show them both closed and open. Closed curtains should cover the entire window plus a few inches on each side. Open curtains can stack beyond the frame to let in maximum light.
Try drawing roman shades next. These fold up into neat pleats. Sketch them raised and lowered. They work great under curtains for a layered look.
Consider drawing shutters or blinds too. Show how much space they take when open. Make sure they don’t block the full window view when pushed aside.
Your drawing reveals if you need blackout fabric for bedrooms or light-filtering material for living spaces. It also shows if your chosen style fits the room’s overall vibe.
Fireplace Focal Point Layouts
Fireplaces are natural focal points. Drawing the area around them helps you enhance this feature.
Sketch your fireplace dead center on the page. Show the mantel height and width. Now add furniture facing it. Sofas and chairs should angle toward the fireplace to make it the room’s main attraction.
Draw what goes on the mantel. Try a large mirror or art piece centered above it. Add candles, vases, or small sculptures on the mantel shelf itself. Keep your drawing balanced (similar visual weight on both sides) or intentionally asymmetrical for modern style.
Consider the TV placement in relation to the fireplace. Some people mount the TV above the mantel. Draw this to see if it hangs too high for comfortable viewing. You might need to sketch the TV on a different wall instead.
Add built-in shelves or cabinets flanking the fireplace in your drawing. These create symmetry and provide storage. Sketch what goes on these shelves: books, photos, decorative objects.
Small Living Room Space Drawings
Small rooms need smart planning. Drawing helps you maximize every inch.
Start with multi-functional furniture sketches. Draw a storage ottoman that serves as both seating and a coffee table. Sketch a console table behind the sofa for extra surface space without taking floor area.
Try vertical thinking in your drawings. Show tall bookcases reaching the ceiling. Draw wall-mounted shelves at different heights. Sketch curtains hung from the ceiling to the floor. All these tricks make small rooms feel taller.
Draw furniture pulled away from walls. This sounds backwards, but floating furniture creates better flow in tight spaces. Sketch your sofa a few inches off the wall with a narrow table behind it.
Consider drawing built-in furniture. Sketch a bench seat with storage underneath along one wall. Draw corner shelving units that use dead space. Show how built-ins open up the room center.
Open Concept Living Space Drawings
Open floor plans need invisible boundaries. Drawing helps you create distinct areas without walls.
Sketch your entire open space first. Mark where the living room should be versus the dining area or kitchen. Use furniture to draw these lines.
Place your sofa with its back to the dining table. This creates a visual divider. Draw an area rug under the living room furniture but not extending into the dining zone. Different rugs define different spaces.
Add a console table behind the sofa in your sketch. This gives you a clear boundary and useful surface. You can also draw tall plants or a bookshelf in this spot to add height and separation.
Show how sightlines work. When someone sits on the sofa, what do they see? Your drawing should show pleasant views, not the kitchen mess or dining clutter. Arrange furniture to control these views.
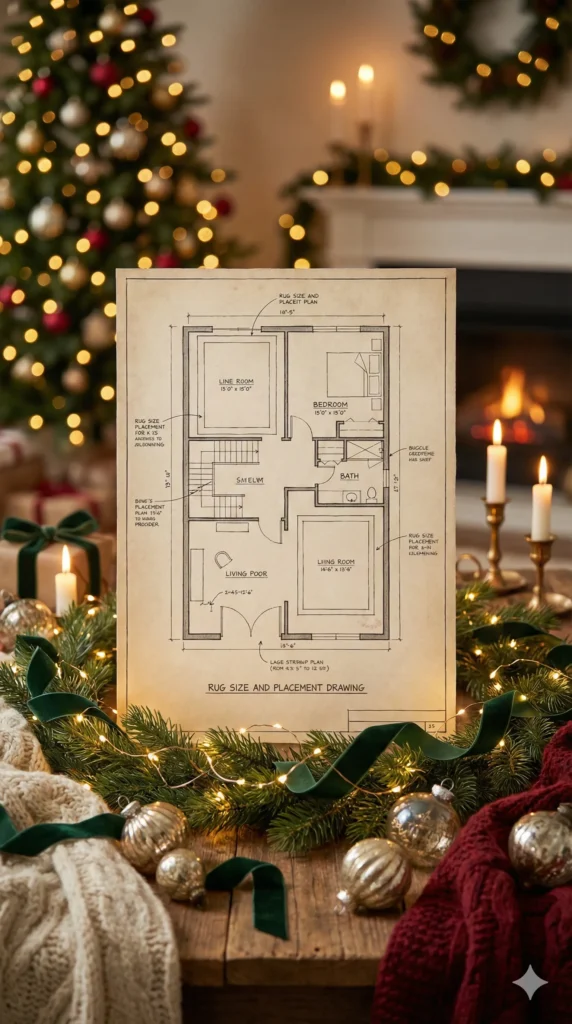
Rug Size and Placement Drawings
Wrong rug size ruins a room’s proportions. Drawing prevents this common mistake.
For living rooms, draw a rug where all furniture front legs sit on it. The back legs can be off or on. This size (usually eight by ten feet or nine by twelve feet) anchors the seating area.
Sketch an alternative: all furniture legs fully on the rug. This works in larger rooms. Draw at least 18 inches of rug showing beyond the furniture on all sides.
Try drawing a smaller rug too, just under the coffee table with all furniture off it. This only works in very specific modern or small spaces. Your drawing will show if it looks too tiny.
Mark the rug edges in your drawing. They should sit at least six inches from walls, preferably more. A rug touching the wall looks cramped.
Coffee Table Style and Size Sketches
Coffee tables need careful sizing. Too big and they dominate. Too small and they look lost.
Draw your seating first. Then add a coffee table that’s about two-thirds the length of your sofa. This proportion looks balanced.
Sketch different shapes. A rectangular table works for longer sofas. A round or oval table softens angular furniture. A square table fits sectionals well.
Show the height in a side-view sketch. Coffee tables should sit level with sofa cushions or slightly lower. Draw someone sitting on your sofa with their feet on the ground. Their knees should clear the table edge by a few inches.
Mark the space around the table in your drawing. You need 14 to 18 inches between the table edge and sofa for legroom. Your drawing shows if you have enough clearance.
Accent Chair Placement Ideas
Accent chairs add seating and style. Drawing shows where they work best.
Sketch a chair angled in a corner. This creates a cozy reading nook. Add a floor lamp beside it and a small side table. Your drawing shows if you have space for this setup.
Try drawing two accent chairs facing each other with a small table between them. This creates an intimate conversation spot separate from the main seating area.
Place an accent chair perpendicular to the sofa in your sketch. This forms an L-shape. The chair becomes part of the main seating while adding visual interest from its different angle.
Consider drawing an accent chair floating in an awkward space, like between two windows. Sometimes chairs fill odd gaps better than other furniture. Your drawing reveals these opportunities.
TV Wall Design Drawings
TV walls need balance. Drawing prevents the black screen from dominating your room.
Sketch your TV centered on the wall at eye level when seated. This usually means the center of the screen sits 42 inches from the floor. Draw a person sitting on your sofa to check this height.
Add a media console underneath in your drawing. It should be wider than the TV but proportional. A 65-inch TV looks good over a 60 to 72-inch console.
Draw the space around your TV. Try floating shelves on both sides. Sketch a gallery wall surrounding the screen. Show tall plants flanking the media console. These elements balance the TV’s visual weight.
Consider drawing the TV in a built-in cabinet with doors. You can close the doors when not watching. Or sketch a frame TV that displays art when off. Your drawing shows if these ideas suit your space.
Built-In Shelving Design Sketches
Built-ins add storage and character. Drawing the design prevents costly construction mistakes.
Sketch your wall from floor to ceiling. Mark where shelves should go. Lower shelves hold heavier items and things you use often. Higher shelves display lighter, decorative objects.
Draw different shelf heights. Not all shelves should be evenly spaced. Vary the gaps based on what you’ll store. Tall shelves fit large books or vases. Shorter shelves work for small frames or collectibles.
Show closed cabinets at the bottom in your drawing. These hide clutter. Add doors with simple hardware. Sketch open shelving above for displaying pretty things.
Consider drawing asymmetrical built-ins. Maybe shelves on one side of a fireplace and closed storage on the other. Your drawing shows if this imbalance works or looks odd.
Reading Nook Corner Drawings
Every living room needs a quiet corner. Drawing helps you create the perfect reading spot.
Sketch a comfortable chair in the corner. Add a floor lamp arching over from behind. The light should illuminate a book without glare.
Draw a small side table next to the chair for coffee, books, or reading glasses. It should be easy to reach without stretching.
Show a cozy throw blanket draped over the chair arm. Add a pillow or two for lumbar support. These small touches turn a chair into a true nook.
Consider drawing a bookshelf nearby within arm’s reach. Or sketch floating shelves on the wall behind the chair. Your reading material should be right there.
Plant Placement Planning Drawings
Plants bring life to living rooms. Drawing prevents overcrowding or bare spots.
Sketch large floor plants in empty corners or beside furniture. Draw a fiddle leaf fig next to the sofa or a bird of paradise behind a chair. Show their full size, including how wide their leaves spread.
Add medium plants on tables, shelves, and mantels in your drawing. These fill vertical spaces and add layers. Draw them at realistic heights so you can see if they block anything.
Show small plants on coffee tables, side tables, or windowsills. Group odd numbers (three or five) for visual appeal. Your drawing reveals if you’re clustering too many in one spot.
Mark light sources in your drawing. Place plants where they’ll get appropriate light. Sun-loving plants go near windows. Low-light plants can sit in corners or under shelves.
Throw Pillow Arrangement Sketches
Pillows add color, texture, and comfort. But too many look messy. Drawing shows the right amount.
For a standard sofa, sketch three to five pillows. Start with two matching pillows in the corners. Add one large pillow in the center. Fill gaps with one or two accent pillows.
Draw different sizes. Big pillows (22 to 24 inches) go in back. Medium pillows (18 to 20 inches) sit in front. Small lumbar pillows (12 by 20 inches) add variety.
Show pattern mixing in your drawing. Use one solid color, one pattern, and one textured pillow. This formula prevents chaos while keeping things interesting.
Try drawing pillows on accent chairs too. One or two per chair is plenty. Your drawing shows if you’ve gone overboard with pillows throughout the room.
Side Table and End Table Layouts
Side tables need smart placement. Drawing finds the perfect spots.
Sketch a side table next to every seat. People need somewhere to set drinks, phones, and remotes. The table height should match the sofa arm height or be slightly lower.
Draw c-shaped tables that slide under sofa arms. These work great when space is tight. Show how they tuck in neatly.
Try drawing nesting tables. Sketch two or three tables that stack together. You can pull them out when needed and tuck them away when not. Your drawing shows if you have space for this flexibility.
Consider drawing a console table behind the sofa. This adds surface space without using floor area. Sketch it at sofa height with lamps, books, or decor on top.
Wall Color Sample Drawings
Testing paint colors on paper saves you from repainting mistakes.
Draw large squares representing your walls. Color them with pencils, markers, or paint chips in your top color choices.
Show how each color looks with your furniture. Draw your sofa color next to each wall color option. Some combinations will immediately look wrong.
Sketch the room at different times of day. Morning light changes colors differently than evening light. Draw your space with warm yellow light (evening) and cool blue light (morning) to see how colors shift.
Add flooring color to your drawings. The floor color interacts with wall color. If they clash in your drawing, they’ll clash in real life.
Seasonal Decor Planning Sketches
Seasonal changes keep your living room fresh. Drawing helps you plan these updates without overdoing it.
Sketch your room as it is now. Then draw simple swaps for each season. For fall, show orange pillows and a basket of pumpkins. For winter, draw evergreen branches and cozy throws.
Keep the big furniture the same in all drawings. Only change small decor items. This shows how simple swaps create big impact without buying new couches.
Draw where seasonal items get stored when not displayed. Sketch bins under tables or in closets. Planning storage prevents seasonal clutter.
Your drawings reveal if you’re trying to change too much. If every season needs 20 new items, simplify. Focus on a few key changes that pack visual punch.
Focal Wall Feature Drawings
One special wall elevates the entire room. Drawing helps you choose and execute the right feature.
Sketch an accent wall in a bold color. Usually the wall behind the sofa or opposite the entry works best. Draw it and see if it looks dramatic or overwhelming.
Try drawing board and batten or picture frame molding. Show the vertical lines creating texture and interest. Mark measurements to see if the spacing looks right.
Consider sketching wallpaper on your focal wall. Draw the pattern repeat and see how busy it looks. Some patterns work great in small sketches but overwhelm real walls.
Draw floating shelves in an artistic arrangement. Stagger them at different heights and lengths. Your drawing shows if this looks intentional or messy.
Furniture Scale and Proportion Drawings
Big furniture in small rooms or tiny furniture in large rooms looks wrong. Drawing reveals proportion problems before you buy.
Sketch your room to scale. Then add furniture at the same scale. A sectional that looks perfect in the store might eat your entire room in the drawing.
Draw a person sitting on your furniture. This shows if the pieces fit human scale. Oversized chairs should still allow feet to touch the floor.
Show negative space in your drawings. The empty floor and wall space matters as much as the filled space. Too much furniture makes rooms feel cramped even if everything technically fits.
Try drawing the same room with different size furniture. Maybe a loveseat instead of a full sofa. Or armchairs instead of a sectional. Your drawing shows which scale suits the space better.
Final Thoughts
Drawing your living room ideas before decorating saves money, time, and frustration. These 24 sketching approaches help you plan everything from furniture layout to color schemes to final decor touches.
Start with basic room layouts and furniture placement. Get the big pieces right first. Then add layers: lighting, rugs, art, plants, and accessories. Each drawing reveals what works and what doesn’t in your specific space.
You don’t need artistic talent. Simple shapes and honest measurements create useful planning tools. Your rough sketches prevent expensive mistakes and help you create a living room you’ll love for years.
Grab paper and pencil today. Start drawing your ideal living room. You’ll see your space in a new way and make better decorating decisions.
