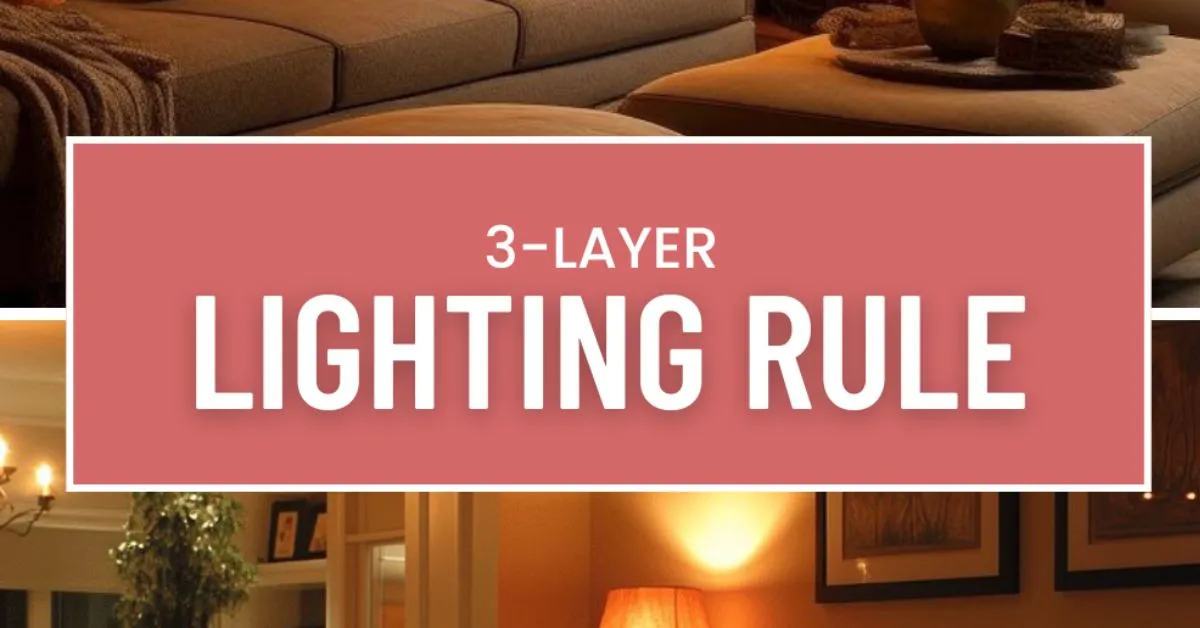
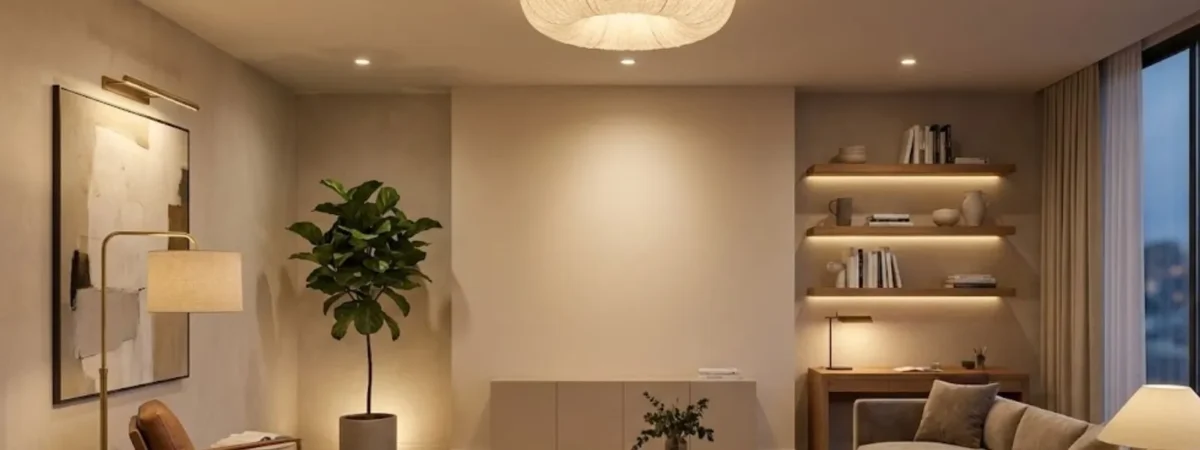
The “3-layer” lighting rule explains how to light a living room like a pro by combining ambient, task, and accent lighting. Ambient lighting provides overall illumination, task lighting supports activities like reading, and accent lighting highlights features or décor. Using all three layers creates balance, depth, and a comfortable, well-designed living space.
This article will walk you through each layer step by step. You’ll learn what each type of light does, where to put it, and how to mix them all together. By the end, you’ll know exactly how to light your living room like a professional designer without spending a fortune or hiring help.
What Is the 3-Layer Lighting Rule?

The 3-layer lighting rule is a design trick that uses three different kinds of light in one room. Think of it like building a sandwich. You need the bread on top and bottom, plus the good stuff in the middle. In lighting terms, you need ambient light as your base, task light for activities, and accent light to show off your favorite things.
Ambient lighting is your main light. It fills the whole room with a soft glow so you can see everything. Task lighting helps you do specific things like reading or working. Accent lighting adds drama and highlights art, plants, or special features. When you use all three together, your room feels complete and alive.
Most people only use one or two types of light. They might have a ceiling light and maybe a lamp. But that leaves the room feeling flat or boring. Adding all three layers makes a huge difference. Your space looks bigger, feels warmer, and gives you control over the mood.
Why Three Layers Matter
Using three layers gives you options. On a busy morning, you can turn on all the lights for energy. On a movie night, you can dim things down and use just accent lights for a cozy vibe. It’s like having different outfits for your room depending on what you’re doing.
Three layers also fix common problems. If your room feels too dark in corners, accent lights can brighten them. If overhead lights feel harsh, adding lamps softens the glow. You’re not stuck with one mood all the time.
Another reason designers love this rule is balance. Too much light from one source creates shadows or glare. Spreading light around the room from different heights and angles makes everything look even and natural. Your eyes don’t have to work as hard, and the space feels more relaxing.
Layer One: Ambient Lighting (Your Foundation)
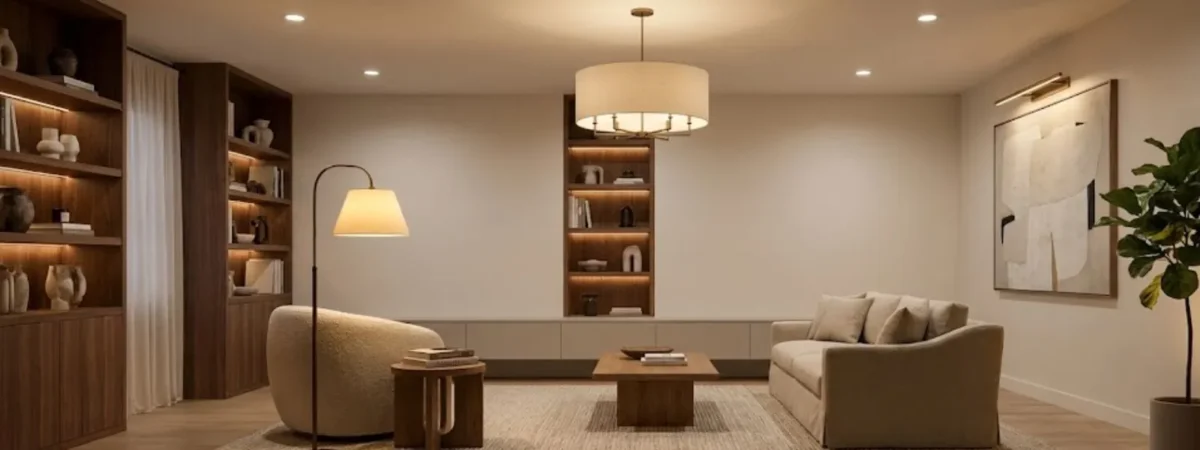
Ambient lighting is the backbone of your room. It’s the general light that fills the space from top to bottom. Think of it as the light you turn on when you first walk in the door. It needs to be bright enough to see clearly but not so bright that it hurts your eyes.
Most living rooms use a ceiling light as their ambient source. This could be a chandelier, flush mount fixture, recessed lights, or track lighting. The goal is to spread light evenly across the whole room without dark corners or super bright spots.
Choosing the Right Ambient Light
Recessed lights work great in modern homes. They’re small circles in the ceiling that give clean, even light. You usually need several of them spaced out to cover a big room. They don’t take up visual space, so your ceiling stays simple and sleek.
If you love a bit of style, go with a chandelier or pendant light. These hang down from the ceiling and act as a centerpiece while lighting the room. Pick one that matches your decor but also puts out enough light. Some fancy chandeliers look amazing but barely light up the space.
Track lighting is another solid choice. It’s a bar with multiple light heads you can aim in different directions. This gives you flexibility to point light where you need it most. It’s practical and works well in rooms with awkward layouts.
How Bright Should Ambient Light Be?
Your ambient light should create a comfortable base level. Not too dim, not too harsh. A good rule of thumb is to aim for about 20 lumens per square foot in a living room. So if your room is 200 square feet, you want around 4000 lumens total from your ambient lights.
That might sound complicated, but most bulbs list lumens on the package. A standard 60-watt LED bulb gives you about 800 lumens. So for that 200 square foot room, you’d need five of those bulbs spread across your ceiling fixtures.
Keep in mind that lighter walls reflect more light, so you might need less. Dark walls absorb light, so you might need more. Start with the basic calculation and adjust based on how your room feels.
Placement Tips for Ambient Light
Ceiling lights should be centered or evenly spaced. If you’re using recessed lights, don’t put them all in a straight line unless your room is narrow. Spread them out in a grid pattern so light reaches every corner.
For chandeliers or pendants, hang them high enough that tall people won’t bump their heads. Usually about 7 feet from the floor to the bottom of the fixture works well. If you have a coffee table, you can hang a pendant above it as a focal point.
Make sure your ambient lights are on a dimmer switch. This is a game changer. You can turn them up during the day or when you need to clean, then dim them down at night for a softer mood. Dimmers give you control without adding more fixtures.
Layer Two: Task Lighting (Lights for Doing Things)
Task lighting is all about helping you see when you’re doing something specific. Reading a book, working on a laptop, folding laundry, playing board games – these all need focused light so you’re not straining your eyes. Task lights are usually lamps or fixtures placed right where you need them.
The key with task lighting is aim. You want the light to shine on what you’re doing, not in your eyes or creating shadows. Think about where you sit and what you do there. That’s where your task light should go.
Types of Task Lights for Living Rooms
Floor lamps are the most popular task light. They stand next to your sofa or chair and shine down on your lap or the side table. Look for ones with adjustable heads or arms so you can point the light exactly where you need it.
Table lamps work great on end tables or console tables. They’re smaller than floor lamps but still give plenty of light for reading or close-up tasks. Pick ones with shades that direct light down and out, not up into your eyes.
Wall sconces are another smart option. These attach to the wall next to a chair or desk area. They save floor space and put light right at the perfect height for reading. Plus they look stylish and add to your decor.
Where to Place Task Lights
Put task lights next to anywhere you sit for long periods. If you have a reading chair, place a floor lamp or table lamp right beside it. The light should come from over your shoulder so it shines on your book or device without casting shadows.
For a sofa, you might want task lights on both ends if two people like to read at the same time. Or put one on the side where you sit most often. Don’t forget about desks or work areas in your living room. A good desk lamp makes a huge difference for paying bills or working from home.
Avoid putting task lights behind you. That creates shadows on whatever you’re looking at. The light should come from the side or slightly above, angled toward your activity.
Choosing the Right Brightness
Task lights should be brighter than your ambient lighting but still comfortable. You want enough light to see clearly without glare. For reading, aim for around 450 lumens, which is about a 40-watt equivalent LED bulb.
If you’re working on a computer, you might want slightly less light since screens glow on their own. Too much light around a screen creates glare and makes your eyes tired. Try a 25-30 watt equivalent bulb and see how it feels.
Always test your task lights before you commit. Sit in your normal spot with the light on and try reading or doing your usual activity. If you’re squinting or getting a headache, the light is probably too bright or aimed wrong. Adjust until it feels natural.
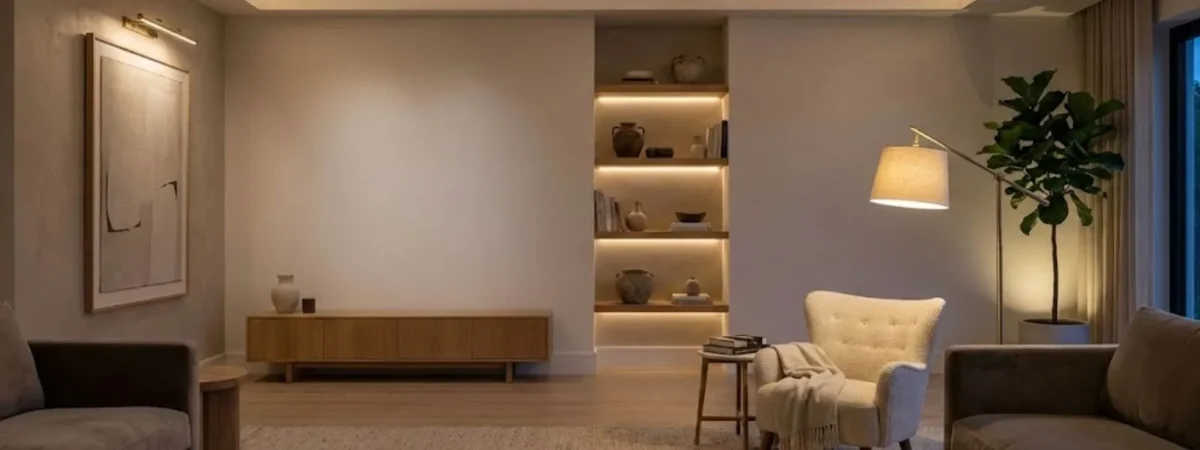
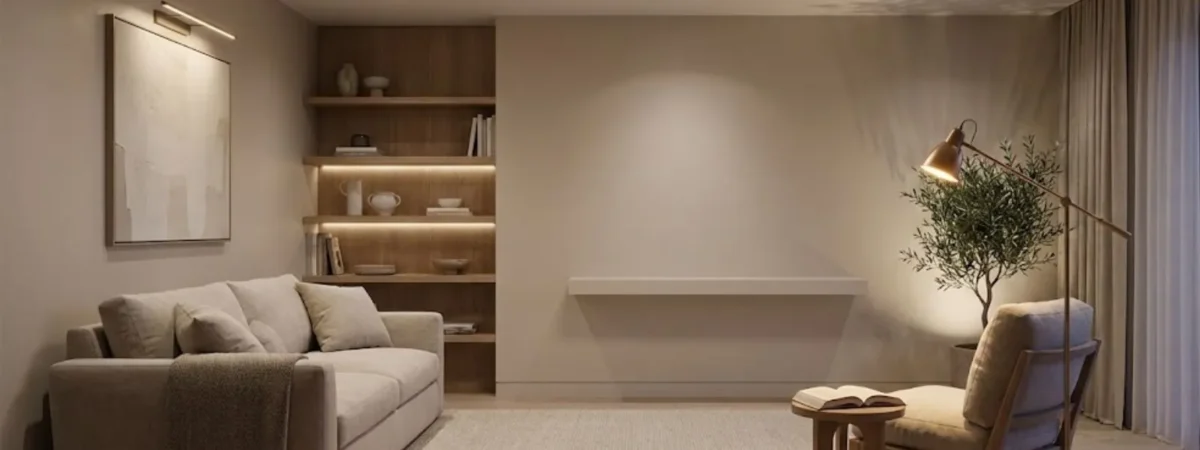
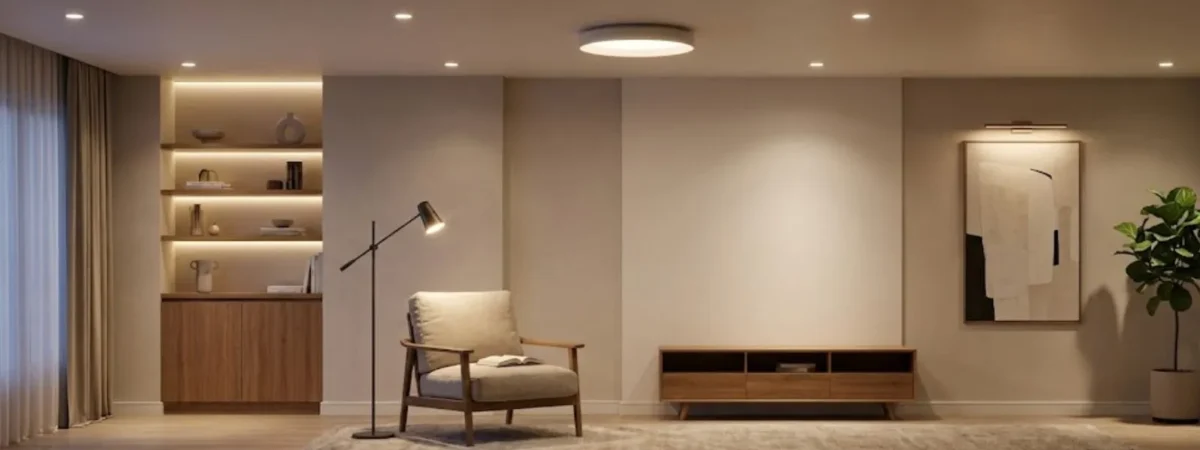
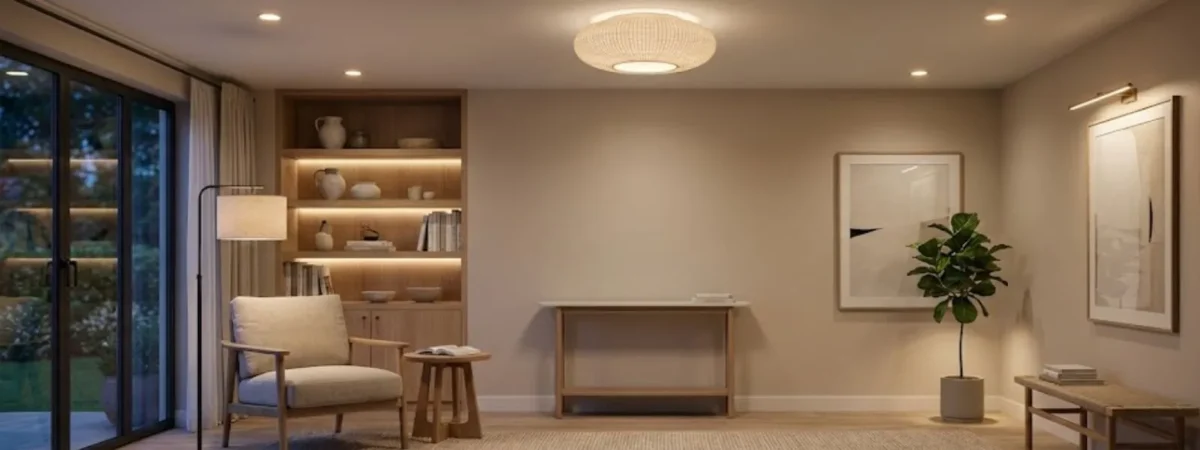
Layer Three: Accent Lighting (The Style Layer)

Accent lighting is where the magic happens. This is the layer that makes your room feel special and polished. Accent lights highlight things you want people to notice – artwork, plants, architectural features, or collections. They create depth and draw the eye around the room.
Unlike ambient and task lighting, accent lights don’t need to be bright. In fact, they work best when they’re subtle. You want them to create interest and shadow, not blast everything with light. Think of them as the jewelry of your lighting design.
What Accent Lights Can Do
Accent lights can make a small room feel bigger by highlighting vertical features like tall bookshelves or curtains. They can make art pop by shining a focused beam on a painting or photo. They can create cozy pockets of light in dark corners that would otherwise feel empty.
One of the coolest tricks with accent lighting is uplighting. This means putting a light on the floor or low shelf and aiming it up at the ceiling or a tall plant. It creates dramatic shadows and makes the ceiling feel higher. It’s a designer move that costs almost nothing but looks expensive.
You can also use accent lights to show off texture. Shining light across a brick wall, wood paneling, or textured fabric brings out details you wouldn’t see otherwise. It adds personality and makes your space feel custom and thoughtful.
Types of Accent Lights
Picture lights are small fixtures that mount above artwork or mirrors. They shine down directly on the piece and make it the star of the wall. These are perfect if you have one special painting or photo you love.
Track lighting can work as accent lighting too. Point the heads at specific features instead of using them to light the whole room. This gives you flexibility to change what you highlight without moving fixtures.
LED strip lights are a modern favorite. You can stick these thin strips under shelves, behind furniture, or along the edges of built-ins. They create a soft glow that feels futuristic and clean. Plus they use very little energy and last forever.
Placement Ideas for Accent Lights
Look around your room for things worth highlighting. Do you have a big plant in the corner? Put a small uplight behind it. Do you have floating shelves? Add LED strips underneath to make your decor glow. Do you have a fireplace or alcove? Add a sconce on each side to frame it.
Don’t try to accent everything. Pick three to five features max. Too many accent lights compete with each other and the effect gets lost. Choose your favorites and let them shine. The rest of the room can stay simpler.
Remember that accent lights work best when your ambient lights are dimmed down. During the day with all the lights on, accents won’t stand out. But in the evening when you lower the main lights, your accent lights become the stars of the show.
How to Combine All Three Layers
Now that you understand each layer separately, let’s talk about using them together. The secret is flexibility. You don’t turn on all your lights at once all the time. You mix and match based on what you’re doing and what mood you want.
Start by mapping out your room. Draw a simple sketch with your furniture. Mark where your ambient lights are on the ceiling. Add your task lights next to seating areas. Then add accent lights near features you want to highlight. This helps you see if you have good coverage or if you’re missing spots.
Creating Different Moods
For daytime or cleaning, turn on all three layers at full brightness. Your ambient lights flood the room with general light. Task lights help you see details. Accent lights add a finished look even during the day.
For evening relaxation, dim your ambient lights to about half. Turn on task lights where people are sitting. Let your accent lights do most of the work creating atmosphere. This combination feels cozy but still functional.
For movie night or entertaining, turn ambient lights way down or off. Use only accent lights and maybe one or two soft task lights. This creates drama and makes the space feel intimate. Your room transforms from functional to special.
Balancing the Layers
No single light should overpower the others. If your ambient light is too bright, it washes out your accent lights and makes task lights feel pointless. If your task lights are too bright, they create harsh spots that feel unbalanced. If you have too many accent lights, the room feels busy and chaotic.
Aim for a ratio where your ambient lighting provides about 50 percent of your total light. Task lighting provides about 30 percent in the areas where you need it. Accent lighting provides the remaining 20 percent to add interest. This isn’t a perfect science, but it’s a good starting point.
Use dimmers on everything possible. This gives you total control. Some nights you might want more ambient light and less accent light. Other nights you flip it. Dimmers let you adjust on the fly without buying new fixtures or bulbs.
Choosing the Right Bulbs and Color Temperature
The bulbs you pick matter just as much as the fixtures. Two things to think about are brightness (measured in lumens) and color temperature (measured in Kelvin). Get these wrong and your beautiful lighting plan won’t feel right.
Color temperature affects the mood of your room more than anything else. Warm light (2700K to 3000K) feels cozy and relaxing. It’s yellowish like a candle or sunset. Cool light (4000K to 5000K) feels energizing and clean. It’s whiter like midday sun. Neutral light (3500K) falls in between.
What Color Temperature to Use Where
For ambient lighting in a living room, warm white works best. It makes the space feel inviting and comfortable. Most people prefer 2700K to 3000K for their main ceiling lights. This creates a homey base layer that doesn’t feel too cold or too yellow.
Task lights can be slightly cooler if you want better focus. A 3000K to 3500K bulb in a reading lamp gives you enough clarity to see details without feeling harsh. Some people like their task lights to match their ambient lights for consistency. Both approaches work.
Accent lights usually match your ambient temperature. If your room is warm white overall, use warm white accents. Mixing temperatures can look cool and modern, but it’s trickier to pull off. Start with matching and experiment later once you’re comfortable.
LED vs Other Bulb Types
LED bulbs are the best choice for all three layers. They use way less energy than old incandescent bulbs, last for years, and come in every brightness and color you need. They also don’t heat up much, which is safer and more comfortable.
The only downside to LEDs is cost upfront. They’re more expensive to buy than traditional bulbs. But they pay for themselves in energy savings within a year or two. Plus you won’t be climbing ladders to replace burned out bulbs all the time.
Make sure your LED bulbs are dimmable if you plan to use dimmer switches. Not all LEDs dim smoothly. Check the package before you buy. A non-dimmable bulb on a dimmer will flicker or just turn off instead of getting softer.
Common Lighting Mistakes to Avoid
Even with a good plan, it’s easy to make mistakes that mess up your lighting. Here are the biggest problems people run into and how to fix them.
Relying only on overhead lights is mistake number one. A single ceiling fixture tries to do everything and ends up doing nothing well. It creates harsh shadows, feels flat, and doesn’t give you any control. Always add at least a couple lamps to break up the light.
Not Using Dimmers
Skipping dimmers is a huge missed opportunity. Dimmers cost very little to install but give you endless flexibility. Without them, you’re stuck with one brightness level all the time. That’s like wearing the same outfit every day no matter what you’re doing.
Some people worry that dimmers are complicated or expensive. But basic dimmer switches are cheap and easy to install if you’re handy. Or hire an electrician for an hour. It’s worth it.
Ignoring the Height of Your Lights
Placing all your lights at the same height makes your room feel flat. You want light coming from different levels – ceiling, eye level, and floor level. This creates depth and makes the space more interesting.
If all your lights are on the ceiling, add some table or floor lamps. If all your lights are lamps, make sure your ceiling fixture is working. Mix high, medium, and low light sources for the best effect.
Buying the Wrong Size Fixtures
A tiny lamp in a huge room disappears. A giant chandelier in a small room feels overwhelming. Scale matters. Your ambient fixture should be big enough to light the whole space. Your task lamps should be substantial enough to actually help you see.
A good rule for chandeliers is to add the length and width of your room in feet, then convert that number to inches. That’s a good diameter for your fixture. So a 12 foot by 14 foot room works with a 26 inch wide chandelier.
Budget-Friendly Ways to Layer Your Lighting
You don’t need to spend thousands of dollars to light your living room like a pro. There are smart, cheap ways to add all three layers without breaking the bank.
Start with what you have. Look at your current lights and figure out which layer they fit into. Your ceiling light is probably ambient. Any lamps you own are likely task lights. Once you know what you have, you can see what’s missing.
Affordable Ambient Light Options
If you don’t have a good ambient source, start there. A simple flush mount ceiling fixture costs as little as 30 dollars and provides solid general light. You can install it yourself if you’re comfortable with basic wiring, or hire someone for around 100 dollars.
LED recessed lighting kits are another affordable option. Some kits let you retrofit old recessed cans with new LED units that just screw in like a bulb. These cost about 15 dollars per light and instantly modernize your space.
Cheap Task Lighting Ideas
Thrift stores and discount retailers have tons of floor and table lamps for under 20 dollars. You don’t need fancy designer lamps to get good task lighting. Focus on function first, style second. A simple lamp with a bendable neck works better than a gorgeous lamp that doesn’t light your book.
Clip-on lamps are ridiculously cheap and versatile. You can clip them to shelves, the back of your sofa, or a side table. They provide focused light exactly where you need it for less than 15 dollars. They’re perfect for renters who can’t install permanent fixtures.
Adding Accent Lights on a Budget
LED strip lights are the cheapest accent lighting you can buy. A 16 foot roll with a remote control costs about 15 to 20 dollars online. Stick them under shelves, behind your TV, or along the top of cabinets. They plug into a regular outlet and create instant ambiance.
Small plug-in puck lights work great too. These are round LED lights you stick to walls or shelves with adhesive. They cost around 3 to 5 dollars each and run on batteries or plug-in adapters. Use them to uplight plants or highlight artwork without any installation.
Shopping Smart for Fixtures and Bulbs
Wait for sales at home improvement stores. They often discount lighting fixtures by 30 to 50 percent during seasonal sales. Sign up for email lists to catch the deals.
Buy LED bulbs in multipacks. A six pack usually costs less per bulb than buying singles. Since LEDs last for years, you’ll eventually use them all anyway. Stock up when they’re on sale.
Check online marketplaces for secondhand fixtures. People renovate their homes and sell perfectly good lights for a fraction of retail price. You can find high-end fixtures for bargain prices if you’re patient.
Smart Lighting Technology and the 3-Layer Rule
Smart bulbs and switches have changed home lighting completely. You can now control all three layers from your phone or voice assistant. This makes the 3-layer rule even easier and more effective.
Smart bulbs connect to your WiFi and let you adjust brightness and color from an app. You can create scenes that turn on specific combinations of lights with one tap. For example, a “movie night” scene could dim your ambient lights, turn off task lights, and bring up accent lights automatically.
Do You Need Smart Lighting?
Smart lighting is convenient but not necessary. The 3-layer rule works perfectly fine with regular bulbs and switches. But if you love technology or want maximum control, smart lights are worth considering.
The benefits are pretty cool. You can schedule lights to turn on before you get home. You can adjust everything without getting off the couch. You can change colors for parties or holidays. And you can save energy by making sure lights turn off when not needed.
The downside is cost and complexity. Smart bulbs cost 10 to 15 dollars each versus 2 to 3 dollars for regular LEDs. You might need a hub device to connect everything. And if your internet goes out, some systems don’t work well.
Best Smart Lighting for Layered Lighting
If you want to try smart lighting, start small. Get a couple smart bulbs for your most-used lamps. See if you like the experience before committing to your whole house. Most major brands work with both Alexa and Google Assistant, so pick based on price and reviews.
Smart dimmer switches are another option. These replace your regular wall switches and control any bulbs in that fixture. They cost more upfront but work with cheaper regular bulbs. This is a good middle ground between full smart bulbs and traditional lighting.
For accent lighting, smart LED strips are amazing. You can change colors, set them to music, or create custom patterns. They’re fun and functional, perfect for making your accent layer more dynamic.
Final Thoughts
Lighting your living room like a pro isn’t complicated once you understand the 3-layer rule. Start with solid ambient lighting to fill your space with general light. Add task lighting next to places where you read, work, or do activities. Then sprinkle in accent lighting to highlight your favorite features and create mood.
The magic happens when you use all three layers together. You get a room that’s bright when you need it, cozy when you want it, and always feels balanced and inviting. You’re not stuck with one level of light all the time. You have control over the atmosphere and functionality.
Take it one step at a time. You don’t need to buy everything at once. Start by identifying what layer you’re missing most, then add that first. Maybe you need better ambient light overhead. Maybe you need a reading lamp. Maybe you need some subtle accent lights to make the room feel finished.
Remember that lighting changes everything about how a room feels. Good lighting makes colors look better, makes spaces feel bigger, and makes people feel more comfortable. It’s one of the most important design elements you can control, and it doesn’t require a huge budget or professional help.
Use dimmers whenever possible. Choose warm white bulbs for a cozy feel. Mix different heights of light sources. Avoid relying on just one fixture. And most importantly, pay attention to how your lighting makes you feel. If something doesn’t work, change it until it does.
Now you have all the knowledge you need to transform your living room lighting. Start planning your three layers, pick a few affordable fixtures, and watch your space come alive. You’ll wonder why you waited so long to fix your lighting. Your living room is about to feel like a completely different place.
