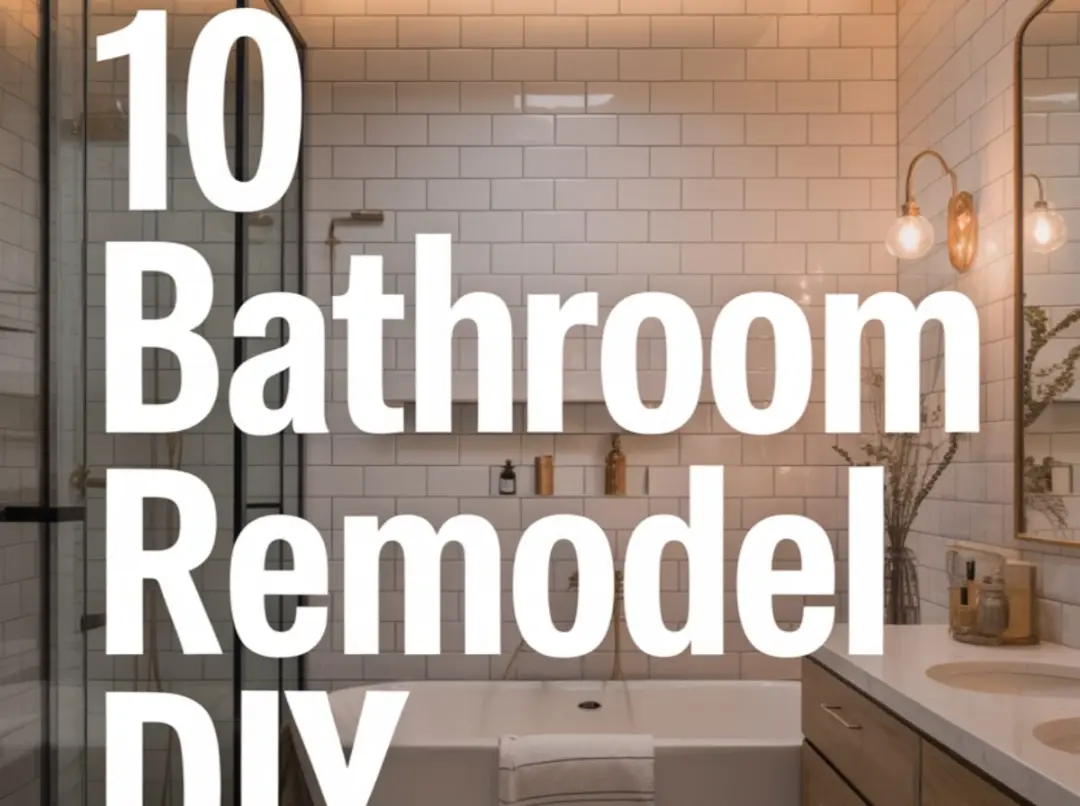
Yes, you can give your bathroom a fresh new look without spending a fortune or hiring pros. A DIY bathroom remodel saves you 30% to 50% on overall costs, according to industry experts. Labor fees make up 20% to 40% of professional installation costs, which you can save by doing the work yourself.
This guide walks you through 10 simple bathroom remodel DIY projects. Each one is easy enough for beginners. You’ll learn how to update your space, boost your home’s value, and feel proud of what you built. A mid-range bathroom remodel offers around 74% to 80% ROI when you sell your home, making it one of the smartest home improvements you can make. Let’s get started!
Paint Your Bathroom Walls for an Instant Refresh
Fresh paint on walls, ceilings, or even the cabinets can completely revive your bathroom’s look. This is the easiest and cheapest way to transform any space. A gallon of quality bathroom paint costs between $30 and $60, and one gallon covers most small to medium bathrooms.
Choose the Right Paint
Bathrooms have lots of moisture from showers and baths. You need paint that can handle this. Look for paints labeled “bathroom paint” or those with mold and mildew resistance. Semi-gloss or satin finishes work best because they wipe clean easily and resist moisture better than flat paints.
How to Get a Smooth Finish
Start by cleaning your walls with a damp cloth. Remove any dust, soap scum, or grime. Fill small holes with spackle and sand smooth once dry. Use painter’s tape to protect your ceiling, trim, and fixtures. Apply primer first if you’re covering a dark color or painting over bare drywall. Then roll on two thin coats of paint, letting each coat dry fully between applications.
Stick to neutral or white tones if you plan to sell your home soon. These colors appeal to more buyers and make small bathrooms feel bigger. If you want something bold, consider painting just one accent wall in a deeper shade.
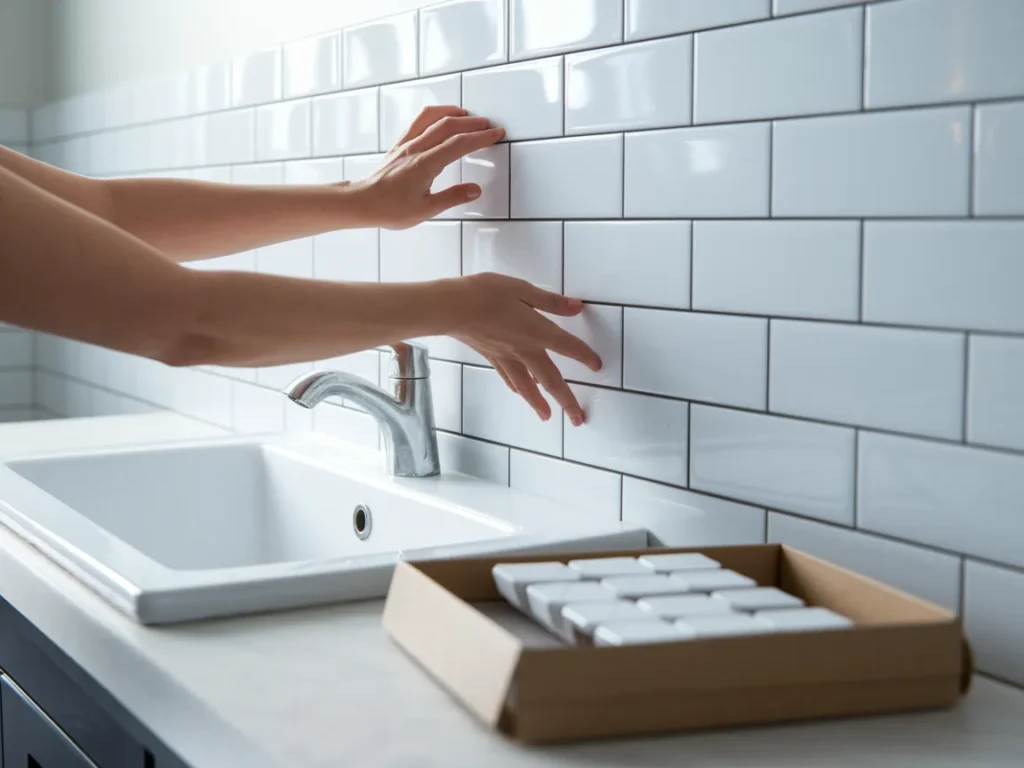
Install Peel-and-Stick Tiles for Quick Style
Peel-and-stick tiles let you transform a plain wall or backsplash without the mess of traditional tile and grout. These self-adhesive tiles are renter-friendly, budget-conscious, and surprisingly easy for beginners.
Where to Use Them
Focus on small areas like the backsplash behind your sink or a single accent wall instead of tiling the whole bathroom. You can find peel-and-stick tiles that look like subway tile, mosaic tile, natural stone, and more. They come in vinyl, glass, and even metal options.
Installation Tips That Work
Surface prep is everything. Your wall needs to be clean, level, smooth, and nonporous for tiles to stick properly. Repair any damage first. Add spackle to raise low spots and sand down high spots. Clean away all dirt, dust, and grease.
Start in the center of the room for symmetry rather than hugging one crooked wall. Lay out the tiles without removing the backing first to see how they align with walls and fixtures. Then peel and stick each tile, pressing firmly from the center outward to avoid air bubbles. Use a rolling pin or heavy paint roller to set each piece firmly.
For bathroom floors, caulk the edges of the tile around splash zones. This keeps water from sneaking beneath tiles and helps your upgrade last for years, not months.
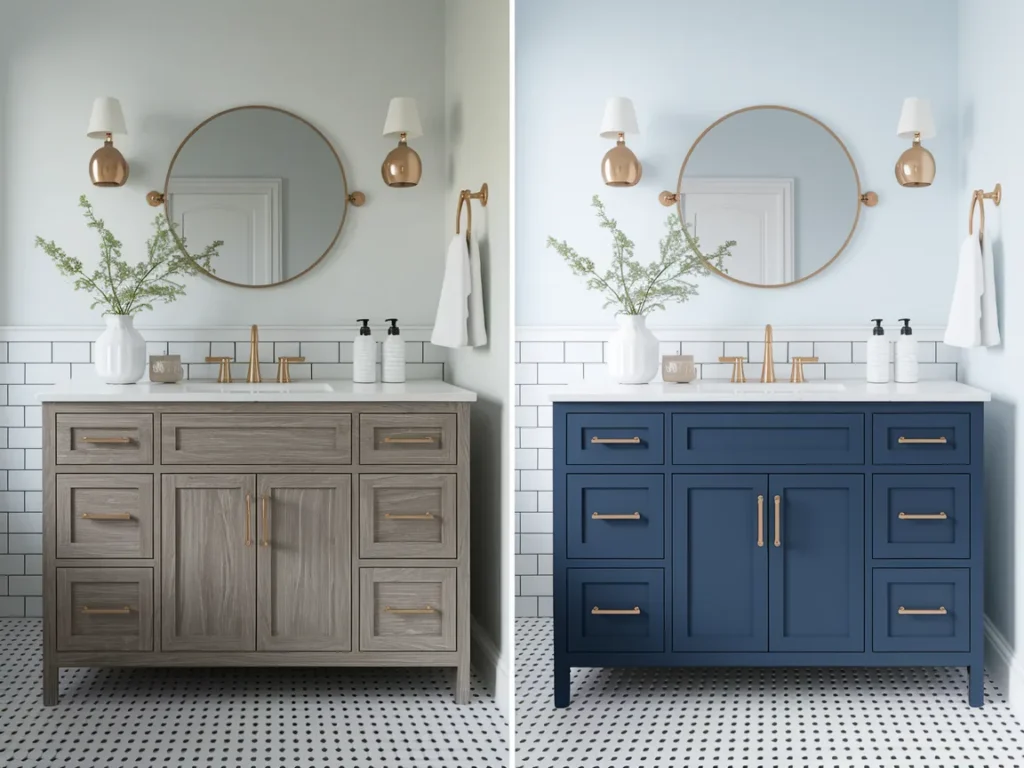
Paint Your Bathroom Vanity Cabinet
Painting your vanity is a simple and practical way to transform your bathroom without replacing expensive cabinetry. With only a quart of paint and the right tools, you can make your vanity look brand new.
Supplies You Need
Gather these items before you start: degreaser, fine-grit sandpaper (220-grit), medium-grit sandpaper (120 to 150-grit), bonding primer, cabinet paint, paintbrushes (2½-inch and 1½-inch angle-sash brushes), small foam roller, painter’s tape, and drop cloths.
Step-by-Step Process
Remove all doors, drawers, and hardware. Label everything so you know where it goes back. Take photos to help you remember.
Clean all surfaces with a degreaser to remove soap, hairspray, lotion, and grime. Rinse twice with fresh water and let everything dry completely.
Sand the doors, drawers, and cabinet frame with medium-grit sandpaper to remove the old finish. Then switch to fine-grit sandpaper for a light second sanding. Always sand with the grain of the wood.
Vacuum the sanding dust and wipe down everything with a damp microfiber cloth. Apply a coat of bonding primer and let it dry. Sand lightly again with fine-grit sandpaper.
Apply two thin coats of cabinet paint, letting each coat dry fully. Lay doors and drawers flat to avoid drips. Once dry, reattach hardware and reinstall doors and drawers.
Consider swapping out old hardware for new knobs and pulls. This small upgrade adds a custom look for just $20 to $50.
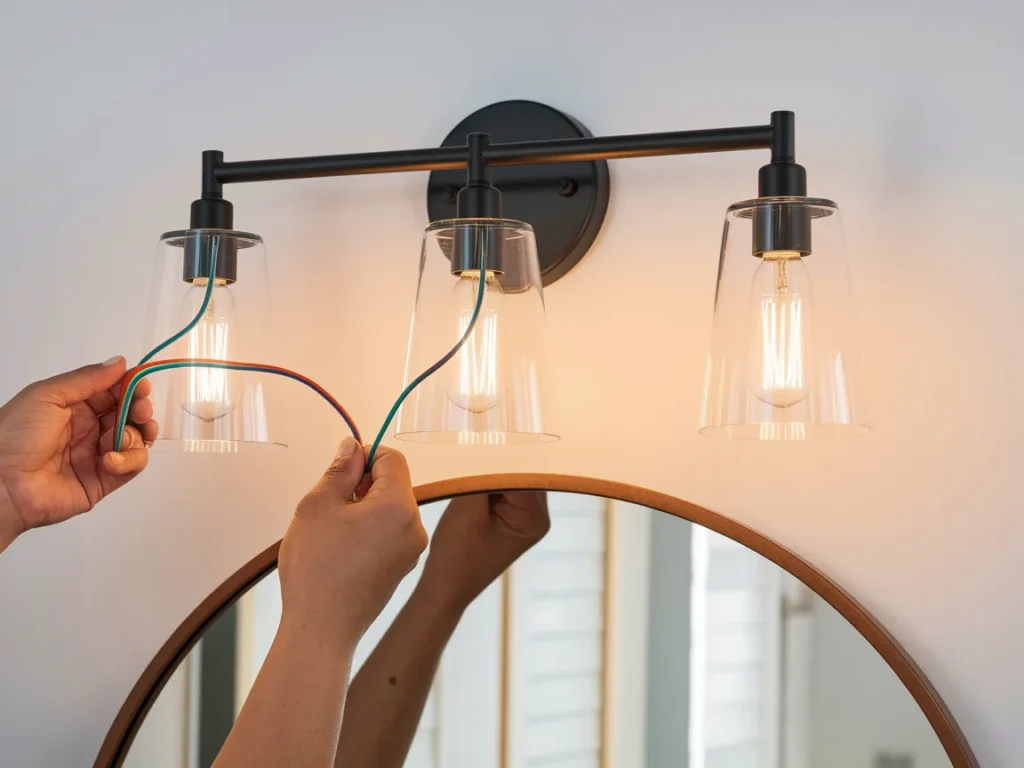
Update Your Bathroom Light Fixtures
New lighting can give an old room a fresh look. This project takes about an hour and costs between $50 and $300 depending on the fixture you choose.
Safety First
Always turn off the power at the circuit breaker before starting. Use a voltage tester to make sure there’s no live current. This tool costs just a few dollars and adds an extra layer of safety.
How to Swap Out a Fixture
Remove the bulbs from the old fixture. Unscrew the cover or canopy and gently pull it away to reveal the wiring. Disconnect the wires by unscrewing the wire nuts. Note which wires connect where: white to white, black to black, and the bare copper or green wire to the grounding screw.
Remove the old mounting bracket if your new fixture needs a different one. Install the new mounting plate per the manufacturer’s instructions. Connect the wires: white to white, black to black, with wire nuts. Connect the ground wire to the grounding nut.
Tuck the wires into the electrical box and secure the new canopy plate. Add bulbs, turn the power back on, and enjoy your new light.
For an even easier upgrade, simply swap out old light shades for new ones. Replace frosted shades with clear seeded glass for a modern touch. This costs under $30 and takes just minutes.
Frame Your Builder-Grade Mirror
Adding a frame to your bathroom mirror is one of the easiest upgrades you can make. This project costs under $30 and completely changes how your bathroom looks and feels.
Choose Your Materials
You can use MDF boards, wood trim, or even inexpensive fence boards. Primed MDF works great if you plan to paint the frame. For a rustic look, use reclaimed wood or fence boards that you can stain.
Simple Framing Method
Measure your mirror’s width and height. Add the width of your chosen boards to these measurements. Cut the boards to size. If you want mitered corners, cut 45-degree angles on each end. For a simpler look, you can overlap the boards at the corners.
Paint or stain your boards before attaching them. Use construction adhesive that works on glass and wood. Apply two thin beads of adhesive along the outer edges of the back of each board, staying at least 1 inch from the inside edge. This prevents adhesive from showing in the mirror’s reflection.
Press the frame pieces onto the mirror and hold for a minute. Use painter’s tape to hold them in place while the adhesive cures for 24 hours. Caulk any gaps at the corners and touch up paint if needed.
You can also use stick-on mirror frame kits that require no tools at all. These cost around $60 and install in under 30 minutes.

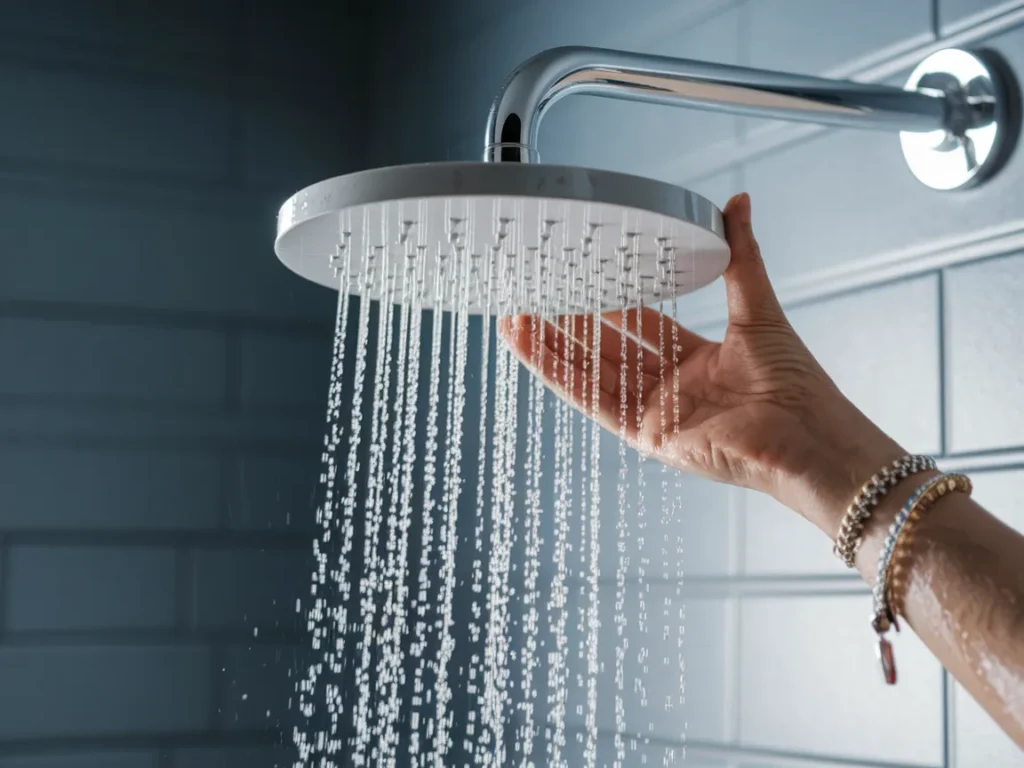
Replace Your Showerhead in Minutes
Changing your showerhead is a simple task that takes less than 15 minutes. You don’t need any plumbing experience. A new showerhead can improve water pressure, fix leaks, and give your shower a spa-like feel.
Tools Needed
All you need is a pair of pliers or an adjustable wrench, Teflon tape, and a clean cloth.
How to Do It
Remove the old showerhead by turning it counterclockwise. Wrap a cloth around the connection first to protect the finish. If it’s stuck tight, use pliers to get it started.
Clean the threads on the shower arm to remove old tape and buildup. Wrap fresh Teflon tape clockwise around the threads, overlapping slightly. This creates a watertight seal.
Screw the new showerhead on by hand, turning clockwise. The threads should engage smoothly. Tighten by hand until snug, then give it a quarter turn more with the cloth-covered pliers.
Turn on the water and check for leaks. If you see dripping at the connection, tighten slightly more or add another wrap of Teflon tape.
Dual showerheads and hand-held combos install the same way. They add flexibility and a luxury feel for under $100.
Add New Bathroom Hardware and Accessories
Replacing soap dispensers, toothbrush holders, towel bars, and cabinet hardware pulls your whole look together. This is one of the fastest ways to modernize your bathroom.
Coordinate Your Finishes
Choose a metal finish and stick with it throughout the room. Popular options include brushed nickel, matte black, chrome, and brushed gold. Matching your faucet finish creates a cohesive designer look.
Installation Is Simple
Most towel bars and hooks use wall anchors. Hold the mounting bracket where you want it and mark the holes with a pencil. Drill pilot holes, insert wall anchors if you’re not hitting a stud, and screw in the bracket. Snap or slide the bar into place.
Cabinet hardware is even easier. If your new knobs or pulls use different hole spacing than the old ones, fill the old holes with wood filler. Sand smooth, touch up paint, and drill new holes using a cabinet hardware jig for perfect placement.
Decorating with towels is a great way to add pattern, color, and texture. Choose fluffy, matching towels in an accent color that pops against your wall color.
Refinish Your Bathtub Instead of Replacing It
A bathtub refinishing kit costs $30 to $200 and is much simpler than removing and replacing the whole tub. This saves thousands compared to a new tub installation.
When This Works Best
Refinishing works great on tubs that are structurally sound but look worn, stained, or dated. It’s perfect for changing the color of an old avocado green or harvest gold tub to fresh white.
Refinishing Steps
Clean your tub thoroughly with an abrasive cleaner and scrub pad. Remove all soap scum, mineral deposits, and grime. Rinse and let dry completely.
Sand the entire surface with wet-dry sandpaper to help the new coating stick. Wipe away all dust.
Apply the bonding agent from your kit according to directions. Then brush or roll on the refinishing paint in thin, even coats. Most kits require two to three coats with drying time between each.
Let the tub cure for 24 to 48 hours before using. Avoid abrasive cleaners on your refinished tub to keep it looking new.
For a quicker option, add a DIY frame around your bathtub. Basic lumber and waterproof paint can build a beautiful enclosure that hides dated tile or worn tub edges.

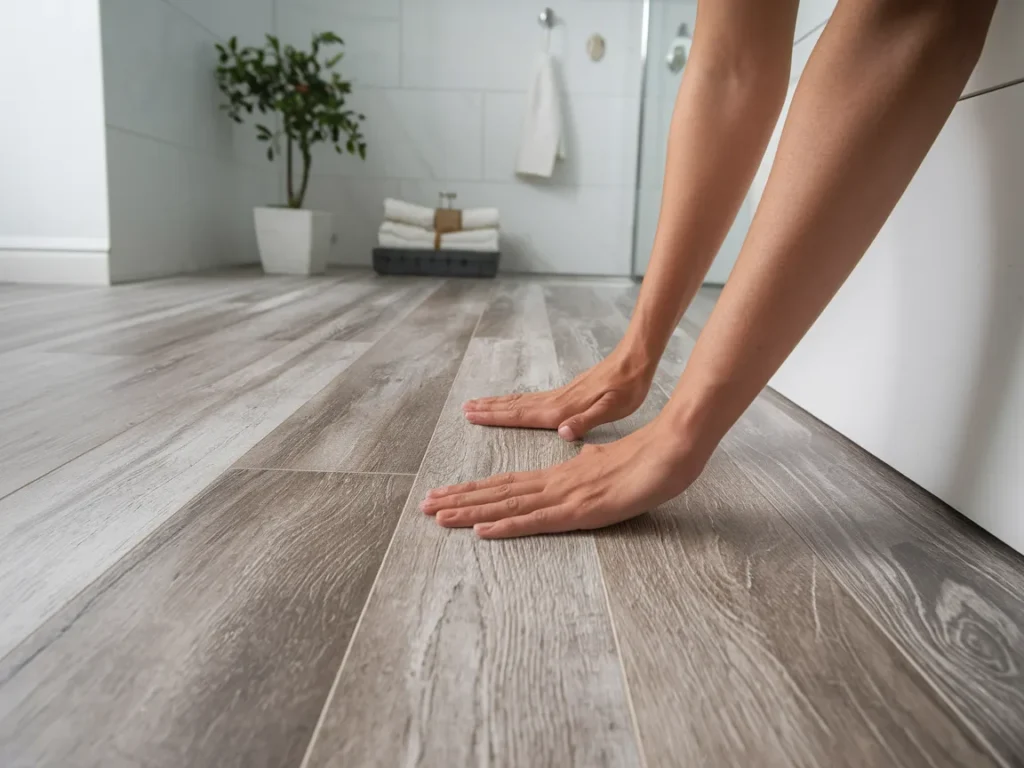
Upgrade Your Bathroom Flooring with Vinyl Planks
DIY bathroom tile flooring costs $80 to $400 for materials and supplies. Luxury vinyl plank flooring is waterproof, durable, and looks like real wood or stone without the price tag.
Why Vinyl Works Well
Vinyl flooring handles humidity and moisture better than hardwood. It’s softer underfoot than ceramic tile. Most vinyl planks click together without glue or nails, making installation fast and reversible.
How to Install
Remove old baseboards first if possible. Clean and level the subfloor. Fill low spots with floor leveling compound and sand down any high spots.
Let your new flooring acclimate to the room temperature for 24 to 48 hours. Measure the room and plan your layout. Start along the longest, straightest wall.
Click the first row together, leaving a quarter-inch gap along the wall for expansion. Cut pieces to fit with a utility knife: score the surface and snap along the line. Stagger seams in subsequent rows by at least 6 inches for a natural look.
Work your way across the room, clicking each row into the previous one. Reinstall baseboards to cover expansion gaps.
For even easier bathroom floors, check out the home gym flooring ideas for durable, moisture-resistant options that work great in bathrooms too.
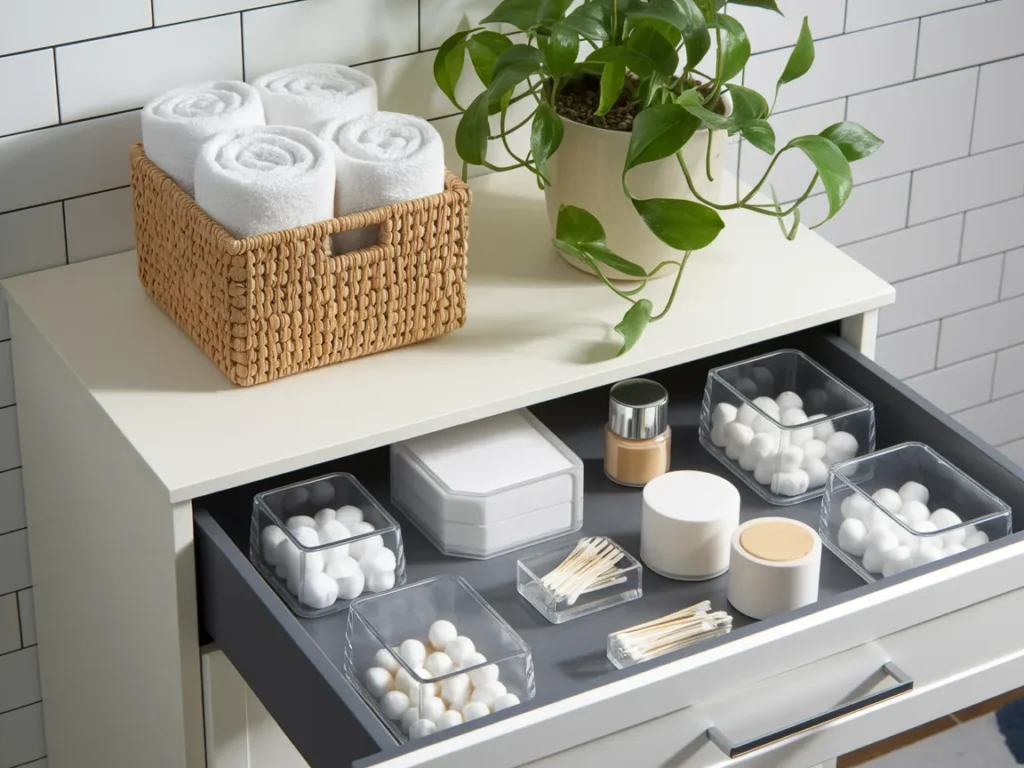
Organize Your Bathroom Storage
Good organization makes even a small bathroom feel bigger and work better. This upgrade costs little but delivers big impact.
Use What You Have
Repurpose baskets, jars, or boxes you already own. A little spray paint or new labels can unify mismatched items into a stylish storage system. Woven baskets keep toiletries neat and look attractive on open shelves.
Add Vertical Storage
Install floating shelves above the toilet for extra storage without taking floor space. Use tension rods inside cabinets to hang spray bottles. Add over-the-door organizers for hair tools and products.
Drawer dividers inside your vanity keep makeup, razors, and toiletries easy to find. Clear containers let you see what’s inside at a glance.
Plants add life to your bathroom too. Hardy, inexpensive plants like pothos or ferns thrive in humid spaces. Look for budget planters at dollar stores or DIY your own from old containers.
For more storage solutions, explore these dorm room storage ideas that work just as well in compact bathrooms.
Budget Breakdown for DIY Bathroom Remodels
Here’s what you can expect to spend on common DIY bathroom projects:
| Project | DIY Cost | Pro Cost |
|---|---|---|
| Paint walls | $30–$100 | $200–$400 |
| Peel-and-stick tile | $50–$300 | $300–$800 |
| Paint vanity | $50–$150 | $300–$600 |
| New light fixture | $50–$300 | $150–$400 |
| Frame mirror | $20–$60 | $100–$300 |
| New showerhead | $20–$150 | $100–$250 |
| New hardware | $30–$100 | $100–$200 |
| Refinish tub | $30–$200 | $300–$600 |
| Vinyl flooring | $80–$400 | $400–$1,200 |
| Storage solutions | $20–$100 | N/A |
A complete DIY bathroom remodel costs $70 to $100 per square foot compared to $120 to $275 per square foot for professional work. That’s a savings of 30% to 50% by doing it yourself.
Image Prompt: A calculator, notepad with budget figures, and bathroom material samples like tile and paint swatches arranged on a counter, showing project planning in progress.
Common Mistakes to Avoid
Even simple DIY projects can go wrong without proper planning. Here are pitfalls to watch out for.
Skipping Surface Prep
Most DIY failures come from poor preparation. Paint won’t stick to greasy surfaces. Tiles won’t stay on dusty walls. Take time to clean, sand, and prime properly. This extra step saves you from redoing your work later.
Forgetting About Moisture
Bathrooms are wet spaces. Always use materials rated for moisture. Choose bathroom-specific paint. Seal edges of flooring with silicone caulk. Make sure your exhaust fan works well to remove humidity.
Going Too Trendy
Bold choices can make your space hard to sell later. If you plan to move within a few years, stick with neutral colors and timeless finishes. Save trendy colors for easily changed items like towels and accessories.
If you’re also updating your small kitchen, the same rules apply: focus on prep work and choose finishes that have staying power.
Image Prompt: A split image showing a DIY mistake (peeling paint on a bathroom wall) on one side and the proper fix (hand sanding the wall in preparation) on the other side.
When to Call a Professional
Some bathroom work requires expertise beyond basic DIY skills. Know your limits to avoid costly mistakes.
Plumbing Changes
Moving pipes or installing new drains involves skills most homeowners don’t have. A plumber costs $45 to $150 per hour, but getting it right matters. Water damage from bad plumbing can cost thousands to repair.
Electrical Work
Anything beyond swapping a light fixture should go to an electrician. They cost $50 to $130 per hour but know how to meet building codes and keep you safe. Bathrooms require GFCI outlets near water sources, and getting this wrong creates serious hazards.
Structural Changes
Knocking out walls, moving doorways, or expanding your bathroom footprint requires permits and professional help. Structural changes affect your home’s integrity and often need inspection.
Experienced DIYers can handle cosmetic updates, flooring, painting, and simple fixture swaps. Save the big plumbing and electrical projects for the pros.
Image Prompt: A professional plumber working under a bathroom sink with proper tools, showing a scenario where calling a pro makes sense compared to DIY.
Final Thoughts
A DIY bathroom remodel puts real money back in your pocket while creating a space you’ll love. Start with easy projects like painting and new hardware. Build your confidence, then tackle bigger updates like flooring and vanity refinishing.
The key is good preparation. Clean surfaces, gather the right tools, and follow directions carefully. Take your time rather than rushing through projects. A well-done DIY bathroom adds real value to your home and gives you skills you’ll use for years.
Ready to start your bathroom transformation? Pick one project from this list and begin this weekend. You’ll be amazed at what you can accomplish. And once you finish that first update, you’ll want to keep going until your bathroom looks exactly how you’ve always dreamed.
For more home inspiration, check out our master bedroom ideas and small living room design ideas to transform your whole home one room at a time.
