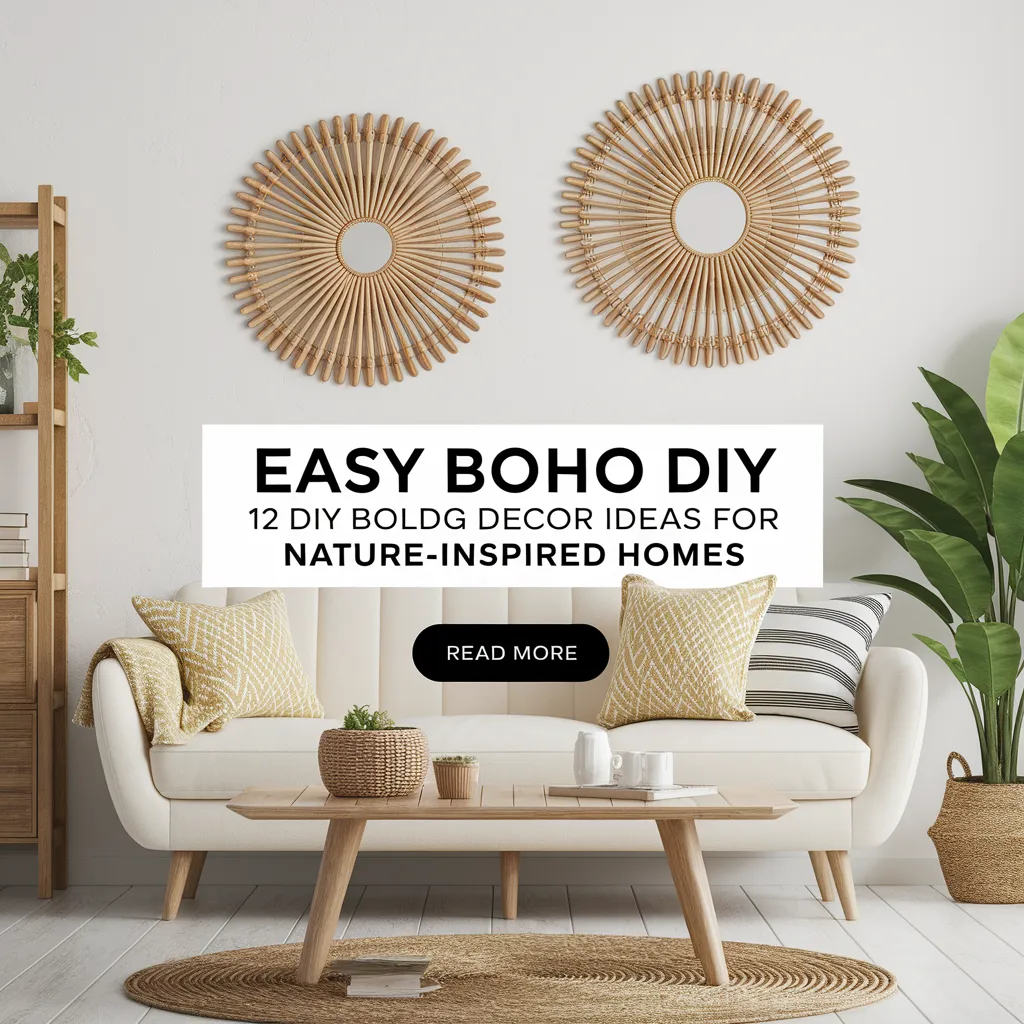
Want to give your home that relaxed, creative boho vibe without spending a fortune? You can!
DIY boho decor is all about making your space feel cozy, personal, and full of character using simple projects you can do yourself. Boho style mixes natural textures, earthy colors, fun patterns, and handmade touches. The best part? You don’t need special skills or expensive materials to create beautiful bohemian pieces.
In this guide, you’ll find 12 DIY boho decor projects that anyone can make. From macrame wall hangings to painted plant pots, these ideas use easy-to-find supplies and take just a few hours. Each project adds that free-spirited, artistic feel that makes boho style so popular in 2026.
Whether you’re decorating a bedroom, living room, or even a dorm, these DIY ideas will help you create a space that feels like you. Ready to get crafty? Let’s start making your bohemian dream home!
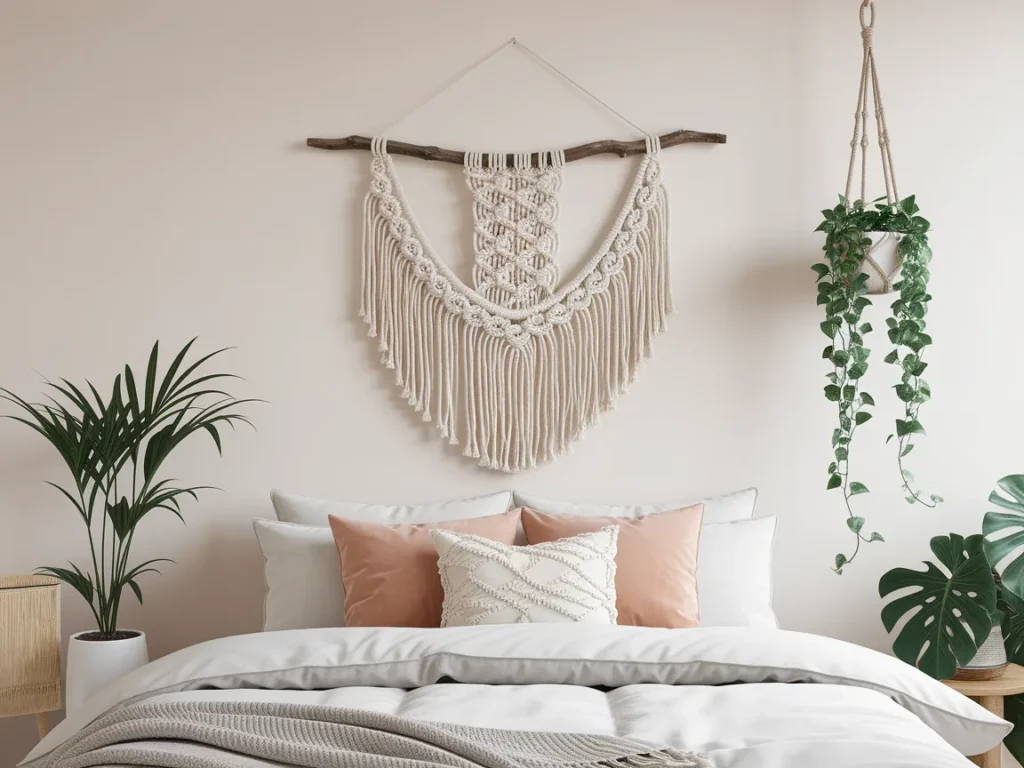
Make a Macrame Wall Hanging
Macrame is the heart of boho decor.
These woven wall hangings add instant texture and that carefree bohemian vibe to any room. They look fancy but are actually pretty simple to make. All you need is some rope, a wooden dowel, and basic knot-tying skills. Macrame wall hangings are a staple in Bohemian wall decor, adding texture and a touch of whimsy to any space.
Don’t worry if you’ve never done macrame before. The basic knots are easy to learn. Most patterns only use two or three different knots repeated over and over. You can watch free videos online that show you exactly how to tie each knot.
Getting Your Supplies
Here’s what you’ll need:
Cotton rope or cord (about 3-4mm thick works best) A wooden dowel or stick (about 12-18 inches long) Scissors Tape measure A place to hang your work while you make it
You can find all these supplies at craft stores or online. Cotton rope feels soft and looks natural. Some people use jute or hemp rope for a more rustic look. The wooden dowel can be anything from a fancy dowel rod to a stick you found outside.
Making Your Wall Hanging
Cut 8-10 pieces of rope that are each about 6 feet long. Fold each piece in half and attach them to your dowel using a simple loop knot. Now you have lots of strands hanging down.
Start tying your knots. The square knot is the easiest and most common. Take four strands, tie the two middle ones together using the two outside strands. Keep repeating this pattern down the hanging.
You don’t have to make everything perfect. Boho style loves things that look handmade and a little imperfect. That’s part of the charm! Add beads, feathers, or leave some strands longer than others to make it more interesting.
When you finish knotting, trim the bottom ends to create a shape you like. Some people cut them straight across. Others make a V-shape or leave them messy and uneven. There’s no wrong way to do it.
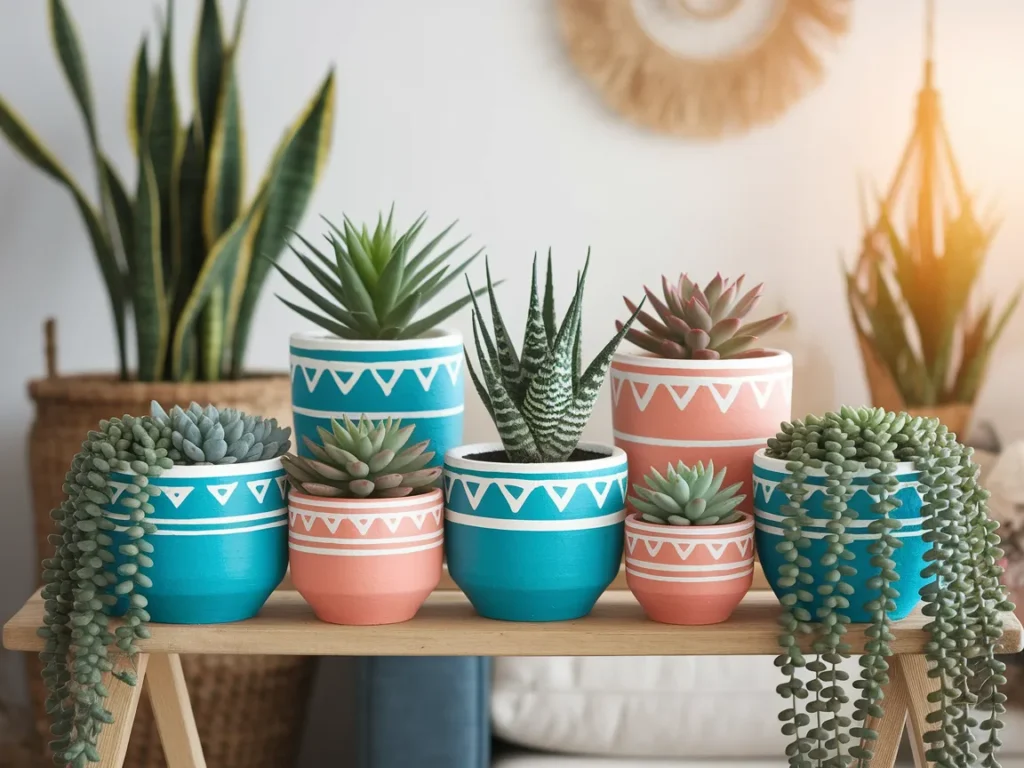
Create DIY Painted Terra Cotta Pots
Plain clay pots become boho art with paint!
Terra cotta pots cost almost nothing. You can find them at any garden store or dollar store. With some paint and creativity, you can turn boring brown pots into stunning bohemian planters. Pottery is a staple of just about every boho-decorated home, and DIY versions offer a budget-friendly option.
Painted pots add color and personality to your space. Plus, this project is so easy that kids can help. It’s perfect for a fun afternoon craft session.
Painting Techniques to Try
You can paint your pots in lots of different ways. Here are some popular boho styles:
Geometric patterns: Use painter’s tape to create triangles, diamonds, or stripes. Paint inside the taped areas, then peel off the tape when dry.
Moroccan-inspired designs: Paint the whole pot in a bold color like turquoise or coral. Then add white or gold details using a small brush or paint pen.
Ombre effect: Start with a dark color at the top of the pot. As you paint down, add more white paint to make the color lighter and lighter.
Abstract dots and dashes: Use a foam brush or cotton swab to make random dots and dashes in different colors. This looks fun and modern.
According to craft experts, acrylic paint works best on terra cotta because it dries fast and stays bright. Always seal your painted pots with a clear spray if you plan to use them outside.
Step-by-Step Guide
First, clean your pots and let them dry completely. Paint sticks better to clean clay.
Paint a base coat in your chosen color. Let it dry for an hour. You might need two coats to cover the clay completely.
Add your designs. Take your time with this part. Use tape for clean lines or freehand for a more relaxed look.
Let everything dry overnight. Then spray with a clear sealer to protect your design.
Now fill your beautiful pots with plants! Succulents, herbs, or trailing plants all look great in boho pots. For more plant display ideas, check out these home decor vase ideas.
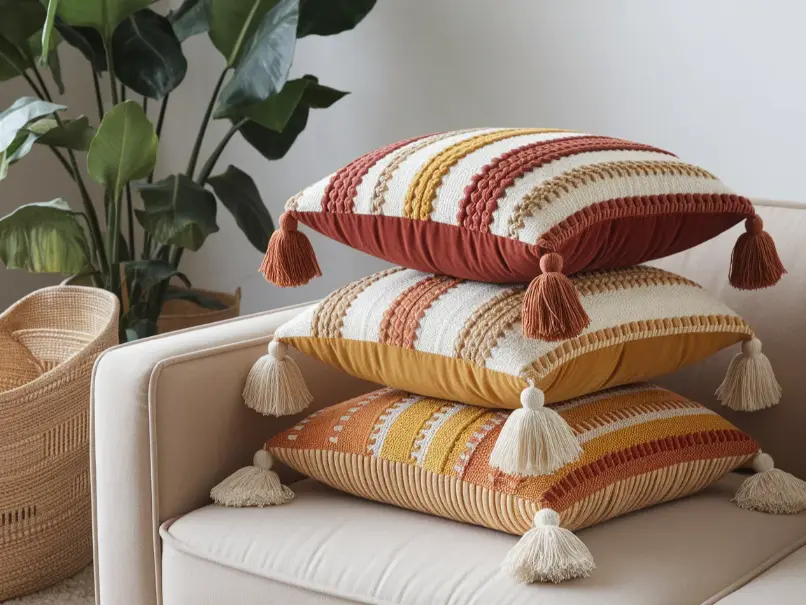
Design Boho Throw Pillow Covers
Pillows are the easiest way to add boho style.
You can make custom pillow covers without even sewing! There are several no-sew methods that work great. Or if you do sew, making pillow covers is one of the simplest projects. Boho decor is all about blending different textures, and DIY pillows do just that.
Pillow covers let you change your decor with the seasons or your mood. Make a bunch in different patterns and swap them out whenever you want a fresh look.
No-Sew Pillow Cover Methods
Tie method: Cut fabric slightly bigger than your pillow. Wrap the fabric around the pillow like a present. Tie the extra fabric into knots at the corners. This works great with bandanas or fabric with fun fringe.
Hot glue method: Cut fabric to size. Fold the edges under and glue them with fabric glue or a hot glue gun. Leave one side open to slide the pillow in. Add velcro dots to close it.
Safety pin method: Cut fabric bigger than needed. Wrap it around your pillow and safety pin it closed on the back. You can add decorative pins or buttons on the front too.
Sewing Simple Covers
If you can sew, pillow covers are super easy. Cut two squares of fabric the size of your pillow plus an inch on each side. Put the pretty sides together and sew around three sides. Turn it right-side-out and stuff your pillow inside. Sew or safety pin the last side closed.
Mix different fabrics for extra boho vibes. Try pairing:
- A woven texture with smooth velvet
- Bold geometric print with solid earthy colors
- Fringe or tassel trim on plain fabric
- Vintage fabric pieces with new materials
Add extra details like pom-poms, embroidery, or rope tied around the edges. These little touches make your pillows look special and handmade. Get more ideas from vintage home decor inspiration.
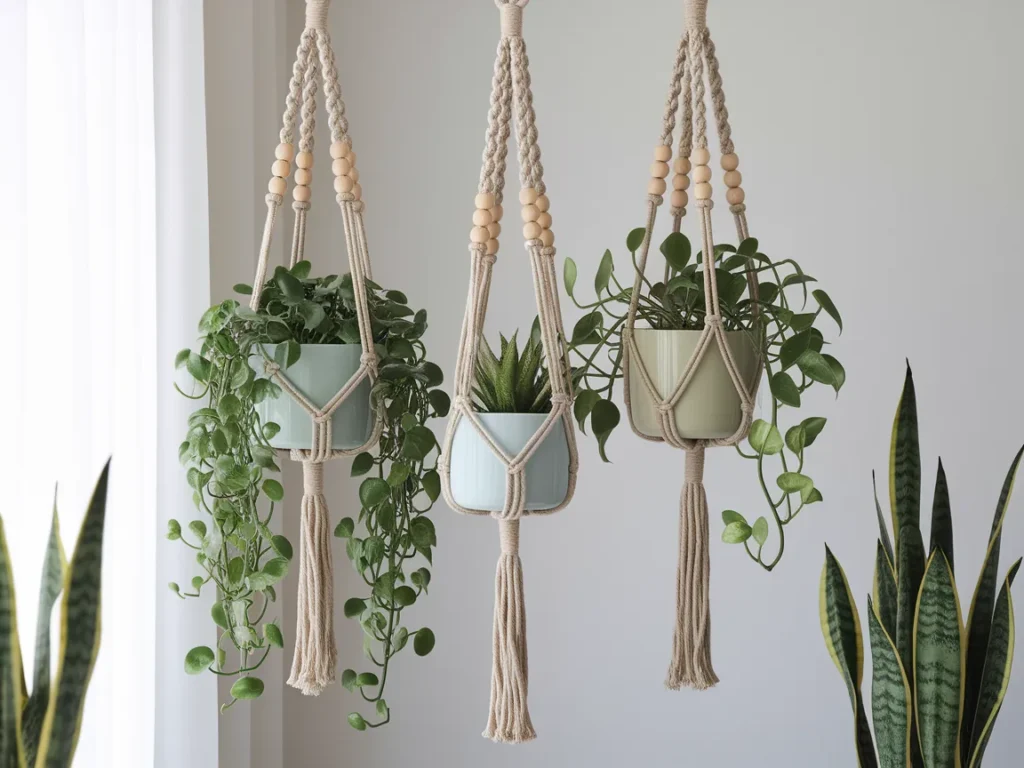
Make a Hanging Planter with Macrame or Beads
Hanging plants are perfect for boho spaces.
They add greenery without taking up floor space. DIY plant hangers are easy to make and look amazing. You can use macrame techniques or create simpler versions with beads and rope. Plants are fundamental for bohemian decor, and macrame hanging plant holders are excellent for displaying them.
Hang your planters at different heights to create visual interest. Group three or five together for a mini indoor garden. This works great in corners, by windows, or above tables.
Making a Simple Macrame Plant Hanger
You’ll need about 8 pieces of strong rope, each about 8-10 feet long. That might seem like a lot, but rope shrinks up as you tie knots.
Gather all your rope pieces together and tie a knot about 6 inches from one end. This creates a loop for hanging. Divide your ropes into four groups of four strands each.
About 20 inches down from the top, tie a square knot with each group of four strands. This creates the top of your basket.
Now comes the fun part. Take two strands from one group and two strands from the next group. Tie them together about 4 inches below your first knots. Do this all the way around. This creates the basket that will hold your pot.
Do this one more time a few inches lower to make the basket deeper. Gather all the strands at the bottom and tie a big knot. Trim the ends or leave them long and flowing.
Bead and Rope Version
If macrame feels too complicated, try this easier version. You’ll need three long pieces of rope and some large wooden beads.
Tie the three ropes together at the top, leaving a loop for hanging. Thread beads onto each rope, sliding them down.
Tie knots under the beads to keep them in place. About halfway down, tie all three ropes together. This creates a spot for your pot to rest.
Add more beads below if you want. Tie another knot at the bottom and trim the ends.
Both methods work for pots up to about 6 inches wide. For heavier pots, use thicker rope and more strands.
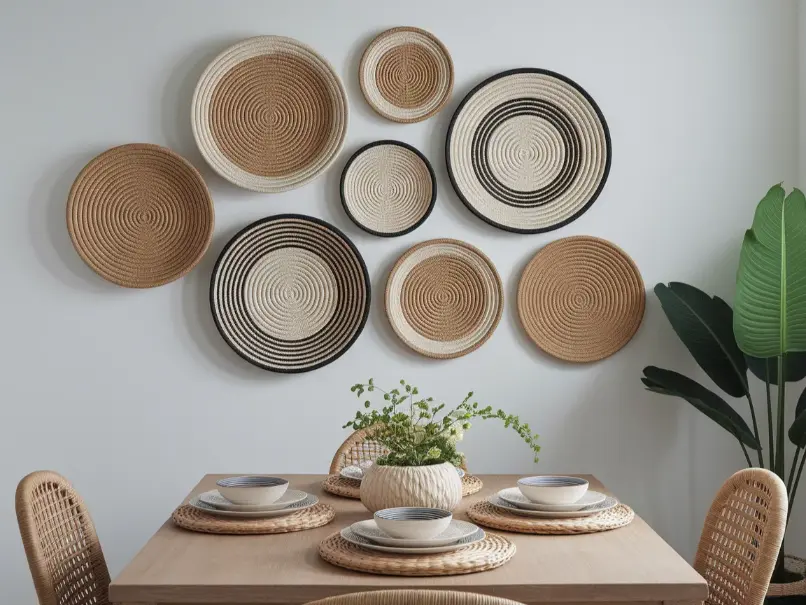
Craft a Woven Wall Basket Gallery
Baskets aren’t just for storage!
Hanging baskets on your wall creates texture and visual interest. This trend combines woven baskets and trivets from thrift stores and flea markets to create a stunning Boho-style gallery wall. You can find cheap baskets at thrift stores, dollar stores, or online. Mix different sizes, colors, and weaving patterns for the most boho look.
A basket wall costs almost nothing but looks like expensive art. Plus, you can change it up anytime by adding or moving baskets around.
Finding the Right Baskets
Look for flat baskets that can hang on walls. Round woven plates, decorative baskets, and even old basket lids work great. Don’t worry if they’re all different colors. That variety is what makes it look boho!
Some good places to find baskets:
- Thrift stores (usually $1-5 each)
- Yard sales
- Dollar stores
- Online marketplaces
- Import stores
You’ll need about 5-9 baskets for a good gallery wall. Odd numbers look better than even numbers when arranging them.
Arranging Your Basket Wall
Lay all your baskets on the floor first. Play around with different arrangements until you find one you like. Take a picture with your phone so you remember the layout.
Common arrangements:
- Cluster them all together with edges touching
- Spread them out with space between each one
- Make a pattern like a triangle or line
- Put a big basket in the center with smaller ones around it
Most baskets have a natural loop on the back for hanging. If yours don’t, you can attach picture hanging hardware or use command strips. For heavier baskets, use nails or screws in the wall.
Start with the center or largest basket. Hang that one first, then add the others around it. Step back often to check how it looks.
Adding Extra Touches
Mix in other wall decor with your baskets. Small mirrors, home decor signs, or macrame pieces work great. You can also tuck dried flowers or greenery into some of the baskets.
Paint some baskets if you want more color. Leave others natural for contrast. Some people add pom-poms, tassels, or embroidery to plain baskets.
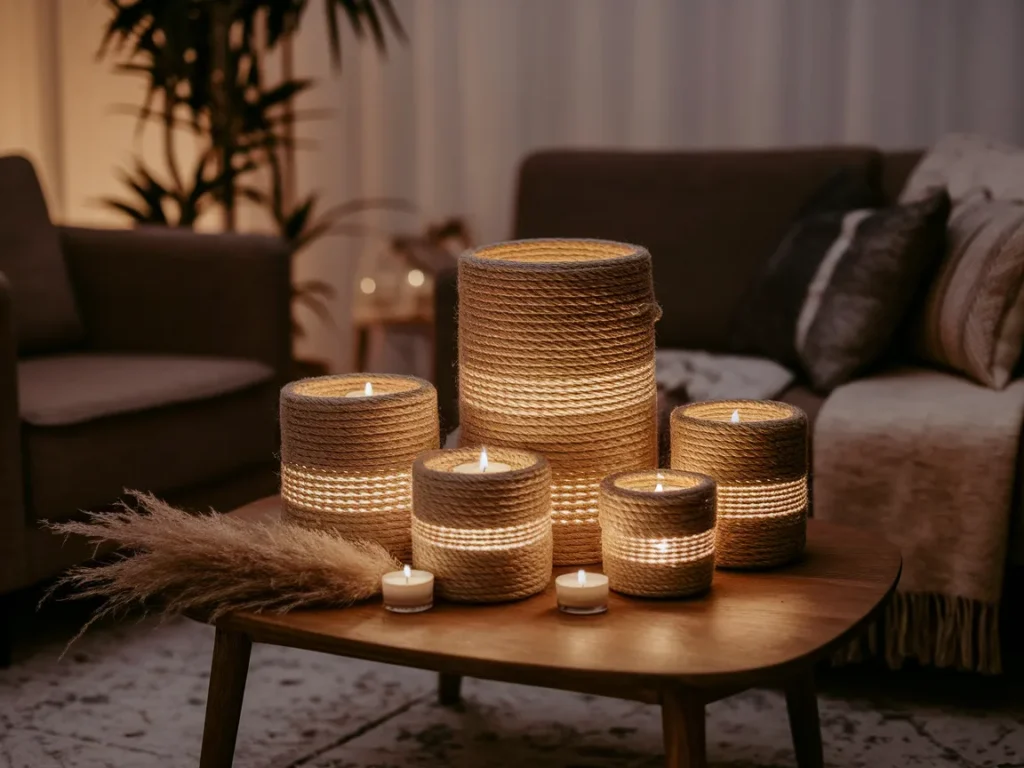
Design Candle Holders with Raffia or Rope
Cozy lighting makes everything better.
Plain glass candle holders get a boho makeover with natural materials. Wrapping raffia or rope around jars and vases creates that earthy, handmade look. This easy DIY project uses materials you might already have at home.
The use of raffia adds a natural, earthy element to the decor, making it perfect for cozy evening projects and thoughtful handmade gifts.
Materials You’ll Need
Start with glass containers. Old candle jars, mason jars, or even empty food jars work perfectly. Clean them well and remove all labels.
For wrapping, you can use:
- Natural jute rope
- Raffia (that papery grass-like material)
- Cotton cord
- Twine
You’ll also need hot glue or strong craft glue.
Creating Your Candle Holders
Start at the bottom of your jar. Put a dab of glue on the glass and press the end of your rope or raffia into it. Hold it for a few seconds until it sticks.
Start wrapping the material around the jar. Keep the wraps tight next to each other so no glass shows through. Every few wraps, add a tiny dot of glue to keep it in place.
Keep going until you cover as much of the jar as you want. Some people cover the whole thing. Others leave the top or bottom plain.
At the end, cut your material and glue the end down securely. Let it dry for a few minutes.
Styling Your Candle Holders
Group several wrapped candle holders together for more impact. Use different heights and widths. Mix materials too—some wrapped in rope, others in raffia.
Add decorations:
- Tie a piece of leather cord around the middle
- Hot glue small shells or beads on top
- Wrap wire around and tuck in dried flowers
- Paint parts of the raffia in metallic gold
Drop tea lights or small candles inside your holders. The natural materials look beautiful when candles glow through them. These work great as centerpieces or on entryway table decor.
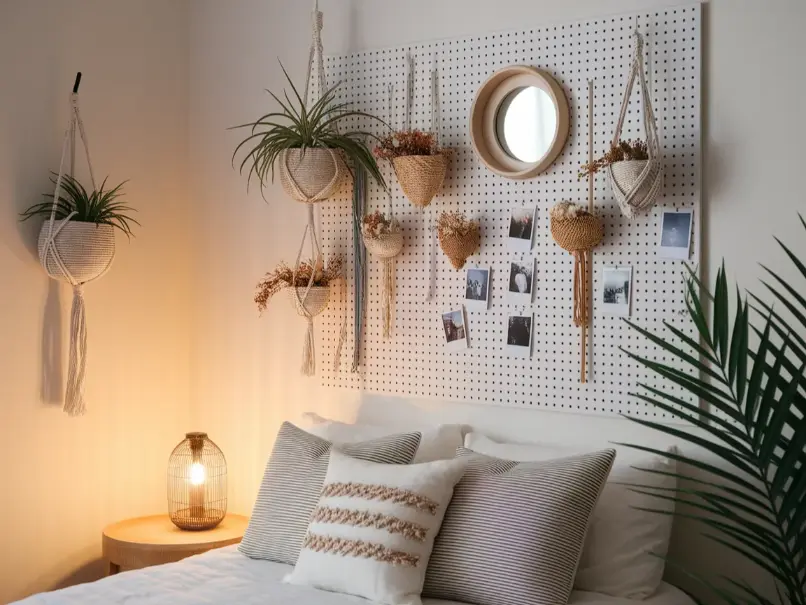
Build a Boho Peg Board Display
Peg boards are super useful and stylish.
They give you a place to hang and display all your favorite things. You can change what’s on the board whenever you want. This DIY boho peg board can be made in 5 easy steps and is perfect for creating a focal point on a blank wall.
Peg boards work great in bedrooms, offices, kitchens, or entryways. They’re especially good for small spaces because they use wall space instead of floor space.
Getting Your Peg Board Ready
Buy a peg board from a hardware store. They come in different sizes. A 2 by 4 foot board is a good size to start with. You’ll also need wooden pegs that fit the holes.
Paint your peg board if you want. White, natural wood, or pastel colors work great for boho style. Let the paint dry completely before hanging it.
Mount the board on your wall. Make sure to use the right hardware so it hangs securely. The board needs to sit about half an inch away from the wall so the pegs can fit in the back.
What to Display
The fun part is deciding what to put on your board! Here are some boho ideas:
Plants: Hang small potted plants or air plants in holders Baskets: Small woven baskets for storage Mirrors: Round or decorative mirrors
Photos: Favorite pictures in frames or just clipped on Dried flowers: Bunches of pampas grass or eucalyptus Jewelry: Hang necklaces and bracelets Hats: Show off your hat collection Candles: Small shelves with candles on them
Arrange things in clusters rather than spreading everything out evenly. Leave some empty space. This looks more natural and less cluttered.
Making It Extra Boho
Add macrame holders to hang plants from the pegs. Wind string lights around the edges. Tie ribbons or fabric strips to some pegs for soft texture.
Paint designs on the board itself. Mandalas, geometric patterns, or simple stripes add interest. Use stencils if you don’t want to freehand it.
Switch things out with the seasons or your mood. That’s the beauty of peg boards—nothing is permanent!
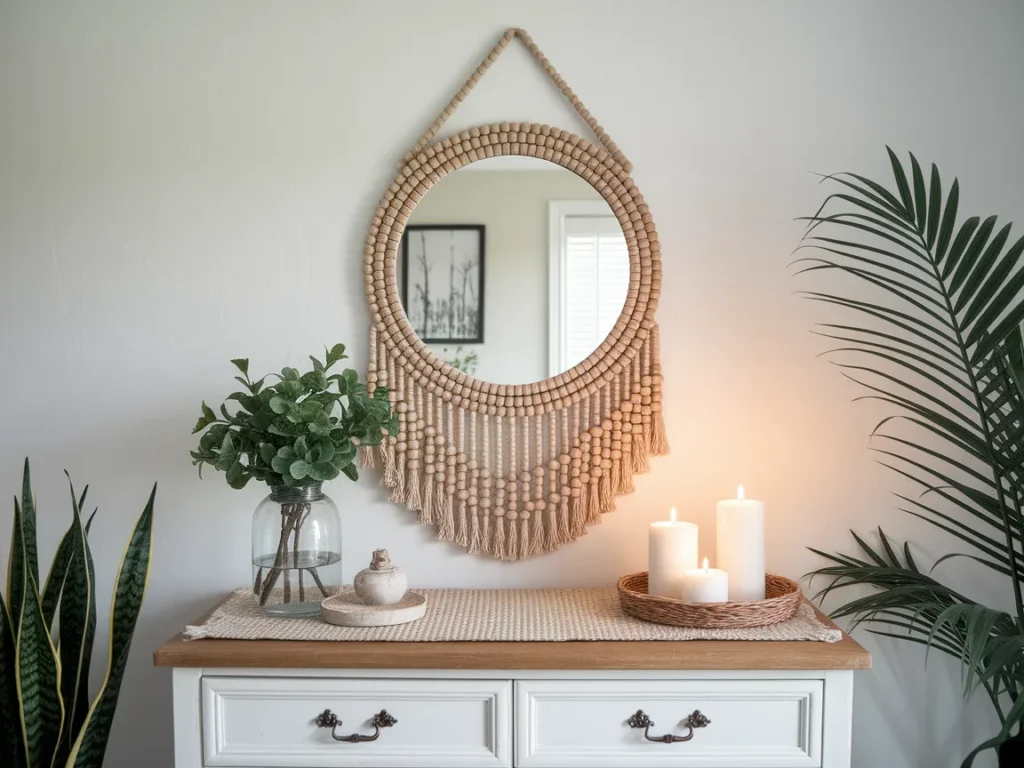
Create a Beaded Mirror Frame
Mirrors are boho must-haves.
A plain round mirror becomes a statement piece with added beads. This project includes a mirror, beads, and cardboard, making an adorable mirror perfect for any room, especially teenage spaces.
You can buy a basic round mirror for cheap. Then dress it up with wooden beads to create that natural, handmade look.
What You’ll Need
Start with a simple round mirror. Check dollar stores or thrift shops—you don’t need anything fancy.
For beads, wooden ones work best. Natural wood beads in different sizes create nice texture. You’ll need quite a few—maybe 50-100 depending on your mirror size.
You’ll also need:
- Cardboard
- String or wire
- Hot glue
- Scissors
- Optional: paint for the beads
Making Your Beaded Frame
Cut a ring of cardboard that’s wider than your mirror. This will be the base for your beaded frame. The ring should be about 2-3 inches wide all around.
String your beads onto wire or strong string. Make sections of beads in different lengths. Some might be 3 inches long, others 5 inches. This variety looks more interesting.
Glue these beaded strings onto your cardboard ring. Cover the whole ring with beaded strings, letting them hang down over the edges.
Once the cardboard is covered, glue your mirror to the front center. Make sure it’s centered and straight.
For the back, add a piece of cardboard with a loop of string for hanging. Glue this securely.
Design Options
Paint some beads before stringing them. Turquoise, coral, or gold paint adds pops of color. Leave some natural for contrast.
Mix bead sizes and shapes. Round beads with long tube beads creates visual interest.
Add other materials between beads. Small shells, metal rings, or leather cord pieces all work.
Make the beaded strings different lengths. This creates a layered, flowing effect.
For more mirror inspiration, see these home decor mirror ideas that combine different styles.
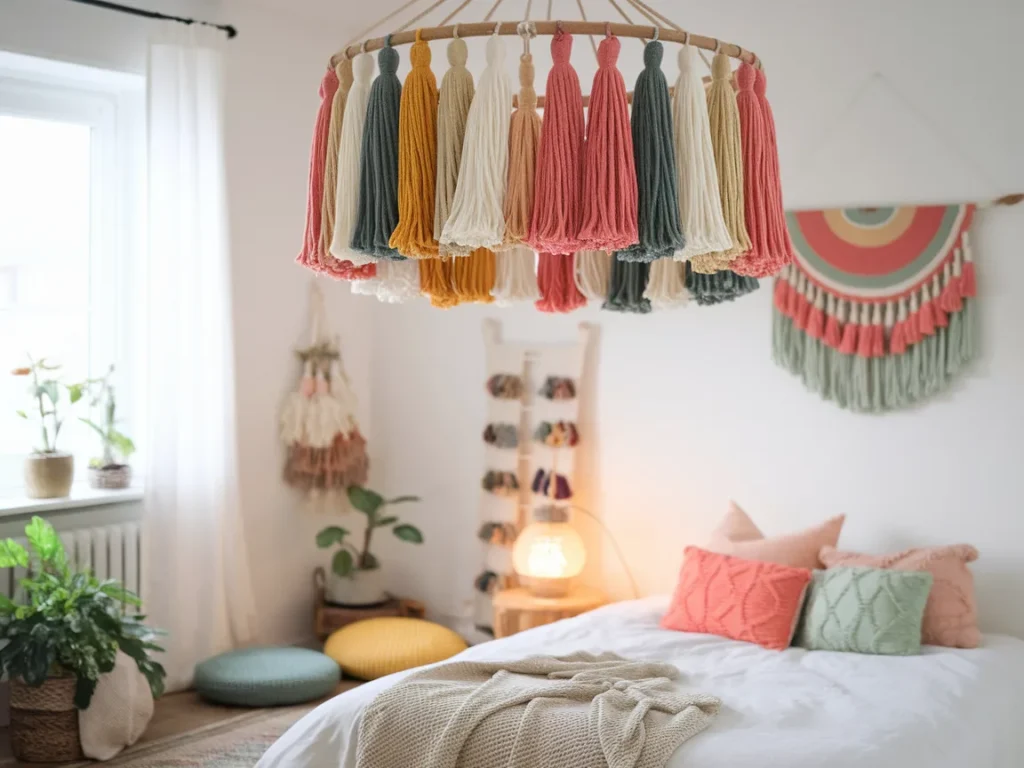
Make a DIY Tassel Garland or Chandelier
Tassels add that playful boho touch.
You can make tassels from yarn, fabric strips, or even paper. String them together to create a garland for walls or make a hanging chandelier. A DIY tassel chandelier is a fantastic way to add a cosy, lived-in feel to your modern Boho-style interior using a mix of colourful yarns.
This project is super cheap and looks amazing. Plus, kids love helping make tassels!
Making Your Tassels
Pick your materials. Yarn works great and comes in every color. You’ll need about 20-30 tassels for a nice garland or chandelier.
To make one tassel:
- Wrap yarn around a piece of cardboard about 20-30 times
- Slide a piece of yarn under the loops at the top and tie tight
- Cut the loops at the bottom
- Wrap another piece of yarn around the top to create the tassel head
- Trim the bottom so all strands are even
Make tassels in different colors for a rainbow effect. Or stick to 2-3 colors that match your room.
Creating Your Garland
String your tassels onto a long piece of twine or ribbon. Space them about 3-4 inches apart. Tie each one with a simple knot so they don’t slide around.
Hang your garland:
- Along a wall above your bed
- Across a doorway
- On a bookshelf edge
- Along your mantel
You can also drape the garland in a swag pattern, hanging lower in the middle.
Making a Tassel Chandelier
For a chandelier, you need a round frame. An embroidery hoop works perfectly. Or make a circle from stiff wire.
Tie tassels all around the hoop, hanging down at different lengths. Make some short (6 inches) and others longer (12 inches). This creates a flowing, organic look.
Attach three or four strings to the top of your hoop for hanging. Tie them together at the top to create a hanging loop.
Hang your chandelier from the ceiling using a hook. Put it over a bed, in a corner, or above a reading nook. The tassels will sway gently when air moves, which looks really cool.
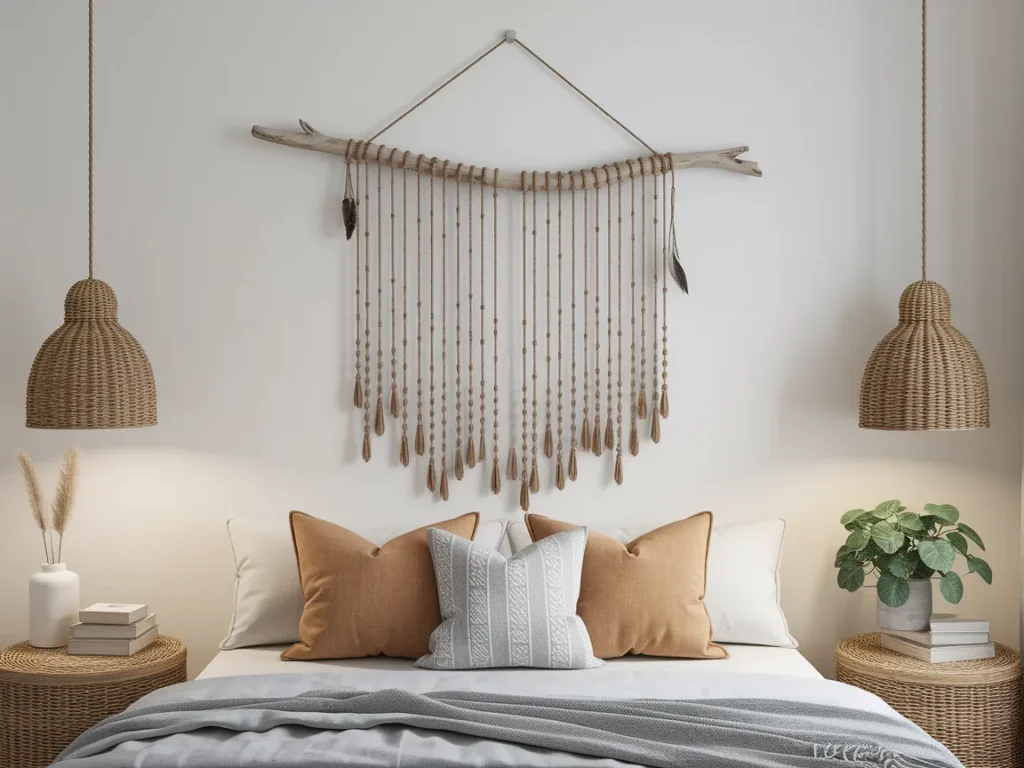
Design a Driftwood or Twig Wall Art
Nature brings the best boho vibes.
Driftwood or twigs create rustic, natural wall art. This takes you through creating a beautiful piece of wall decor using driftwood, bringing a piece of the beach into your home while remaining accessible for DIYers of all skill levels.
Walk through a park or beach to collect free materials. Then turn them into unique wall decor that nobody else will have.
Collecting Your Materials
Look for interesting pieces of wood:
- Driftwood from beaches
- Twigs and branches from your yard
- Fallen wood from parks (check if collecting is allowed)
Pick pieces with cool shapes, colors, or textures. Don’t just grab the first stick you see. Look for bent branches, pieces with interesting bark, or wood with a nice weathered look.
You’ll also need:
- String, yarn, or thin rope
- Hot glue
- Scissors
- Optional: small items to hang (beads, feathers, shells)
Simple Driftwood Hanging
Find one main piece of driftwood about 12-20 inches long. This will be your base.
Cut pieces of string in different lengths. Tie these strings to your driftwood, spacing them along the wood.
On each string, you can:
- Thread beads and tie knots
- Add feathers at the bottom
- Hang small shells or charms
- Leave them plain and tie knots for texture
- Wrap parts with thin cord
Attach a string to each end of the driftwood for hanging. Hang it on your wall!
Twig Geometric Art
Collect several straight twigs about the same thickness. Cut them to different lengths.
Arrange them into geometric shapes:
- A triangle
- A hexagon
- An abstract pattern
Use hot glue or tie them together with thin string at the connection points. If using string, wrap it several times and tie tight knots.
Wrap parts of the twigs with colorful yarn or add beads for extra interest.
Hang your geometric shape on the wall using a small nail or command hook.
This type of wall art pairs beautifully with romantic bedroom decor for a natural, organic feel.
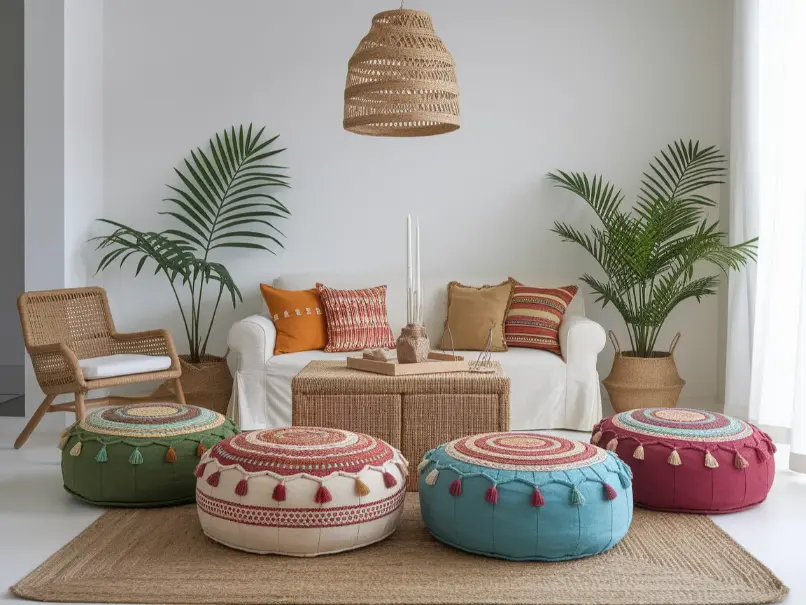
Create DIY Floor Poufs
Poufs are perfect for boho lounging.
These low seats add extra seating without taking up much space. You can sew your own pouf covers or even make stuffed poufs from scratch. This DIY pouf is perfect for a little bohemian relaxing and includes sewing instructions for creating cozy furniture.
Poufs work great for:
- Extra seating when friends visit
- Footrests while reading
- Low tables when you put a tray on top
- Fun floor seating for kids
Making a Simple Pouf Cover
You’ll need about 2 yards of sturdy fabric. Canvas, denim, or heavy cotton work best. Pick fabric with boho patterns or solid earthy colors.
Cut out circles for the top and bottom (about 18-20 inches across). Cut a long rectangle for the sides (about 60 inches long and 12 inches tall).
Sew the rectangle into a tube by connecting the short ends. Then sew the circles to the top and bottom of the tube. Leave a small opening on the bottom for stuffing.
Turn it right side out. Fill it with old pillows, blankets, or stuffing material. You can also use foam pieces or even bean bag filling.
Sew the opening closed by hand.
No-Sew Tire Pouf
If you have an old tire, you can make a rope-wrapped pouf! Here’s how:
Clean the tire really well. Cut two circles of plywood to fit inside the tire opening (top and bottom). Attach these with screws.
Start wrapping rope around the tire. Use hot glue every few wraps to keep the rope in place. Keep wrapping until the entire tire is covered.
Hot glue the end of the rope securely. Let it dry.
Now you have a sturdy, weather-resistant pouf that works inside or outside!
Decorating Your Poufs
Add extras to make your poufs more boho:
- Sew tassels or pom-poms around the edges
- Add embroidery or fabric paint designs
- Tie ribbons or fabric strips around them
- Stack two smaller poufs for more height
Use poufs in your living room for extra seating. Put them in bedrooms as nightstands. Even use them in kids’ rooms for fun seats during playtime.
Design a Shibori or Tie-Dye Wall Hanging
Bring back the tie-dye trend!
Shibori is a Japanese dyeing technique that creates beautiful patterns. It’s like fancy tie-dye. These Shibori placemats have a totally Boho vibe and create stunning results, but you can make wall hangings too.
This project gets messy, so work outside or cover your workspace well. But the results are worth it!
Getting Ready to Dye
You’ll need:
- White fabric (cotton works best)
- Fabric dye in boho colors (indigo, turquoise, rust)
- Rubber bands or string
- A wooden dowel for hanging
- Buckets or plastic containers
- Rubber gloves
Wash your fabric first to remove any finishes that might stop the dye from working.
Creating Patterns
Tie your fabric in different ways to create patterns:
Spiral: Pinch the center and twist. Wrap rubber bands around it like a pizza Stripes: Fold the fabric accordion-style and wrap rubber bands around it Circles: Pull up sections of fabric and wrap rubber bands around them Crumpled: Just scrunch the whole thing up and wrap it
The tighter you tie, the more white will show. Loose ties let more dye in.
The Dyeing Process
Follow the dye package directions. Usually you mix the dye with water in a bucket.
Dunk your tied fabric in the dye. Leave it in for the time the package suggests (usually 15-30 minutes). You can also paint dye on specific areas with a brush.
Take the fabric out and rinse it in cold water. Keep rinsing until the water runs mostly clear.
Remove the rubber bands. The big reveal! Hang the fabric to dry completely.
Finishing Your Wall Hanging
Iron your dry fabric so it lays flat. Cut it into a rectangle if needed.
Fold the top edge over a wooden dowel and sew or glue it in place. Tie string to each end of the dowel for hanging.
You can add extras:
- Sew tassels along the bottom
- Glue beads to the fabric
- Layer two pieces for more texture
Hang your unique piece of art on your wall. Every piece turns out different, making yours truly one-of-a-kind!
For more creative textile ideas, explore dorm room aesthetic ideas that use similar DIY techniques.
Final Thoughts
You just learned 12 amazing DIY boho decor projects!
Let’s recap what we covered:
Boho style is all about natural materials, handmade touches, and mixing textures. You don’t need to spend a lot of money or have special skills. Most of these projects use simple supplies you can find at craft stores, dollar stores, or even in nature.
Start with one or two projects that excite you most. Maybe make a macrame wall hanging this weekend. Paint some pots next week. Build your boho space one DIY project at a time.
Here’s what makes boho decor so special:
It’s personal. Every piece you make is unique and tells your story. No two macrame hangings look exactly the same. Your painted pots won’t match anyone else’s. That’s the beauty of handmade decor.
It’s budget-friendly. Many of these projects cost under $20. Some use free materials like sticks, old jars, or fabric scraps. You can create an entire boho room without breaking the bank.
It’s forgiving. Boho style loves imperfections. If your knots aren’t perfect or your paint drips, that just adds character. There’s no “wrong” way to do boho.
Ready to Get Started?
Pick your favorite project from this list. Gather your supplies. Set aside an afternoon. Put on some music and get creative!
Remember, the best boho decor reflects who you are. Mix these ideas with your own style. Use colors you love. Add personal touches that make you happy.
Your space should feel like home—cozy, welcoming, and totally you. These 12 DIY projects will help you create exactly that.
What will you make first? Whatever you choose, have fun with it. That’s what boho is all about—enjoying the process and creating with joy.
Want more home decor inspiration? Check out our guides on tulip decor ideas and home decor wood ideas to continue your creative journey.
Now grab those supplies and start crafting your bohemian dream space!
