


A home gym shed feels best when the space stays dry, well-lit, and easy to train in. I planned shed gym layouts where the biggest issues were poor airflow, weak floors, and messy storage. The right setup turns a small shed into a real workout room with clear zones and strong comfort.
I turned my 10-by-12 shed into a gym two years ago, and it is now the room I use most in the house. But I will be honest: the first version was terrible. I threw rubber mats on the bare floor, dragged in a bench, and spent every workout fighting condensation, dim light, and dumbbells rolling into corners. A shed gym only works when you treat the shed like a room first and a gym second. Weatherproofing, flooring, light, and air come before a single piece of equipment.
Before you spend anything, check three things: your local rules (some areas require permits for electrical work in outbuildings or restrict shed conversions), your shed’s structure (the floor must handle dynamic weight; a rotting floorboard under a loaded barbell is dangerous), and your power situation (an extension cord is fine for lights and a fan, but heaters and serious equipment may need a proper circuit). I also recommend training in the empty shed for a week first. You will discover exactly where the drafts, dark corners, and head-bump spots are before they cost you money. For the build side of this project, my home gym shed build ideas cover the construction details.
13 Ideas List
- Rubber flooring for full shed coverage
- Weather sealing for a dry gym
- Wall-mounted storage for equipment
- Compact squat rack setup
- Foldable bench for flexible space
- Mirror wall for form checks
- Bright ceiling lights for full visibility
- Fan or vent for airflow
- Small heater for cold days
- Dumbbell zone with rack storage
- Recovery corner with mat and roller
- Bluetooth speaker shelf setup
- Weekly shed gym reset routine
Rubber Flooring For Full Shed Coverage
Rubber flooring makes a shed gym safer because it protects the floor and improves grip. I used rubber tiles and thick mats to reduce noise and protect the shed base from heavy weights. Full coverage also made the shed feel like a real gym instead of a storage room. Rubber flooring helped keep the space cleaner because dust stayed easier to sweep. This setup works best when the edges stay tight and flat.
Rubber flooring is the foundation everything else depends on, and I mean that literally: it protects the shed floor, deadens noise, and gives you grip. I use interlocking rubber tiles (at least 3/4 inch thick) for full coverage rather than thin roll mats, because tiles stay flat, replace individually if damaged, and do not curl at the edges. For heavy lifting zones, I double up with a second layer or use horse stall mats, which are the cheapest thick rubber you can buy. Leave a quarter-inch expansion gap at the walls; rubber expands in heat and buckles if butted tight. One mistake I made: buying foam puzzle mats first. They felt fine for a month, then compressed permanently under the bench and rack. Foam is for yoga studios, not sheds with iron. My home gym rubber flooring ideas compare all the options in detail.

Weather Sealing For A Dry Gym
Weather sealing protects the shed gym because moisture can damage equipment fast. I added door seals and checked corners for air gaps to reduce damp air inside. This helped prevent rust on weights and kept the space more comfortable year-round. A dry gym also smells better and feels cleaner. This idea matters most before adding expensive gear.
Moisture is the silent killer of shed gyms: it rusts equipment, grows mold on benches, and makes the space miserable. I sealed mine in layers. First, the structure: caulk gaps around windows and doors, add weatherstripping to the door, and make sure the roof does not leak (fix this before anything else). Second, the floor: a vapor barrier under the rubber flooring stops ground moisture wicking up. Third, ventilation, which I cover in the fan section below. I also keep a cheap hygrometer on the wall; if humidity regularly reads above 60 percent, I run a small dehumidifier after workouts. It costs less than replacing one rusted barbell. Do this work in dry weather so sealants cure properly, and recheck every seal each fall.
Wall-Mounted Storage For Equipment
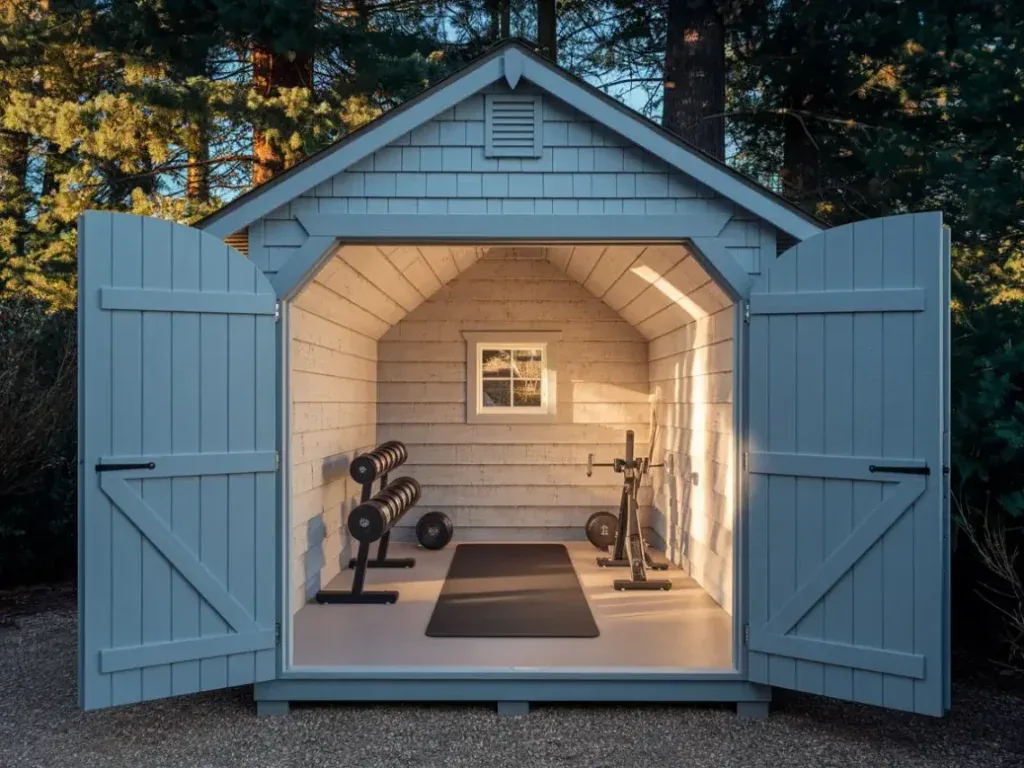
Wall-mounted storage saves space in a shed gym because floor space is limited. I used hooks and racks to store resistance bands, jump ropes, and small accessories. This kept the floor clear for workouts and reduced clutter. Wall storage also makes the shed look more organized in photos. Heavy items should stay low for safety.
Shed floors are small, so walls do the heavy lifting for storage. I mounted a slatwall panel on the two most solid walls and hung everything: resistance bands, jump ropes, lifting belt, foam roller, even the speaker. For heavy items like plate storage, I used French cleats screwed into studs, not drywall anchors; a loaded plate holder pulling out of the wall is a disaster. Keep the floor perimeter clear except for the rack and bench. Every item on the floor is something you will trip over in a dark shed at 6 AM. I also mounted a small shelf by the door for the gym bag and shoes, so outdoor dirt never makes it to the workout zone. Wall storage turned my cramped shed from an obstacle course into an actual gym.

Compact Squat Rack Setup
A compact squat rack makes a shed gym feel complete because it supports many strength exercises in one station. I used a smaller rack with enough room for squats, presses, and pull-ups. Placing it against one wall kept the center open for dumbbell work. A rack setup works best when plates stay stored nearby so the floor stays clear. This idea gives the most workout value in a small shed.
A full power rack rarely fits a shed, but a compact half rack or squat stand does the same job in half the footprint. I use a half rack with spotter arms bolted through the rubber flooring into the shed floor; unbolted racks walk during heavy sets, which is terrifying in a small space. Measure your ceiling height before buying: you need the rack height plus room to load plates overhead, and many sheds have only 7-foot ceilings. If pull-ups matter to you, check that the pull-up bar clears the roof. I skipped the pull-up bar and mounted a separate wall-mounted bar instead, which saved rack height. Buy the rack before the flooring goes down if you are bolting through; it is much easier to cut tile around bolts than to drill through laid tile.

Foldable Bench For Flexible Space
A foldable bench helps shed gyms because you can store it flat after workouts. I used a folding bench so I could open the floor for stretching or cardio drills. This kept the shed from feeling crowded. A stable frame matters because benches must feel secure during presses and rows. Foldable benches work best when stored on a wall hook or slid under a rack.
In a shed, a fixed flat bench is a space hog. I use an adjustable foldable bench that goes flat, incline, and decline, then folds upright against the wall when I need floor space for deadlifts or mobility work. The hinge quality is everything: cheap folding benches wobble at incline, which makes dumbbell pressing feel unsafe. I look for a bench rated at least 600 pounds with a ladder-style adjustment (not the pin-through-hole kind, which wears out). Pad width matters too; a 12-inch pad supports your back properly, while narrow pads feel tippy. When folded, mine takes up 2 square feet. That reclaimed floor space is the difference between a shed that fits one workout style and one that fits them all.

Mirror Wall For Form Checks
A mirror wall improves training because it helps with posture checks during lifts. I placed a large mirror near the rack zone so I could watch squat depth and shoulder alignment. Mirrors also bounce light around the shed, making it feel larger. This idea works best when the mirror reflects clean space, not clutter. A simple frame keeps the shed gym looking modern.
Mirrors in a shed gym are a training tool, not vanity: checking squat depth and deadlift back position in real time prevents injuries. I mounted three large acrylic mirror panels (not glass; glass in a shed with iron plates is asking for trouble) on the wall facing the rack. Acrylic is lighter, shatterproof, and cheap enough to replace. Mount them 12 to 18 inches off the floor so you see your full range of motion, and tilt the top very slightly forward to reduce glare from the ceiling lights. Keep mirrors away from the plate storage wall; one dropped plate can crack even acrylic. I clean mine monthly because shed dust films over everything, and a hazy mirror is useless for form checks.

Bright Ceiling Lights For Full Visibility
Bright lighting matters in shed gyms because dim light makes workouts harder and less safe. I upgraded to strong ceiling lights so every corner stayed visible. Good lighting also improves motivation because the space feels cleaner and more professional. Even lighting works best so shadows do not hide equipment or floor edges. This is one of the most important shed upgrades.
Shed lighting is usually one sad bulb, which is dangerous when you are moving heavy weights. I installed two LED shop lights (5000K daylight) on the ceiling, one over the rack and one over the open floor area. Daylight temperature matters: warm light feels cozy but makes it hard to see plate numbers and floor markings. The fixtures should be enclosed or shatterproof; an exposed tube above a lifting area is a hazard. I wired mine to a switch by the door plus a motion sensor as backup, because walking into a dark shed full of equipment is how shins get destroyed. If you cannot wire new lights, plug-in LED shop lights with pull chains work fine and cost very little. Bright, even light is a safety feature, not a luxury.

Fan Or Vent For Airflow
Airflow keeps a shed gym comfortable because small spaces heat up quickly. I used a strong fan to keep air moving during workouts. A vent option also helps reduce trapped humidity and stale air. Better airflow improves sweat comfort and keeps the space feeling fresh. This idea matters most in warmer seasons.
A shed with no airflow becomes a sauna within fifteen minutes of training, and stale air kills workout quality fast. I installed a shutter exhaust fan on the wall opposite the door: it pulls hot air out and draws fresh air in through the door gap and a small intake vent. Size it to the shed: a 10-inch fan moves enough air for a 120-square-foot shed. I run it on a timer switch so it airs the shed out after I leave, which also fights moisture. In winter I reverse the strategy: fan off during the workout (with the heater on), fan on for ten minutes after to clear humidity. A $30 box fan in the doorway works as a starter version, but the wall-mounted exhaust fan was the single best comfort upgrade I made.

Small Heater For Cold Days
A small heater makes shed gyms usable during cold days. I used a compact heater to warm the space before training so joints felt better during warm-ups. A heater also helps reduce damp air, which protects equipment. This idea works best when the heater stays placed safely away from mats and gear. Warming the shed makes workouts easier to start.
Training in a freezing shed is miserable and stiff muscles invite injury, so I heat mine with a small oil-filled radiator. Oil radiators are my pick for sheds: no exposed glowing elements near rubber flooring, silent operation, and they hold heat after switching off. I never use propane or kerosene heaters in an enclosed shed; the carbon monoxide risk is not worth it. Size the heater to the space (a 1500W radiator handles my 120-square-foot shed down to freezing), and give it 3 feet of clearance from everything. I put mine on a smart plug with a schedule: on 30 minutes before my workout, off an hour after. Walking into a pre-warmed shed in January feels like luxury, and warm muscles train better and safer.

Dumbbell Zone With Rack Storage
A dumbbell zone keeps a shed gym organized because weights stay in one place. I used a compact dumbbell rack and placed thick rubber mats in front of it for floor protection. This setup helped reduce clutter and made workouts faster because weights stayed easy to grab. A dumbbell zone also looks clean in photos when weights stay lined up. This idea works best near the rack or bench area for quick transitions.
Dumbbells loose on the floor are the fastest way to ruin a small gym: they roll, they trip you, and they eat floor space. I use a two-tier rack against the wall, heaviest pairs on the bottom tier for stability. A rack also protects the dumbbells themselves; hex dumbbells left on concrete or bare shed floors chip and rust at the heads. I organize by weight ascending left to right, so grabbing the right pair is automatic mid-workout. Adjustable dumbbells are the space-saving alternative: one pair replaces a whole rack. They cost more upfront but in a shed, floor space is worth more than money. Either way, the rule is simple: every dumbbell lives on the rack, never on the floor. For equipping the rest of the space, my home gym equipment essentials list covers what actually earns its footprint.

Recovery Corner With Mat And Roller
A recovery corner makes a shed gym more useful because stretching and cooldown feel easier. I used a small mat zone with a foam roller and massage ball stored in a basket. This kept the tools from floating around the shed. A recovery corner also improves routine because it supports mobility after training. This setup works best in one quiet corner with open floor space.
I wasted a year skipping recovery, then built a dedicated corner and my training changed. It does not need much: a thick exercise mat (different from the rubber floor; you want cushion here), a foam roller, a lacrosse ball, and a stretching strap, all in a small basket or on a wall hook. Placing it in a specific spot matters psychologically: when the tools are visible and ready, you actually use them. I do five minutes of rolling after every session while the fan airs the shed out. Keep this corner away from the rack and weights; recovery should feel calm, not like sitting in a construction zone. A small Bluetooth speaker at low volume here makes the whole ritual something you look forward to instead of skip.

Bluetooth Speaker Shelf Setup
A speaker shelf setup improves the shed gym vibe because music helps workouts feel smoother. I used a small wall shelf to keep the speaker off the floor and away from sweat zones. This also kept cables and clutter low. A speaker shelf works best near the door or above the rack so sound spreads evenly. This is a small upgrade that makes the shed feel more personal.
Music makes shed workouts dramatically better, but phone speakers do not cut it over fan noise and clanking iron. I mounted a small shelf high on the wall (above head height, away from sweat and dust) and parked a rugged Bluetooth speaker on it. High mounting matters: sound projects over the equipment instead of getting absorbed, and the speaker stays out of harm’s way. I use a speaker with physical buttons, because touch controls with sweaty hands are infuriating. Keep a dedicated charging cable on the shelf so the speaker is always ready; a dead speaker on workout day is a small tragedy. Volume rule for neighborhoods: loud enough to hear over the fan, not loud enough for the neighbors to name the song.

Weekly Shed Gym Reset Routine
A weekly reset routine keeps a shed gym clean because dust builds up fast in small spaces. I used a simple routine: sweep the floor, wipe equipment, and put tools back on hooks. This helped prevent clutter and made the shed feel ready for the next workout. A reset routine also helps gear last longer because sweat and dust get removed. This habit keeps the shed gym photo-ready.
A shed gym degrades fast without maintenance, so I run a 20-minute reset every Sunday. The checklist: sweep the rubber flooring (chalk and dust build up), wipe down the bench and rack with disinfectant, check all bolts on the rack and bench for loosening, oil the barbell sleeves monthly, empty the dehumidifier if I used it, and put every item back in its wall spot. I also do a quick moisture check: look for rust spots on plates, musty smells, or damp corners, and address them immediately. Small problems in sheds become big problems in weeks, not months. This routine takes less time than one skipped workout costs you, and it keeps the space feeling like a real gym instead of a storage unit with weights in it. If you are building a gym inside the house instead, my stylish home gym ideas apply the same principles indoors.
Frequently Asked Questions
Can A Shed Be Used As A Home Gym?
A shed can work as a home gym when the space stays dry, stable, and well-lit. Rubber flooring and wall storage help the most. Airflow also matters for comfort during workouts.
What Flooring Works Best In A Home Gym Shed?
Rubber flooring works best because it protects the base floor and improves grip. Rubber tiles and thick mats also reduce noise. Full coverage helps the shed feel more like a gym.
How Do I Keep A Shed Gym From Getting Damp?
Weather sealing and airflow help reduce damp air. Keeping equipment off bare floors also helps prevent rust. A small heater can support comfort on cold days.
What Equipment Fits Best In A Small Shed Gym?
Adjustable dumbbells, resistance bands, and a foldable bench fit well. A compact squat rack also adds big workout value. Wall storage keeps the floor open for movement.
How Much Does It Cost To Turn A Shed Into A Gym?
For a basic setup, I spent around $800: rubber tiles, a used bench, adjustable dumbbells, a fan, and lights. A mid-range build with a half rack and heater runs $1,500 to $2,500. The shed itself is the big variable; if you already own a solid shed, the conversion is cheap. Buy flooring and weatherproofing first, equipment second. The most expensive mistake is buying equipment before the space is ready and watching it rust.
Do I Need A Permit To Put A Gym In My Shed?
It depends on your area and what you change. Simply putting equipment in an existing shed usually needs nothing. Running new electrical circuits, adding plumbing, or expanding the shed often requires a permit. I called my local building office before wiring lights, and it took ten minutes to get a clear answer. When in doubt, ask. Unpermitted electrical work can void your home insurance, which is a much bigger cost than a permit fee.
Conclusion
Home gym shed ideas work best when the space stays dry, bright, and organized. I got the best results with rubber flooring, compact equipment, wall storage, and strong lighting. Airflow tools like fans made workouts more comfortable, and a recovery corner supported better cooldowns. When the shed stays clean and structured, it feels like a private gym that is easy to use every week.
Build in this order and you will avoid my mistakes: seal the shed, lay the flooring, add light and air, then buy equipment. Most people do it backwards and pay for it in rust and regret. Start with workouts using just dumbbells and a bench while you dial in the space; you will learn exactly what to add next. A shed gym will never be a commercial gym, and that is the point. It is yours, it is ten steps from your door, and on the days you would have skipped the drive across town, it keeps you training. For a garage-based alternative with more space, my garage home gym ideas are worth comparing.